DIY Picture Frames on a Budget ($10 Modern Wood Frame Tutorial)
Store-bought frames are expensive - so I made my own for about $10 each. These DIY wood picture frames look boutique-quality and take under an hour to make.
DIY $10 Picture Frames – Easy Custom Wood Frames Anyone Can Make
Frames are expensive. Like, really expensive. If you’ve ever walked through a craft store or tried to frame digital art prints, you know the price adds up fast. That’s why I decided to make my own DIY wood frames for just about $10 each—and honestly, they look like something you’d buy at a boutique.
Here’s the step-by-step guide to creating affordable, beautiful frames at home using basic tools and materials.
📌 Save this post to Pinterest if you’re planning a gallery wall or want a budget-friendly frame hack!
What You’ll Need
Before you get started, here’s your DIY frame supply list:
Moulding (I used this red oak corner guard moulding from Lowe’s)
Superglue (for assembling corners)
Painter’s tape or masking tape (to hold corners while they dry)
Wood glue (for touch-ups + mixing with sawdust)
Sandpaper (to smooth down filled corners)
Optional but helpful: strap clamps (for larger frames if you want extra reinforcement while the glue sets).
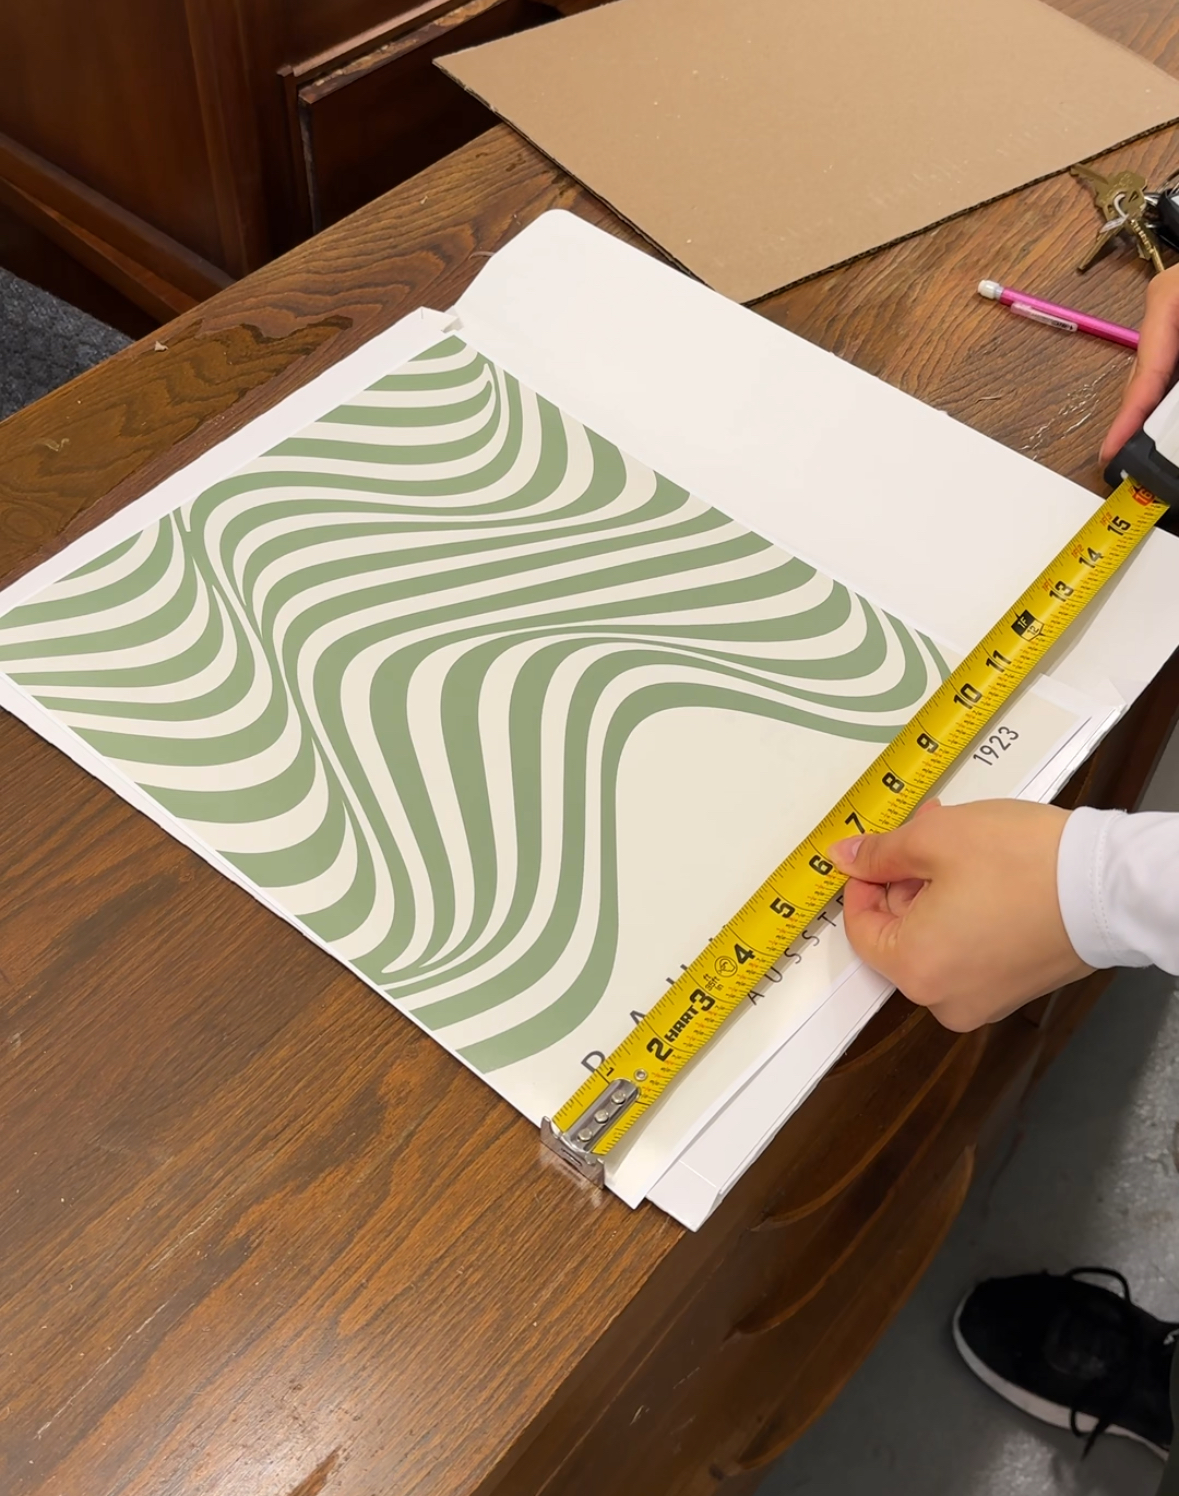
Step 1: Measure Your Art Prints
I started with 11x14 prints I purchased as digital downloads on Etsy. To save even more, I had them printed at Walgreens (always check for promo codes—there are usually some floating around!).
Whatever size you’re working with, make sure to measure carefully. A snug fit makes the frame look custom and professional.
Step 2: Grab Affordable Moulding from Lowe’s
The secret ingredient here is corner moulding from Lowe’s. One 8-foot piece of red oak moulding cost me just $11 - and it’s enough to make a full frame up to 18"x30"!
Not only is it budget-friendly, but the oak grain gives it a beautiful, high-end look without the price tag.
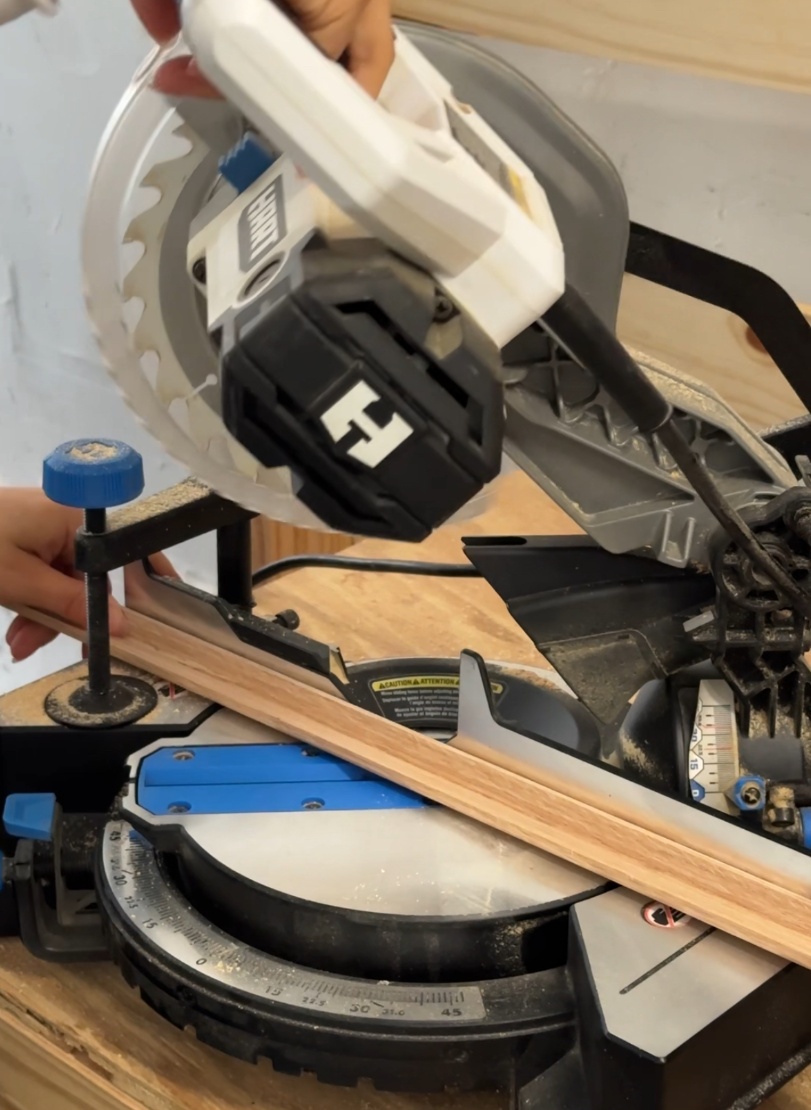
Step 3: Cut Perfect Corners
You’ll need 45-degree angle cuts for each corner. You can:
Use a miter saw (fast and precise), or
Go old-school with a hand saw and a miter box (totally works and much cheaper if you don’t have power tools).
Step 4: Assemble with Superglue
This is where it gets shockingly easy. I just used superglue on the corners and held them together with tape while they dried. No fancy clamps, no nails. Just glue + tape.
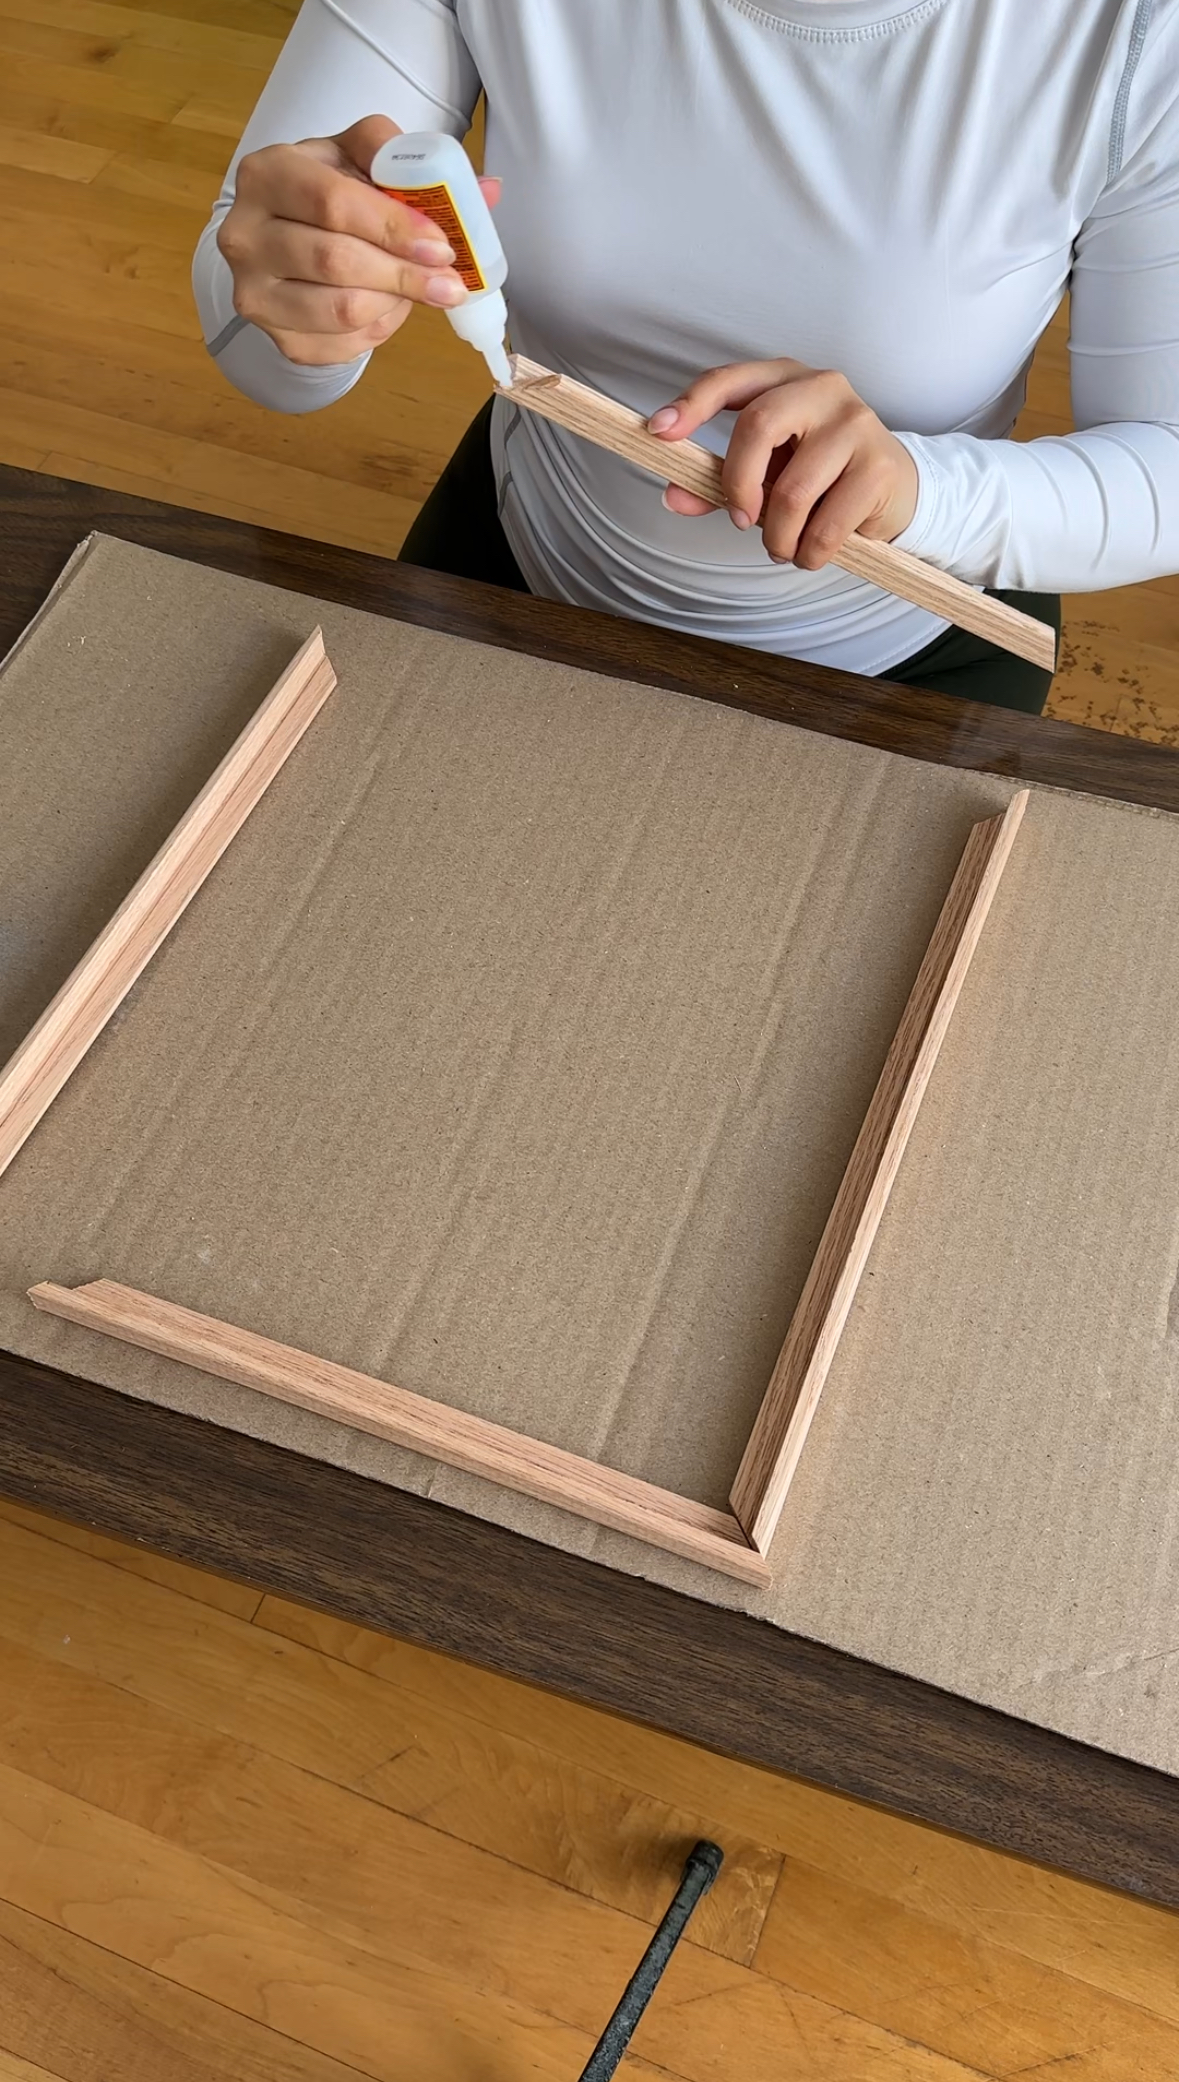
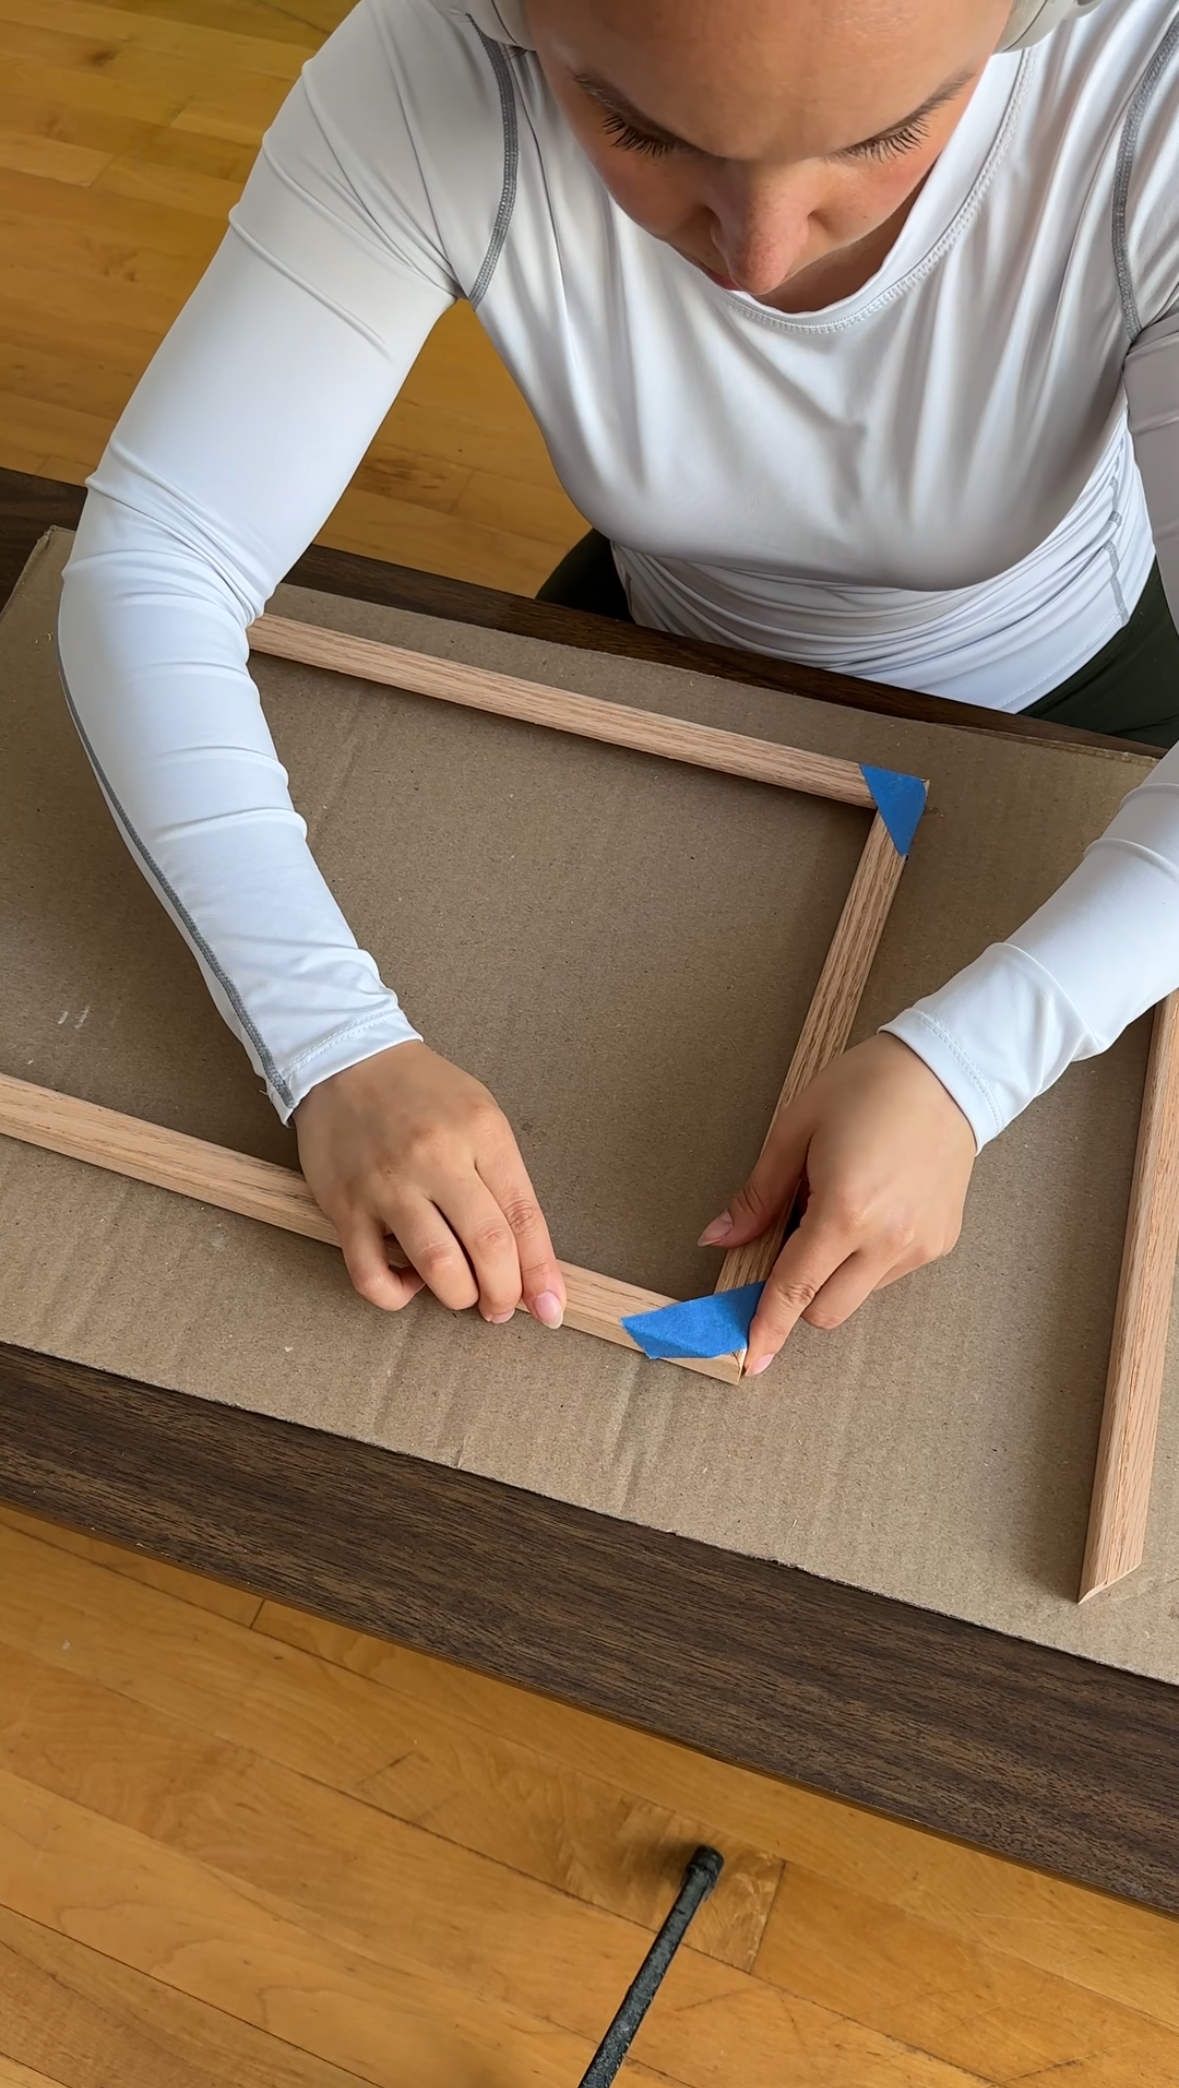
⚠️ Caveat: This method works best on small to mid-sized frames. For larger frames, you’ll want to use a strap clamp (or corner clamps) to hold everything securely while the glue sets.
For touch-ups, here’s a pro tip:
Mix wood glue + sawdust from your cuts to create a natural wood filler.
Sand it down once dry, and it blends seamlessly with your frame.
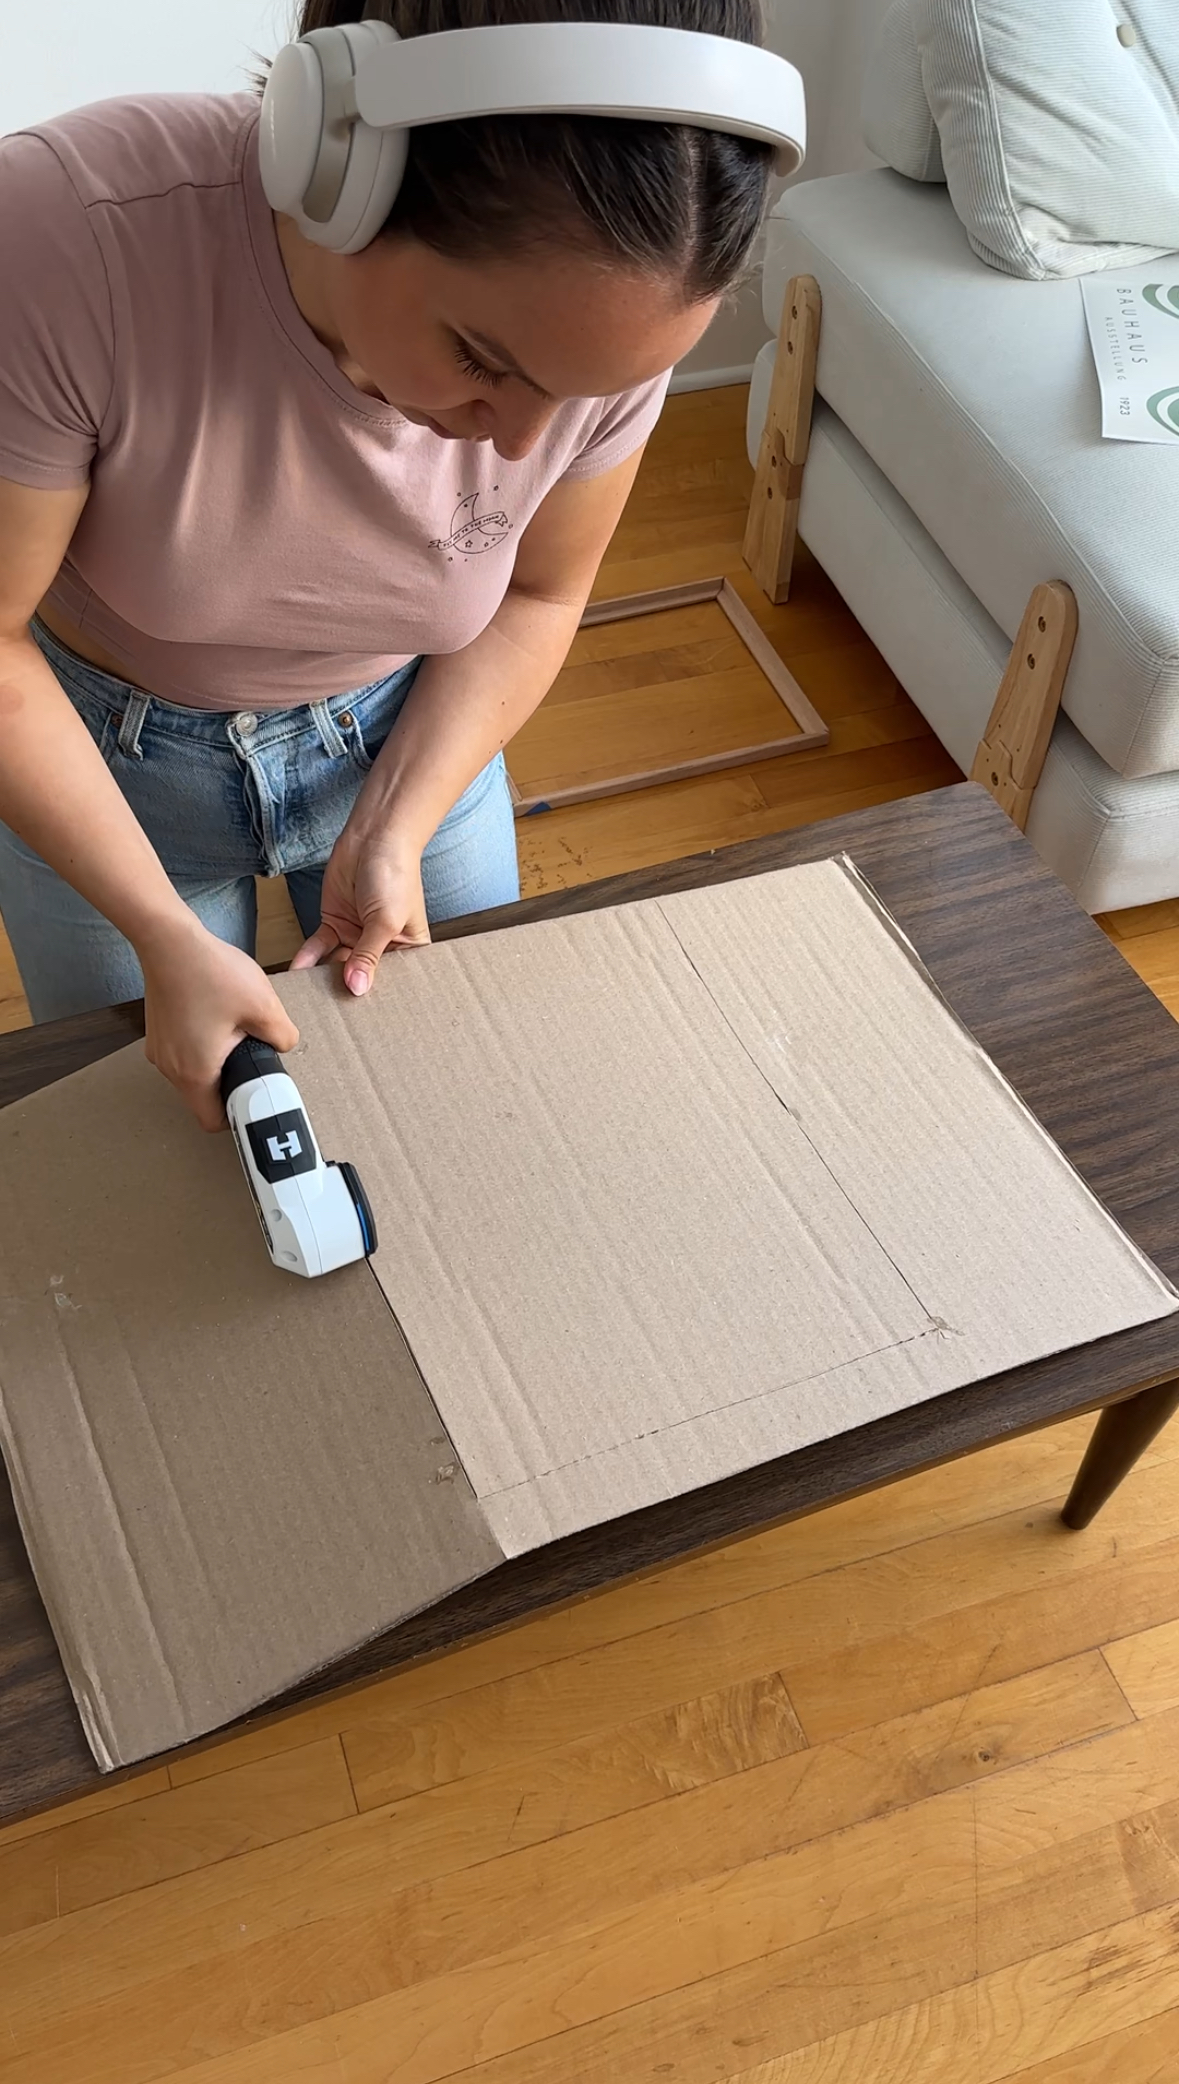
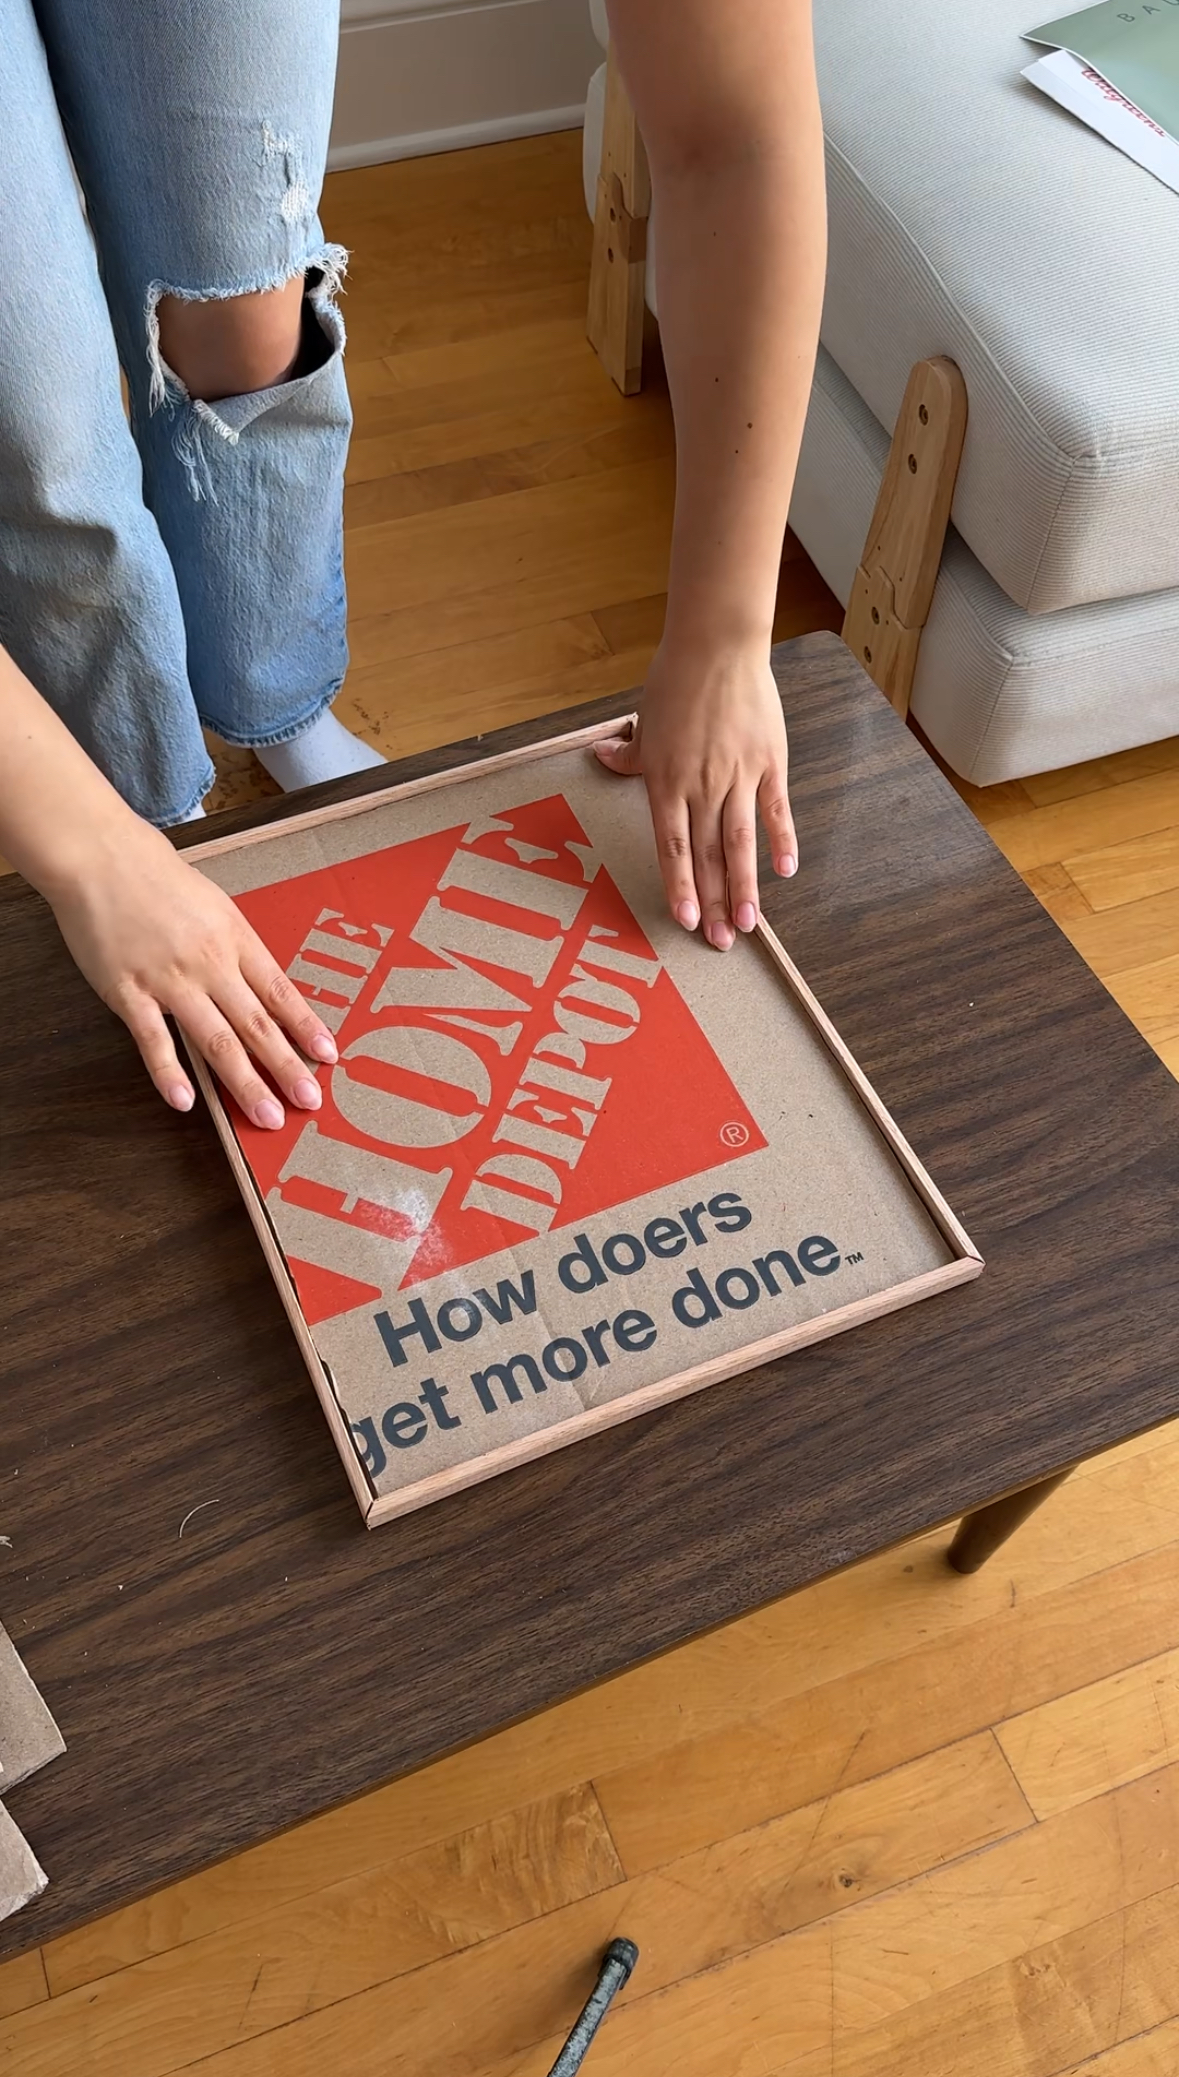
Step 5: Add a Simple Backing
Instead of buying special framing supplies, I just cut down a cardboard box to size.
The trick? Make the cardboard fit tightly inside the frame. If it’s snug enough, it won’t fall out—and you don’t even have to secure it with anything extra.
⚠️ Important notes:
If you’re framing valuable or old artwork, avoid cardboard. It’s highly acidic and can damage art over time. For inexpensive Etsy prints, though, it’s totally fine.
This method works best for prints and posters. It’s not ideal for stretched canvas art, since canvases are thicker than the moulding depth.
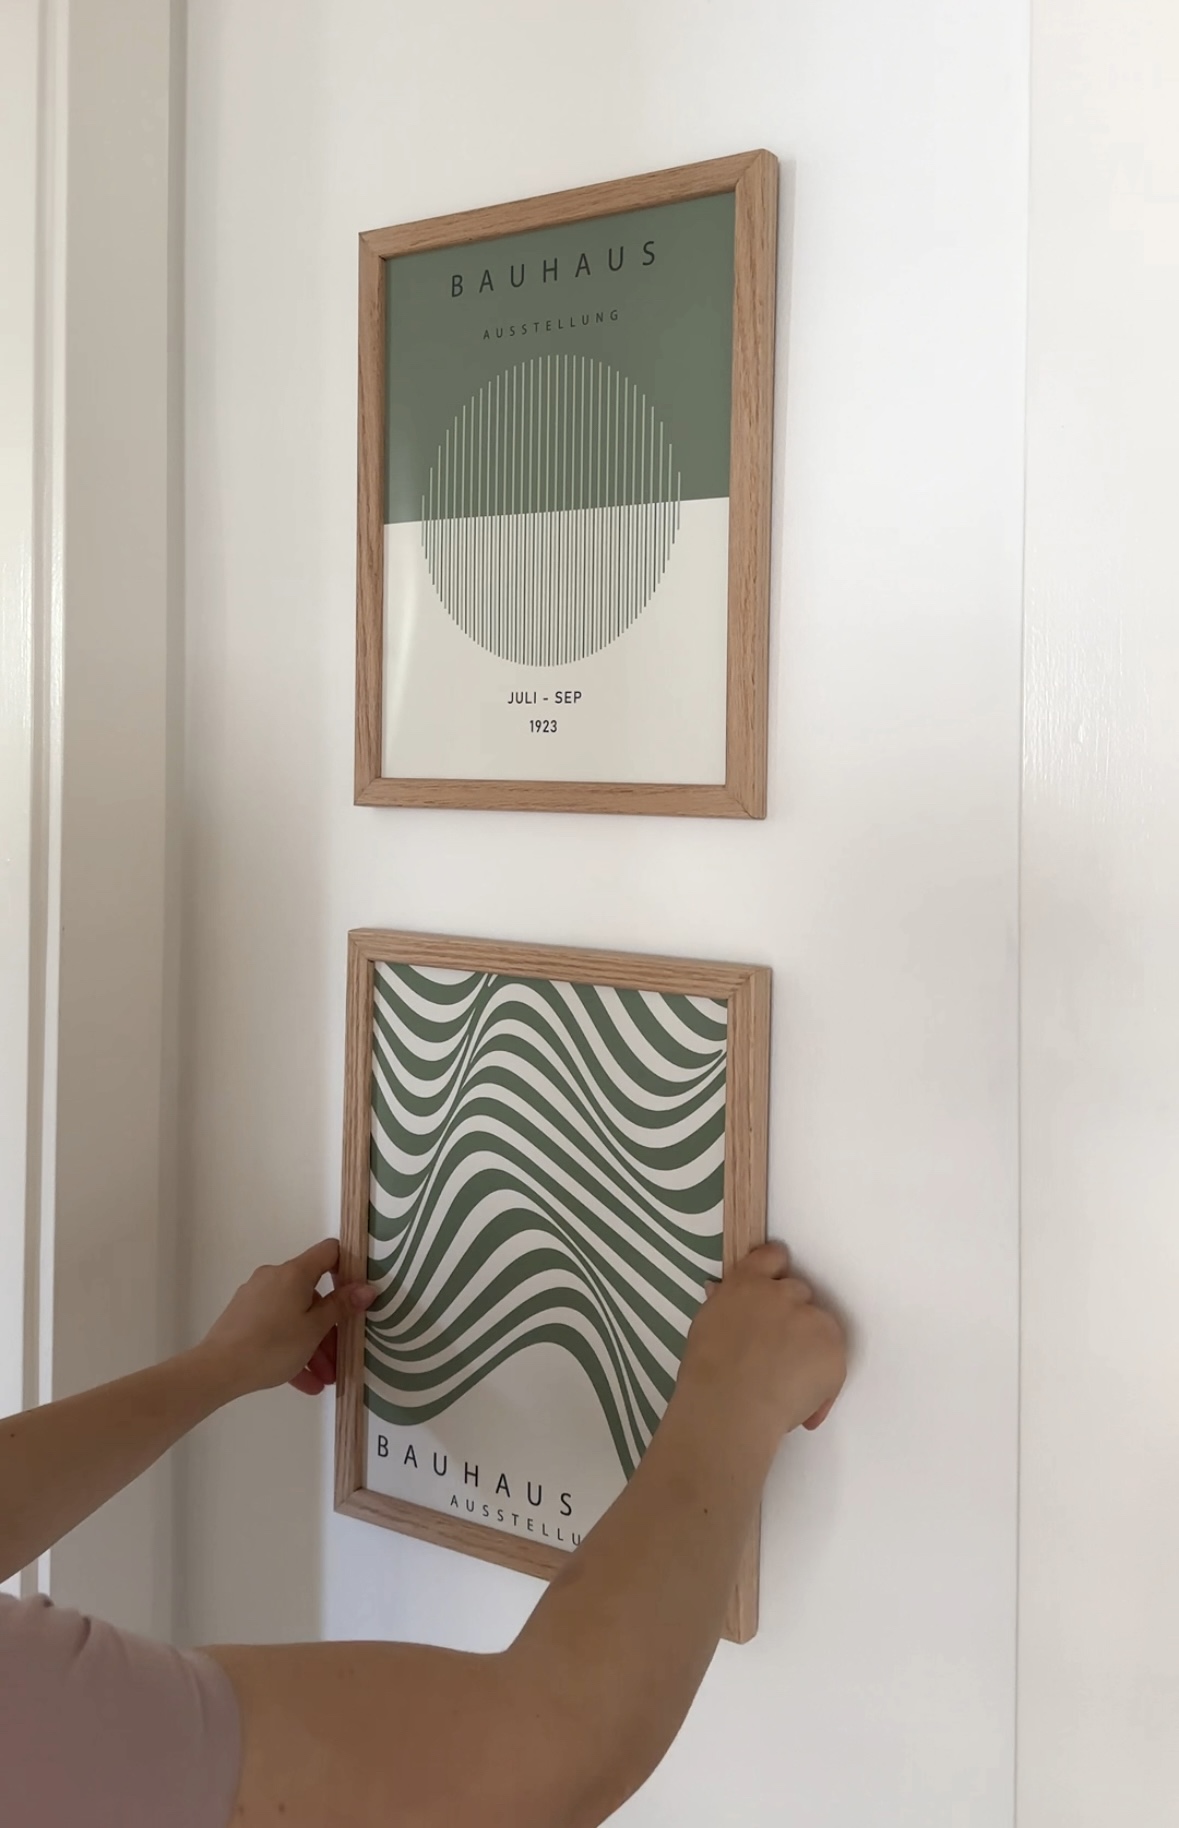
Step 6: Hang It Up
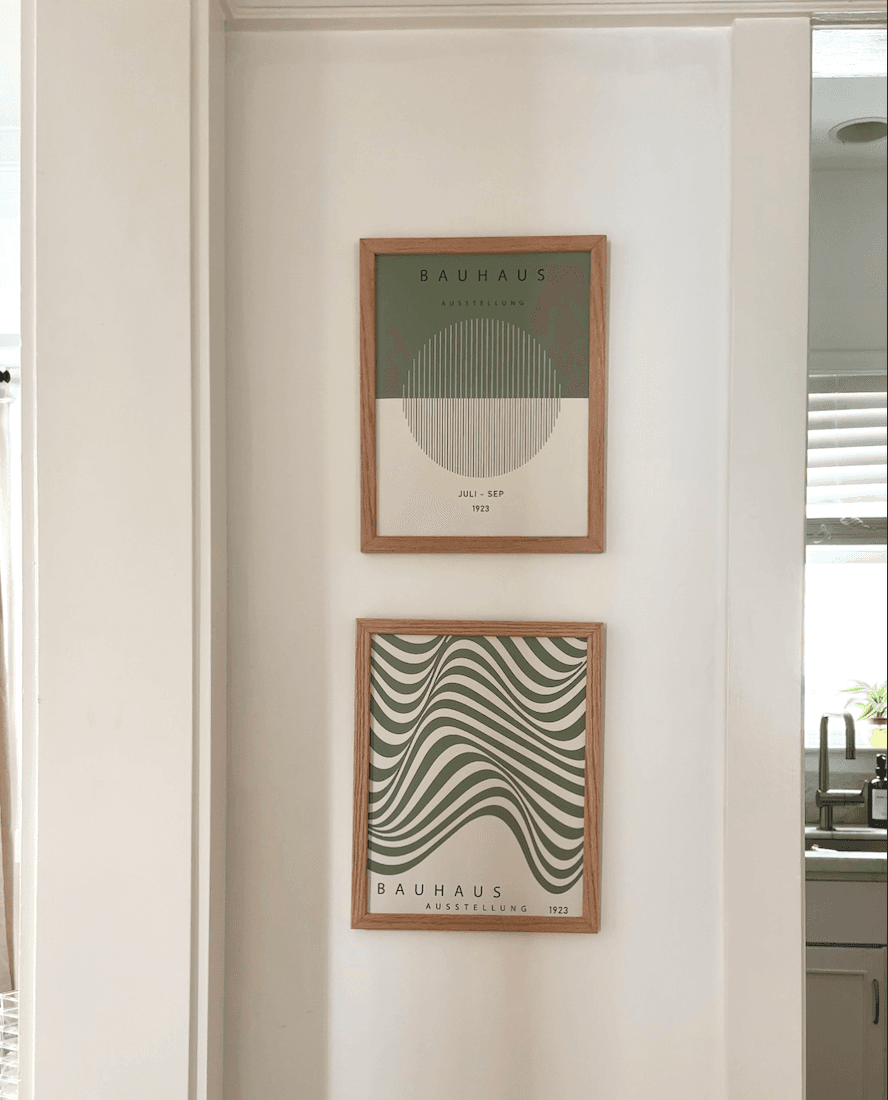
Pop in your art print, press the cardboard backing into place, and you’re done. I recommend thumbtacks or small nails - I used thumbtacks to hang mine and they look amazing on the wall.
✨ Total cost: About $10 per frame
✨ Total time: Under an hour
Finish Your Frame However You Like
Here’s where you can really customize:
Leave the raw red oak grain for a natural look
Whitewash for a coastal vibe
Stain for depth and warmth
Or go bold and paint them any color you like
This flexibility means you can create frames to perfectly match your style and space.
Why You’ll Love This DIY Frame Hack
Affordable: $10 each vs. $40–$100 store-bought frames
Customizable: Finish however you want (stain, paint, whitewash, or raw)
Beginner-friendly: No woodworking experience required
Perfect for gallery walls: Easily make multiples for a cohesive look
Final Thoughts
If you’ve been holding off on decorating because frames are pricey, this DIY wood frame tutorial is your answer. It’s budget-friendly, easy, and honestly kind of addicting once you see the results.
Looking for more DIY wall decor ideas? Check out my textured wall art tutorial for another easy, high-end looking project you can make on a budget.
📌 Don’t forget to pin this DIY frame project so you can try it for your next art print or gallery wall makeover!