Furniture Flip: Nightstand Makeover Before and After (Easy DIY Tutorial)
These damaged Facebook Marketplace nightstands were covered in nails and barely functional - now they’re classic, modern, and completely transformed. Here’s the full DIY makeover from start to finish.
DIY Nightstand Makeover: From Damaged & Dated to Classic & Modern
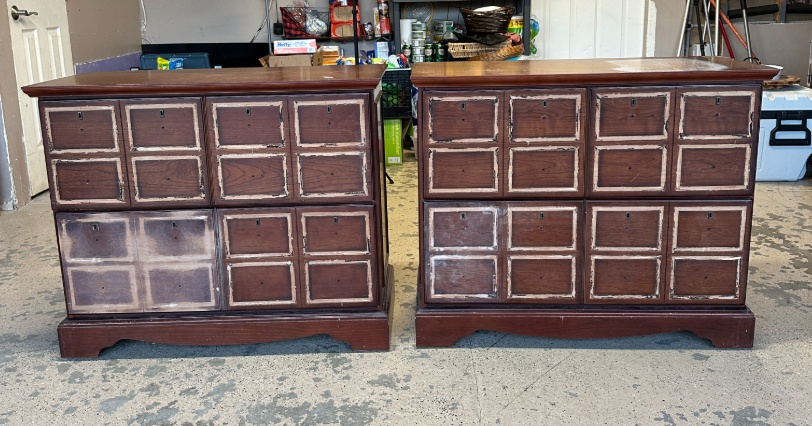
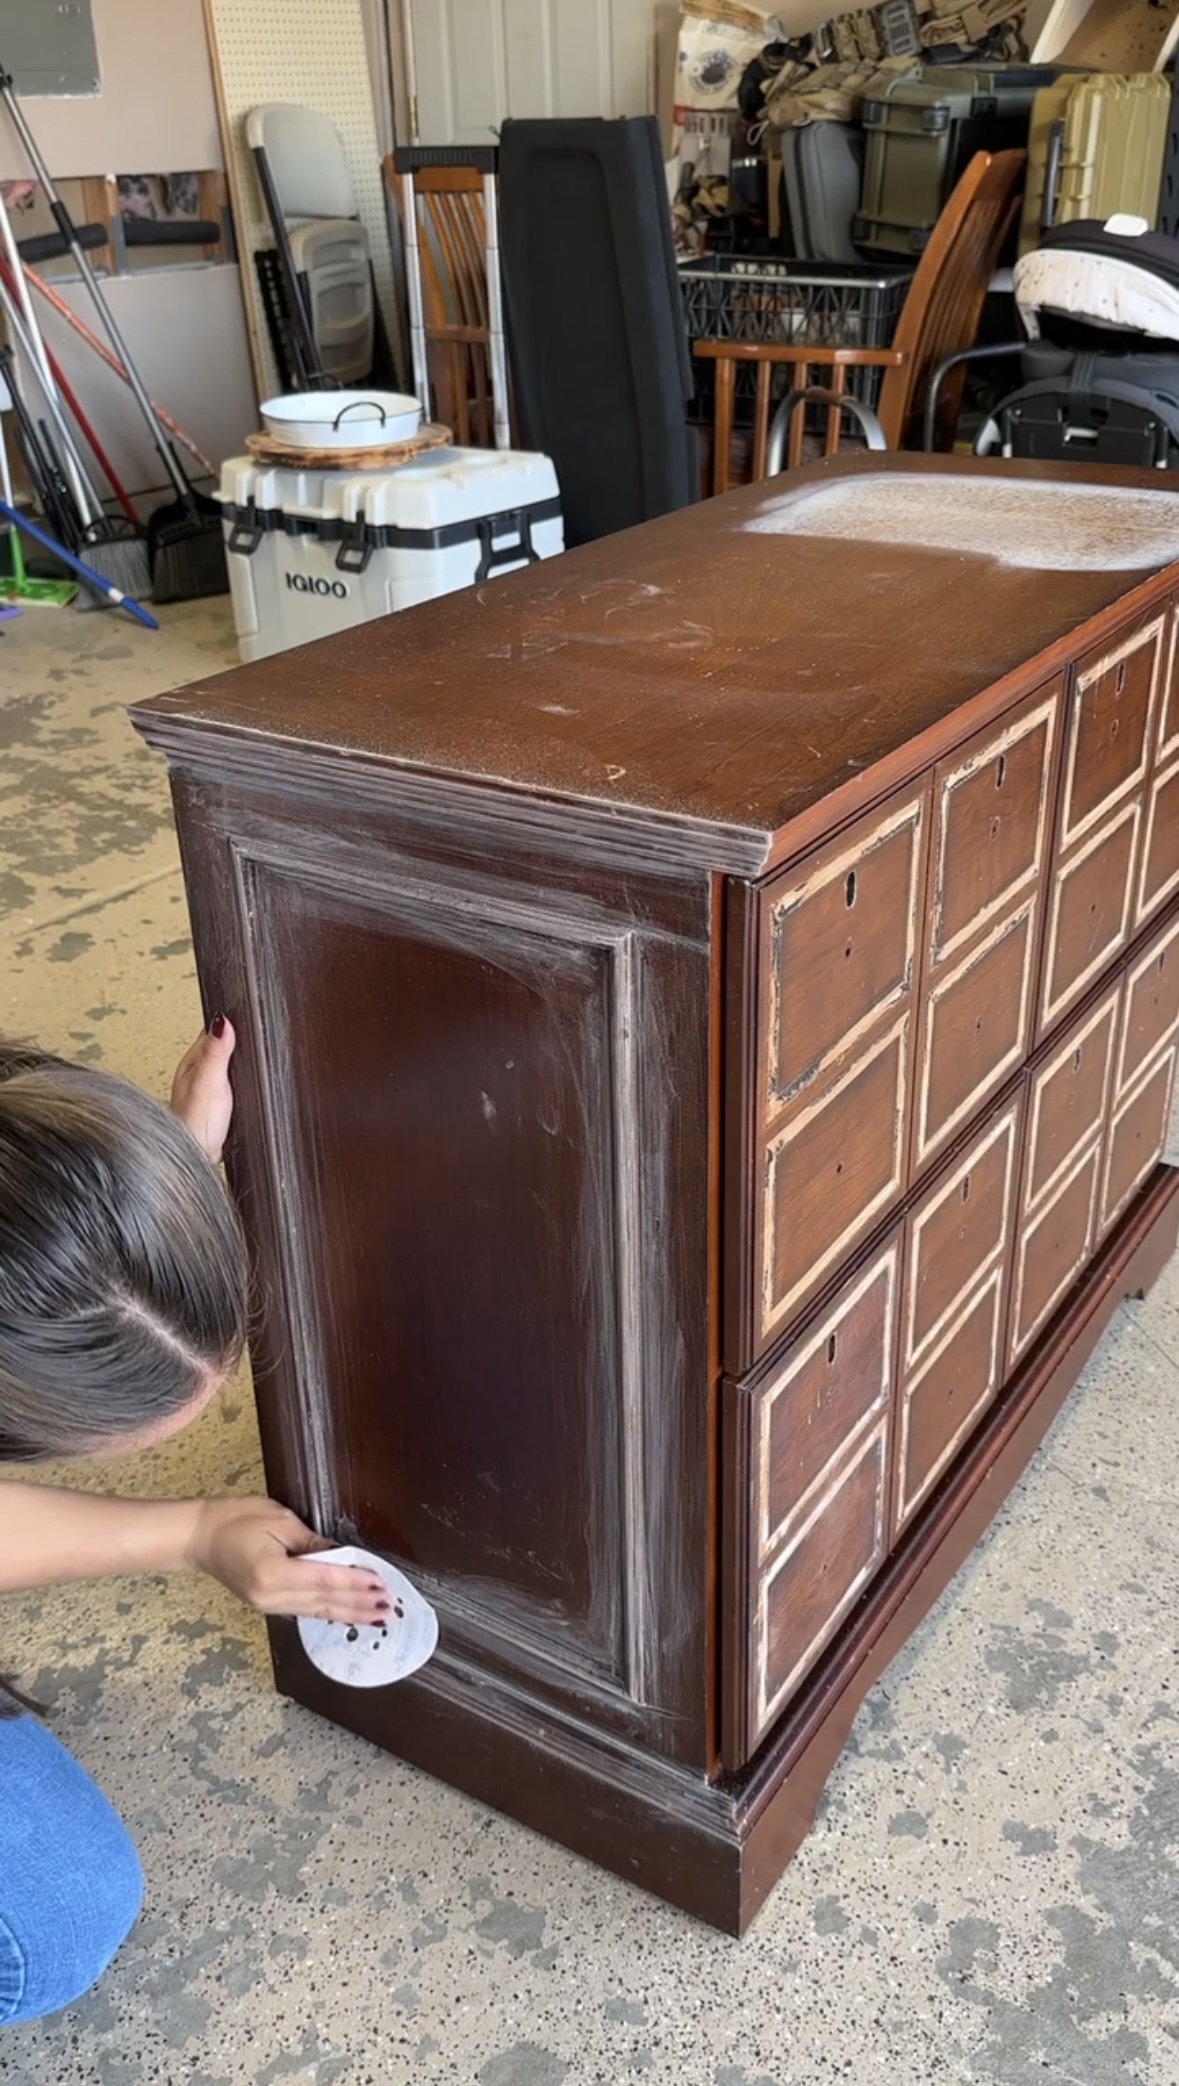
You will not believe the transformation these Facebook Marketplace nightstands went through. At first glance, they were rough—busy design, one drawer completely jammed, and (no exaggeration) hundreds of tiny nails sticking out. But with some teamwork, sanding, Bondo, and a whole lot of patience, these nightstands now look timeless, versatile, and ready for a new life.
If you’ve got damaged or outdated furniture at home, here’s exactly how I flipped these step by step.
In this blog, I’ll walk you through how to prep and repair damaged furniture, smooth out imperfections with Bondo and wood filler, modernize the shape with simple upgrades, and finish everything with a clean, professional-looking paint job.
🛠️ Materials Needed
Before you get started, here’s everything I used for this furniture flip:
Tools
Sandpaper (various grits for sanding + finishing)
Drill + drill bits
Miter saw or miter shears (for cutting trim pieces)
Paint sprayer (I used a Finish Max)
Paintbrush + roller (for primer)
Hardware jig (for consistent placement)
Materials
Bondo (for deep repairs and major damage)
Wood filler (for smaller imperfections)
Paint (I used this color)
Poly (top coat)
Wood trim (for drawer detailing)
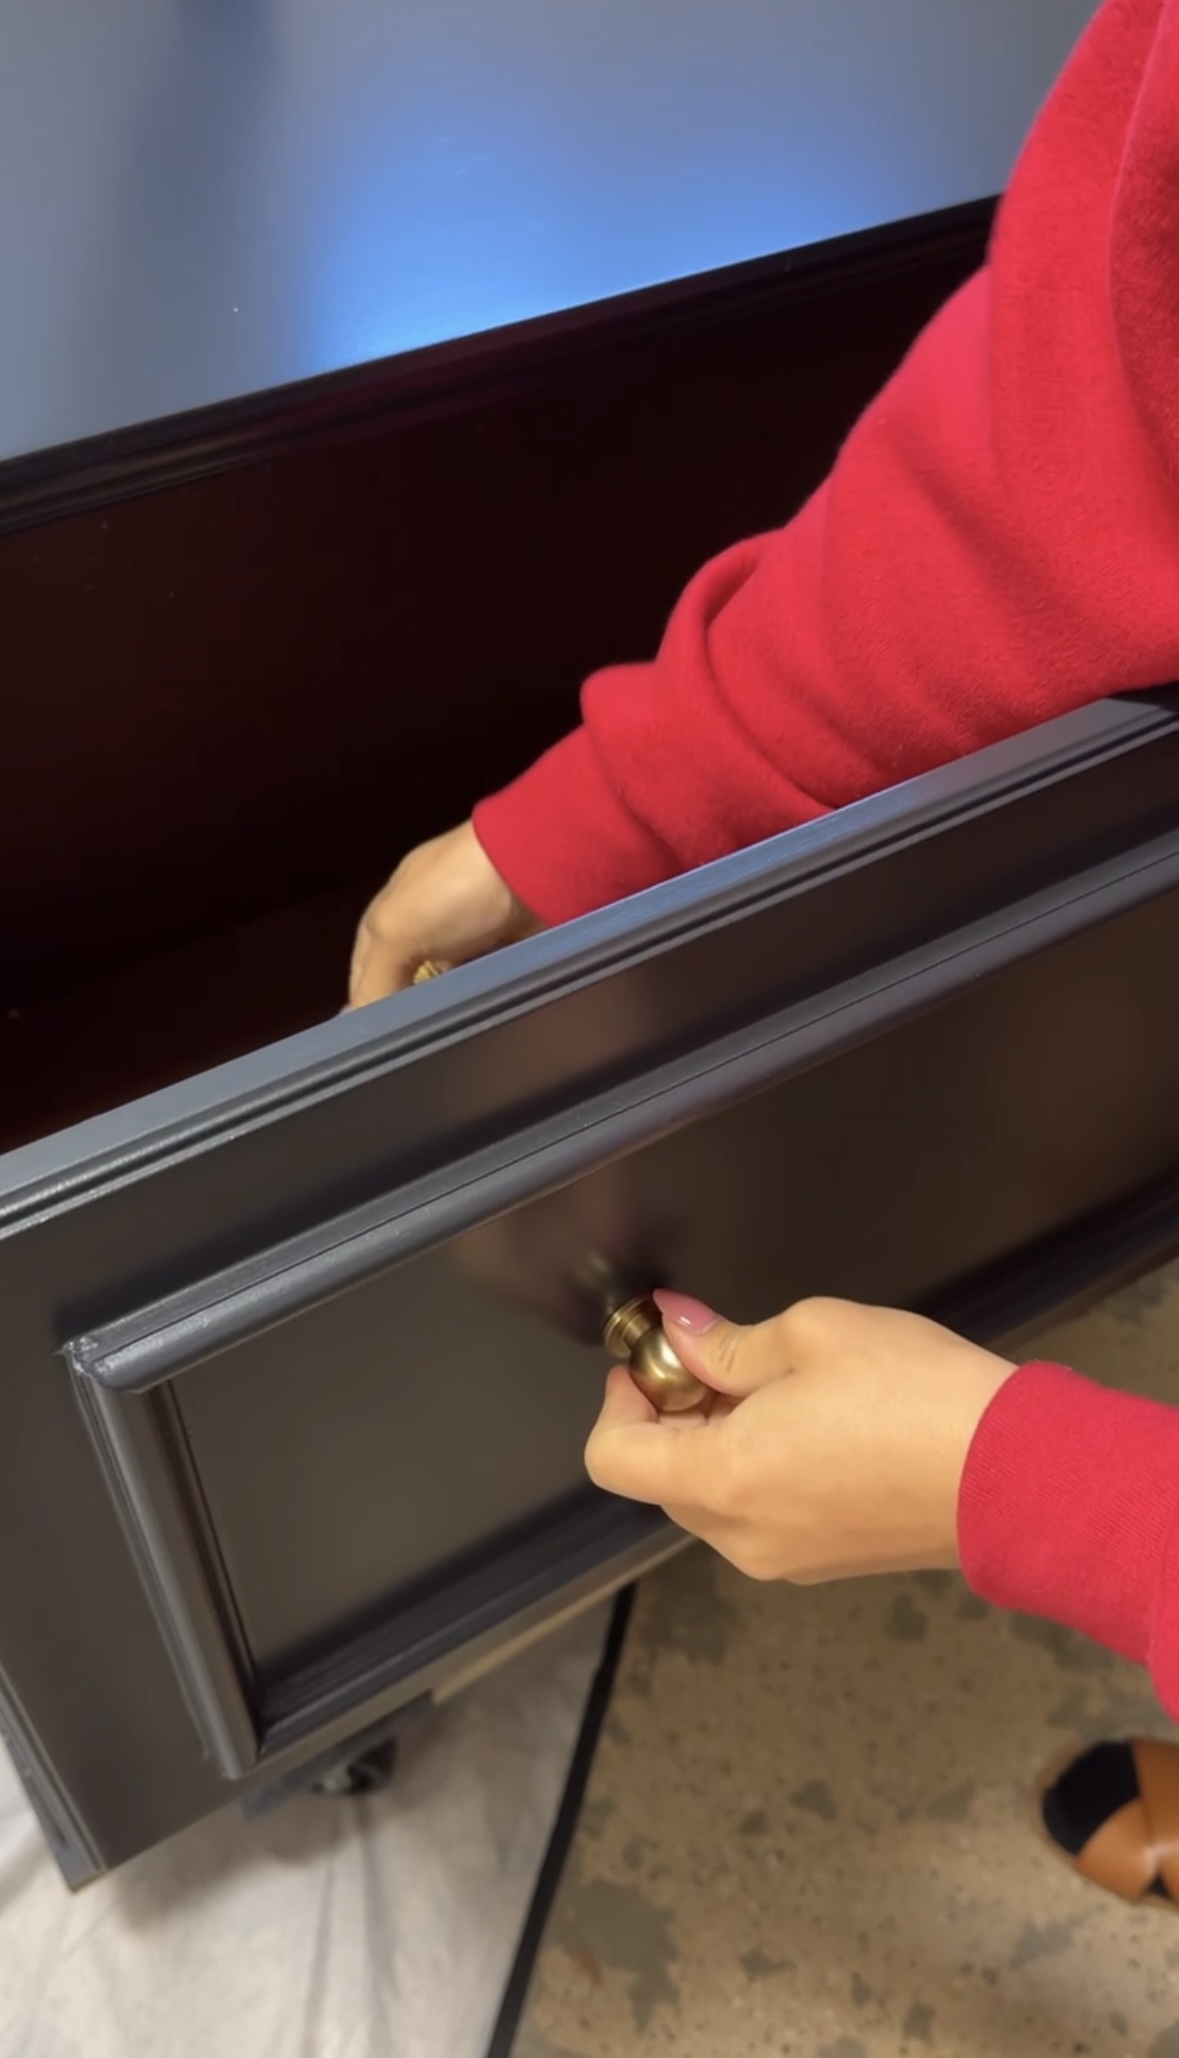
New hardware (I used simple brass knobs)
Step 1: Prep
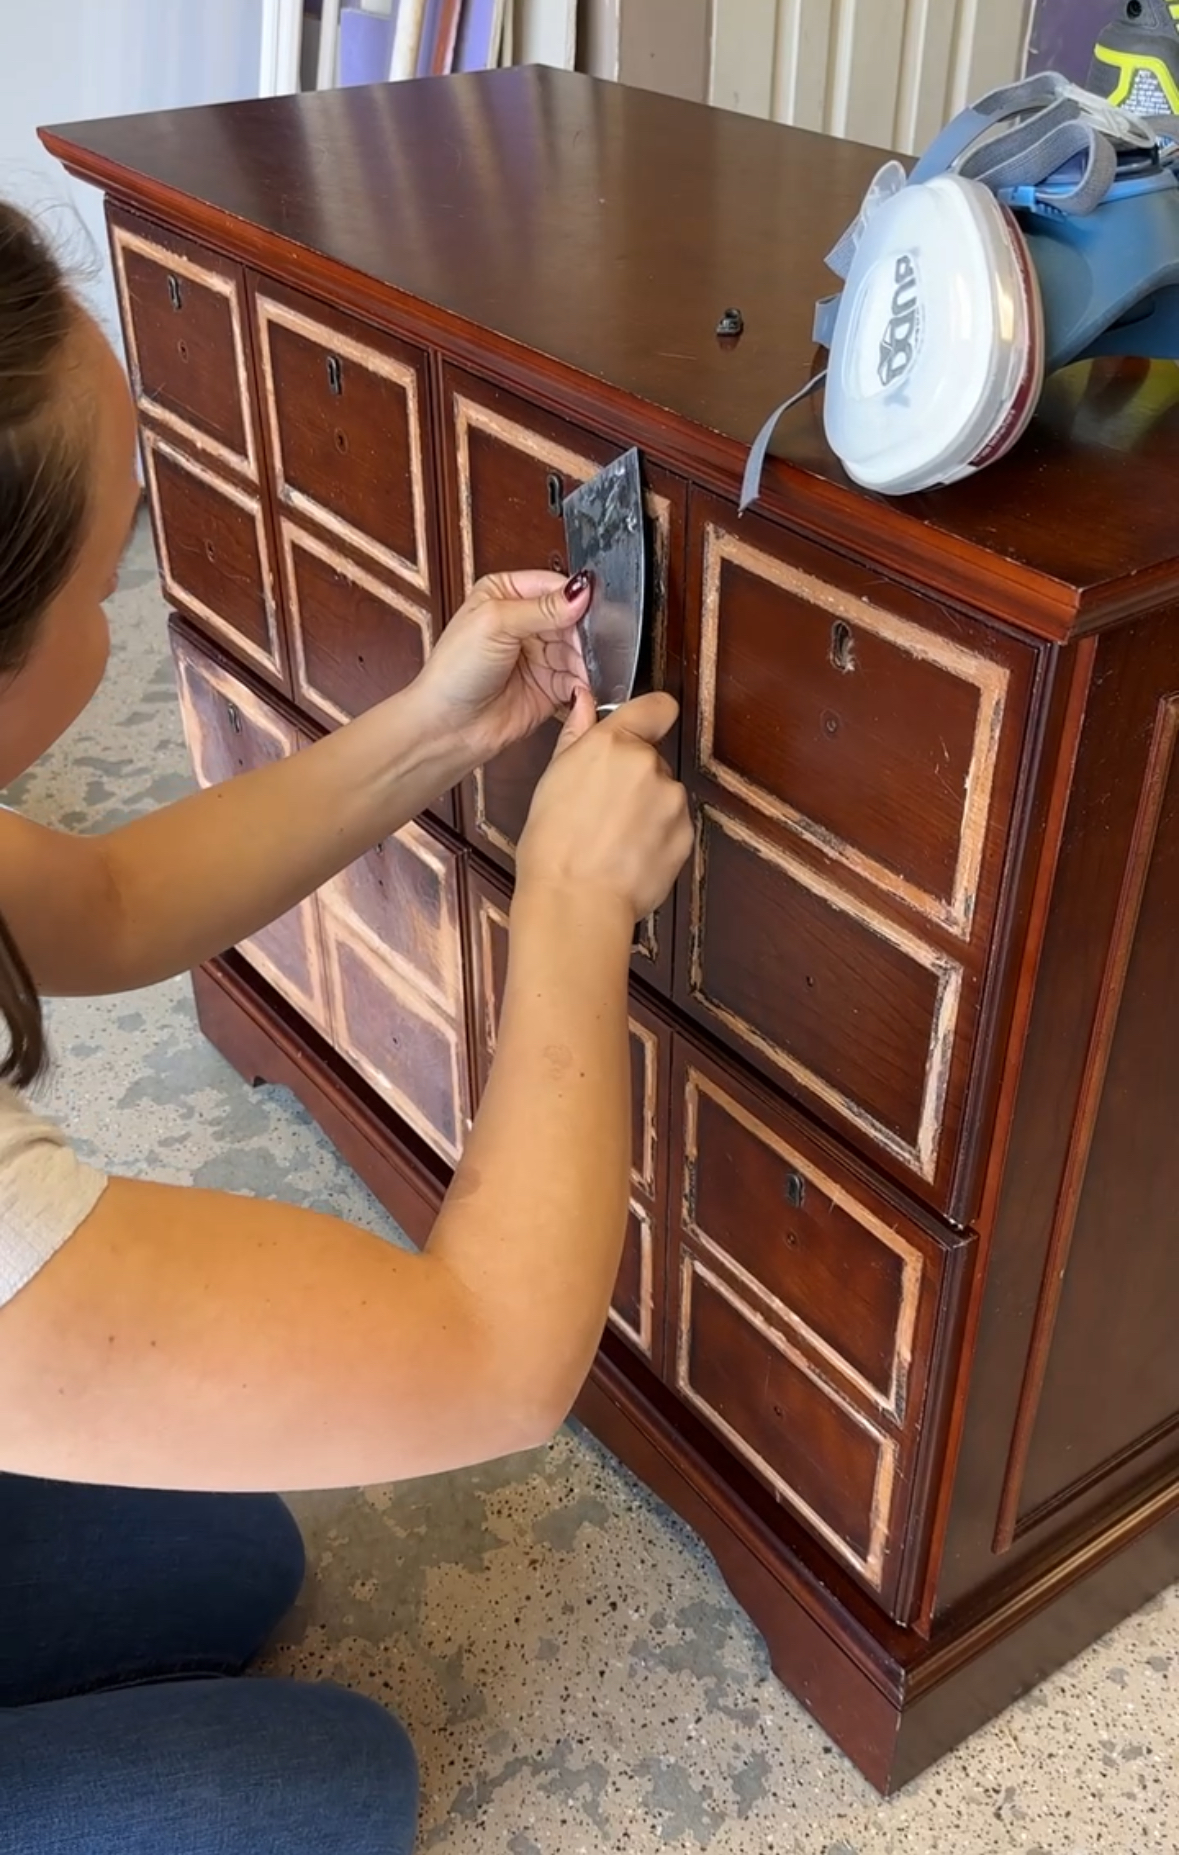
The first thing we had to tackle was the mess. It was clear someone else had already started working on these before I got them - so this meant extra prep to bring everything back to a clean slate before moving forward.
My little brother Cyril jumped in to help pull out all those stray nails while I cleaned every surface and pried off the old keyholes.
Step 2: Sand
Using an orbital sander, Cyril and I took turns sanding down the flat surfaces. This stripped away the old finish and gave us a fresh base to work with.
For the curved edges and hard-to-reach areas, we switched to hand sanding to make sure everything was smoothed out evenly.
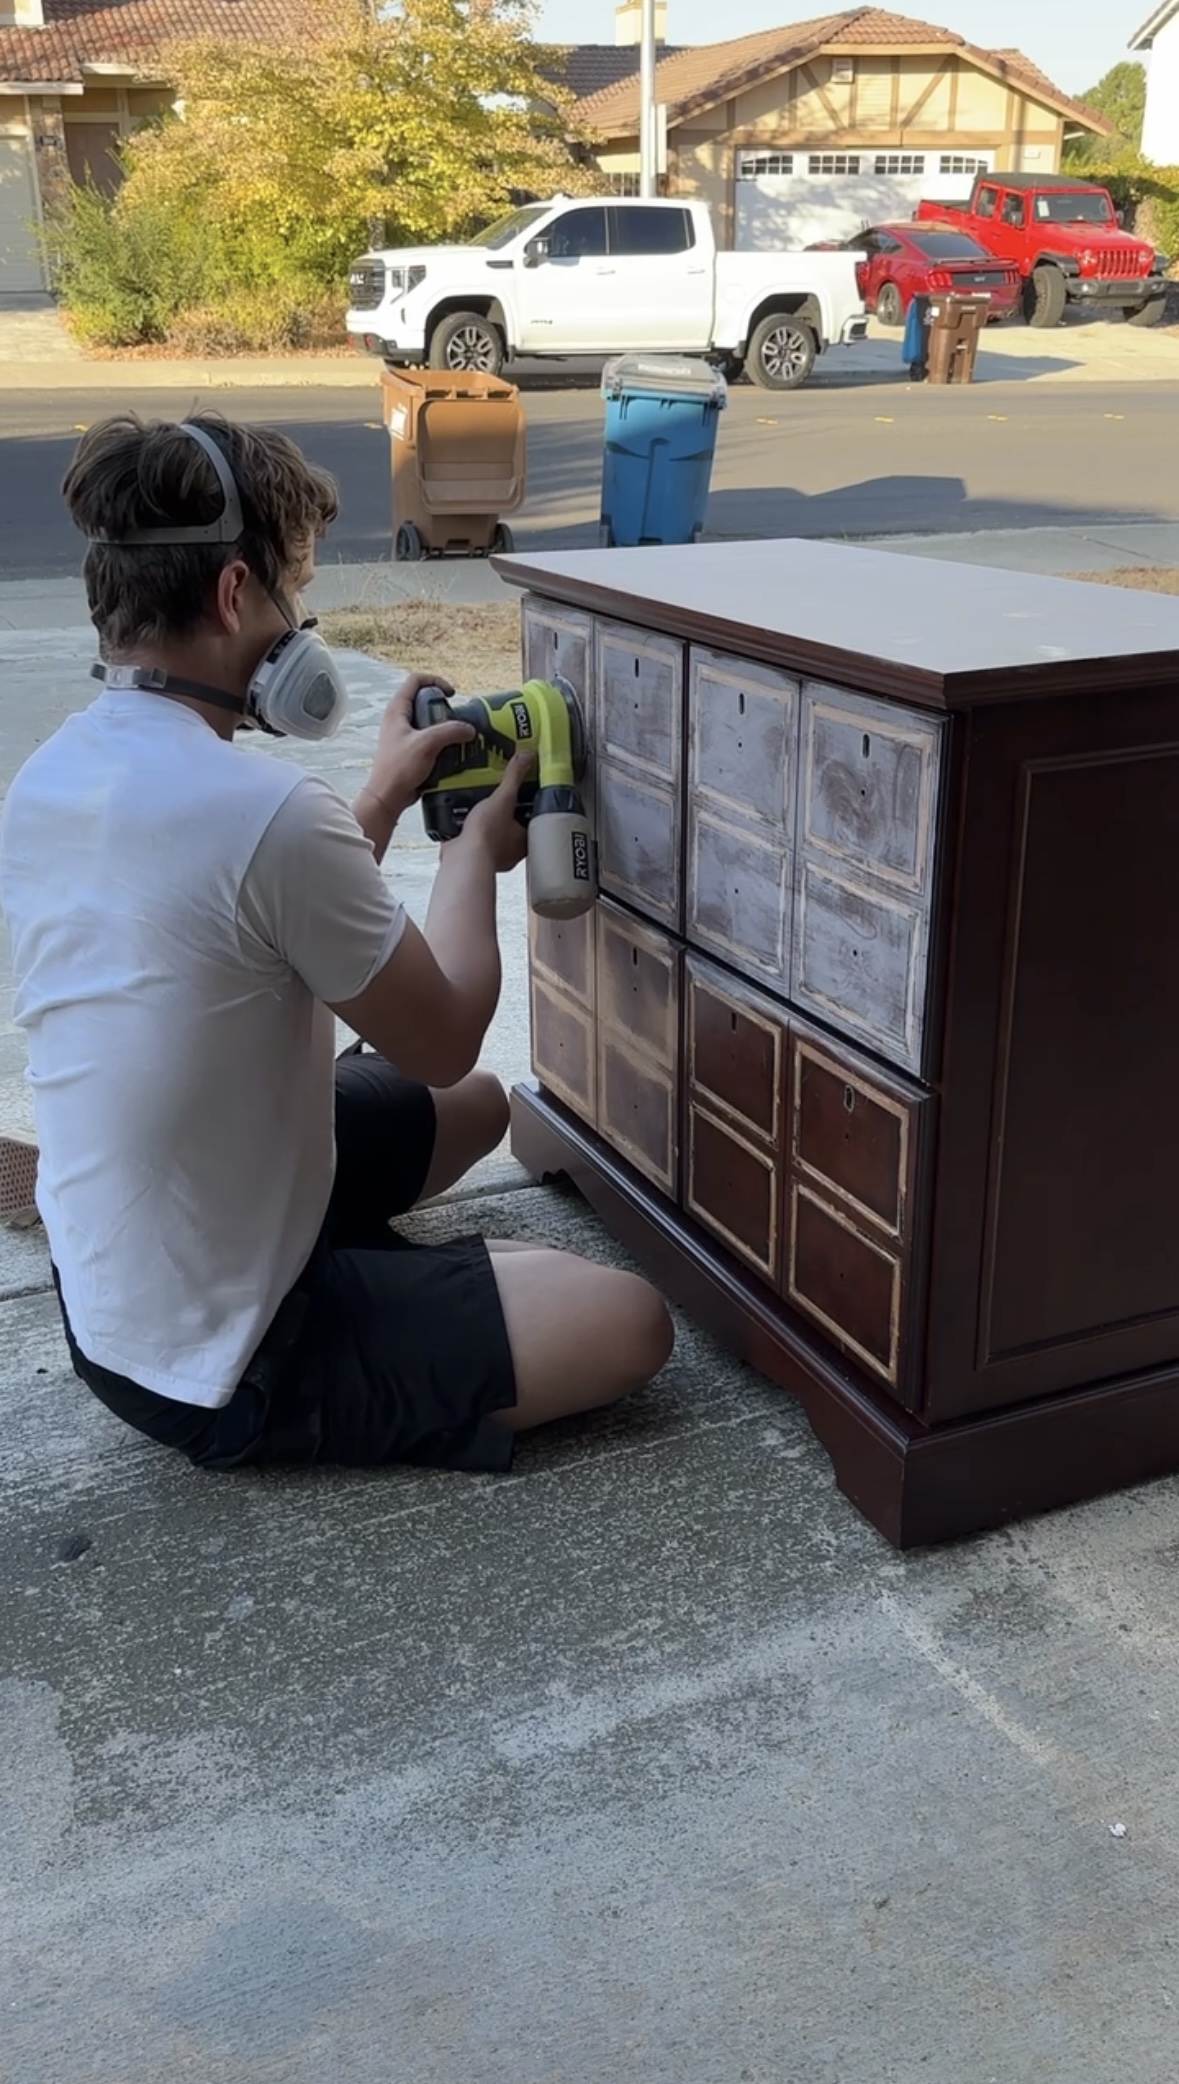
💡 Beginner tip: Sanding not only removes the old finish but also helps your primer and paint stick way better, so it’s worth taking your time here.
Wood Filler vs. Bondo: What’s the Difference?
When it comes to filling grooves, gaps, or damage in furniture, you’ve got two main options: classic wood filler and Bondo.
Wood Filler
Easier to work with
Low odor, safe for indoor use
Best for small dings, scratches, nail holes, or shallow repairs
Slower drying, which gives you more working time
Sands smoothly and blends well with paint or stain
Bondo (Wood Filler or All-Purpose Putty)
Dries much faster and harder than regular wood filler
Ideal for structural issues, deep grooves, or large problem areas
Extremely durable once cured
Strong fumes → always use good airflow and ideally a respirator
Wear gloves (it’s not skin-friendly)
Sets quickly, so you need to work fast
💡 My take: For small cosmetic fixes, wood filler is fine. But for major repairs like these nightstands—with deep grooves and structural quirks—Bondo was the way to go.
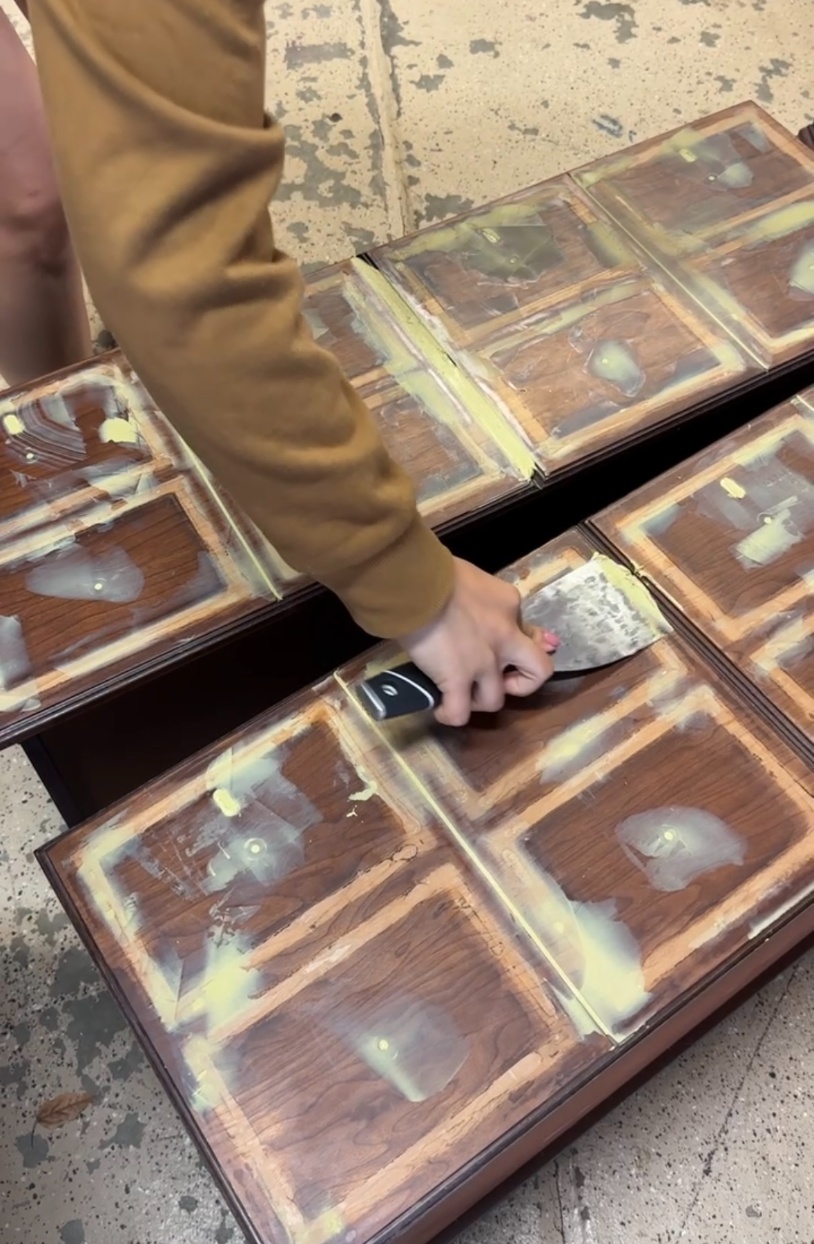
Step 3: Fill
This part was a marathon. I used what felt like a million rounds of Bondo, wood filler, and sanding before finally getting a smooth surface that was ready to prime.
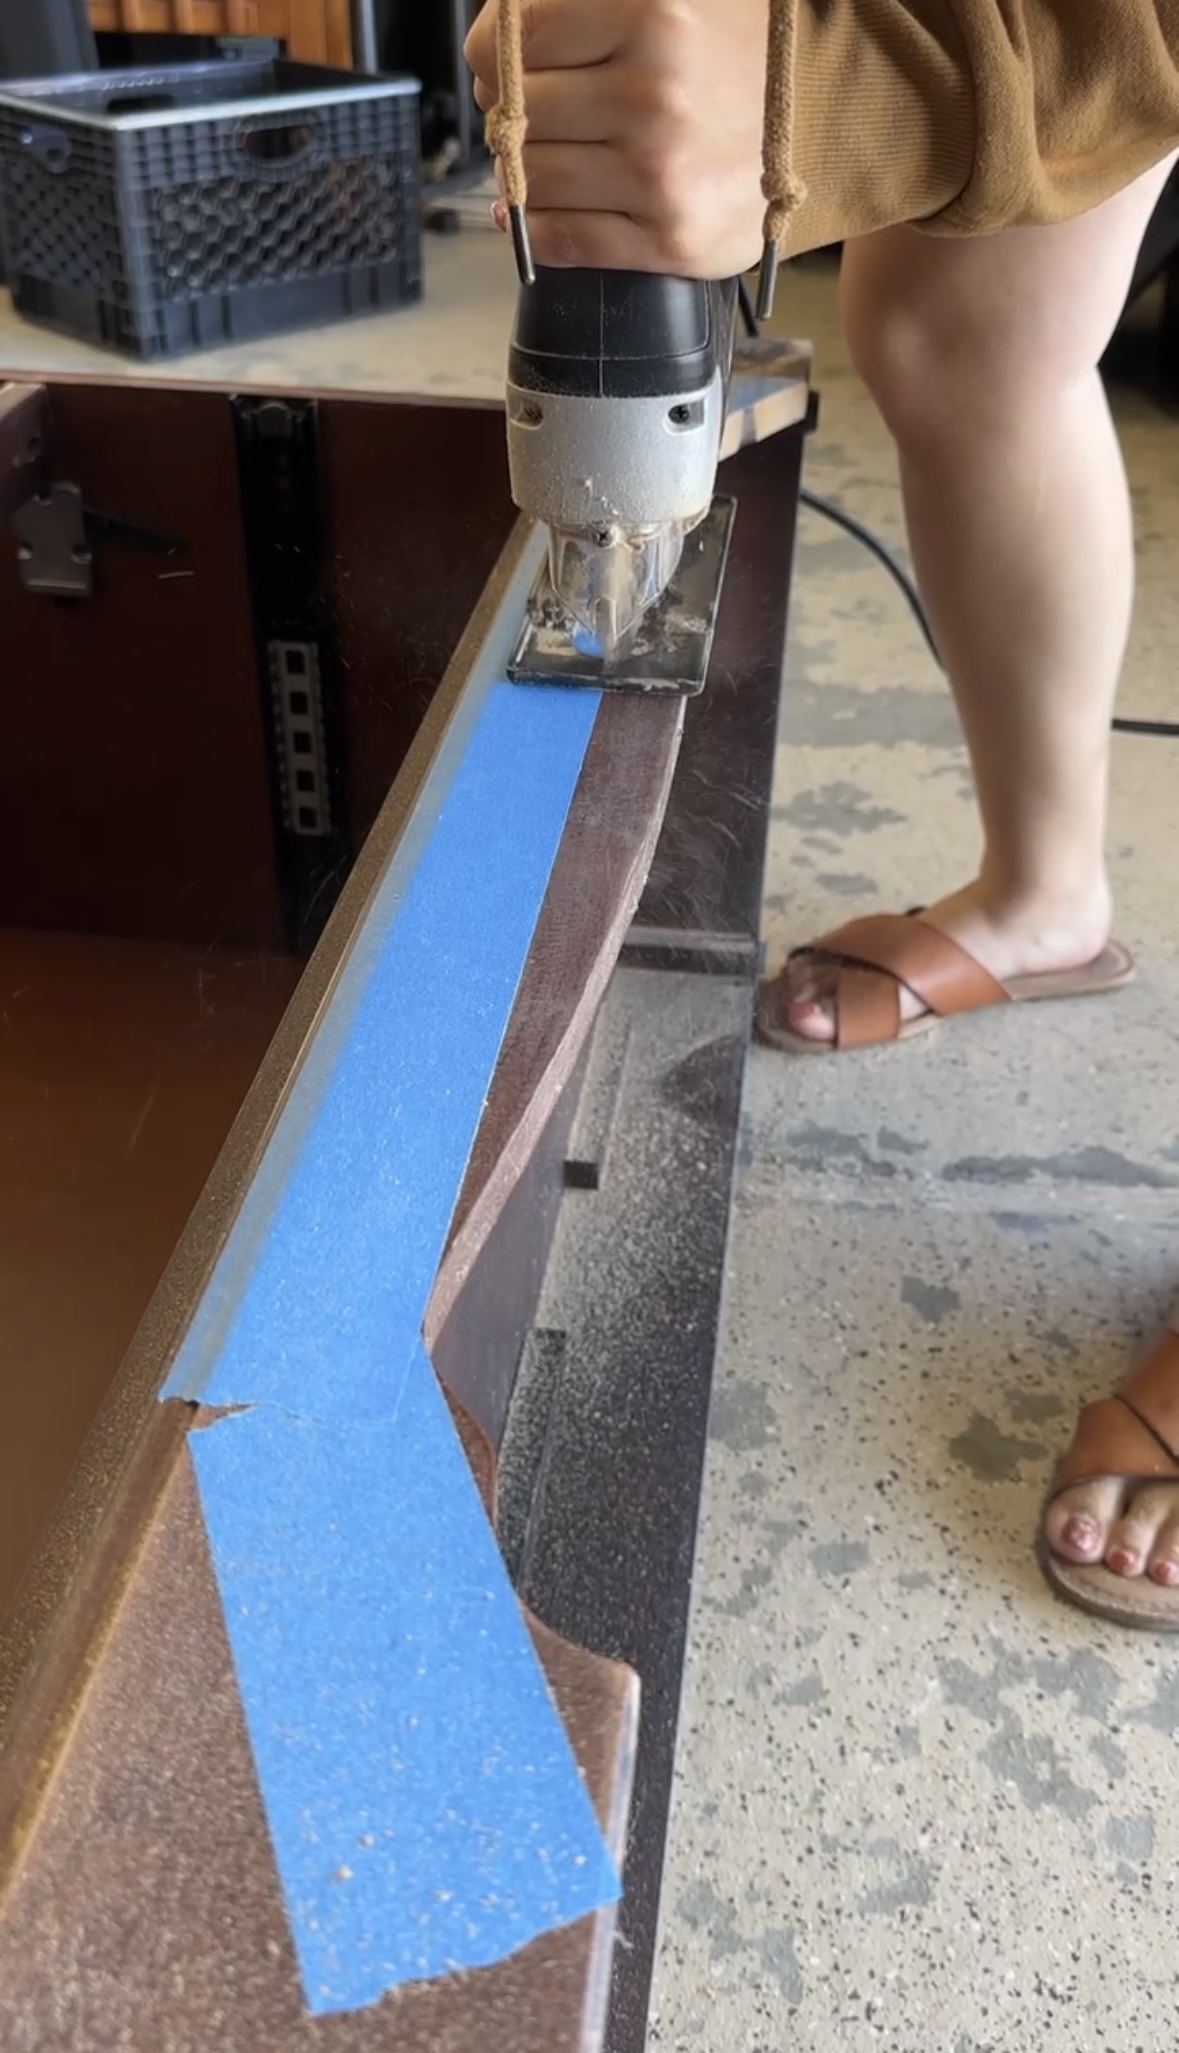
One of the biggest changes was cutting off the curvy base to modernize the shape. This hack works not just for nightstands, but also for dressers or other vintage pieces—it’s one of the easiest ways to give dated furniture a more streamlined, modern look.
After all the filling and smoothing, the nightstands finally looked clean, simple, and ready for the next step.
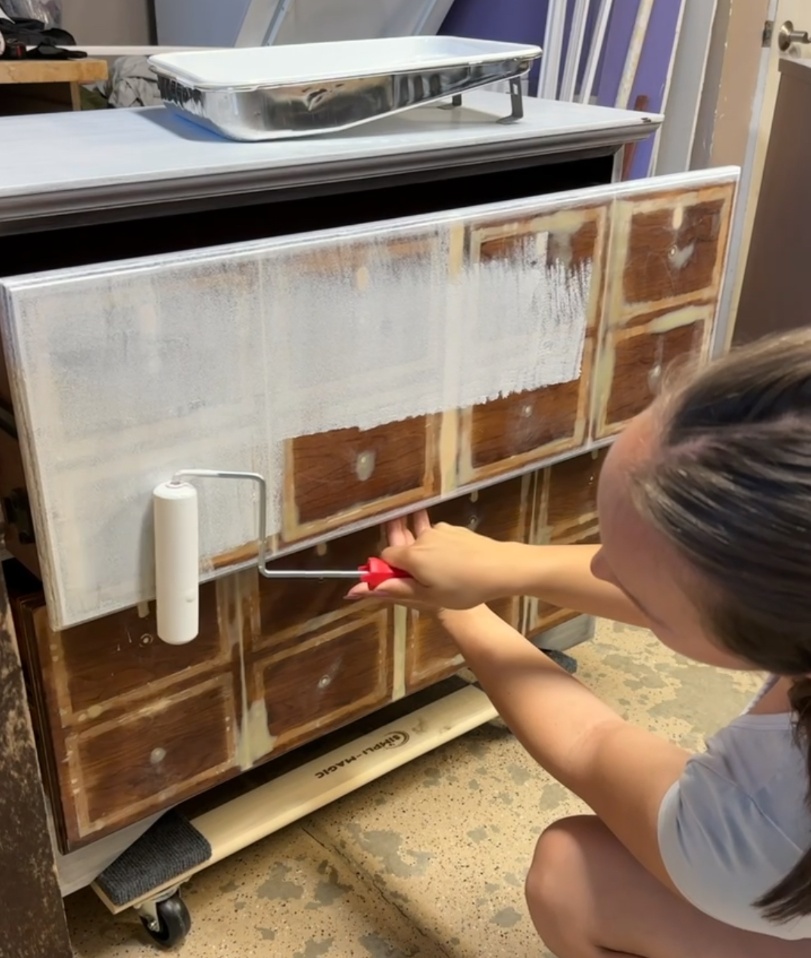
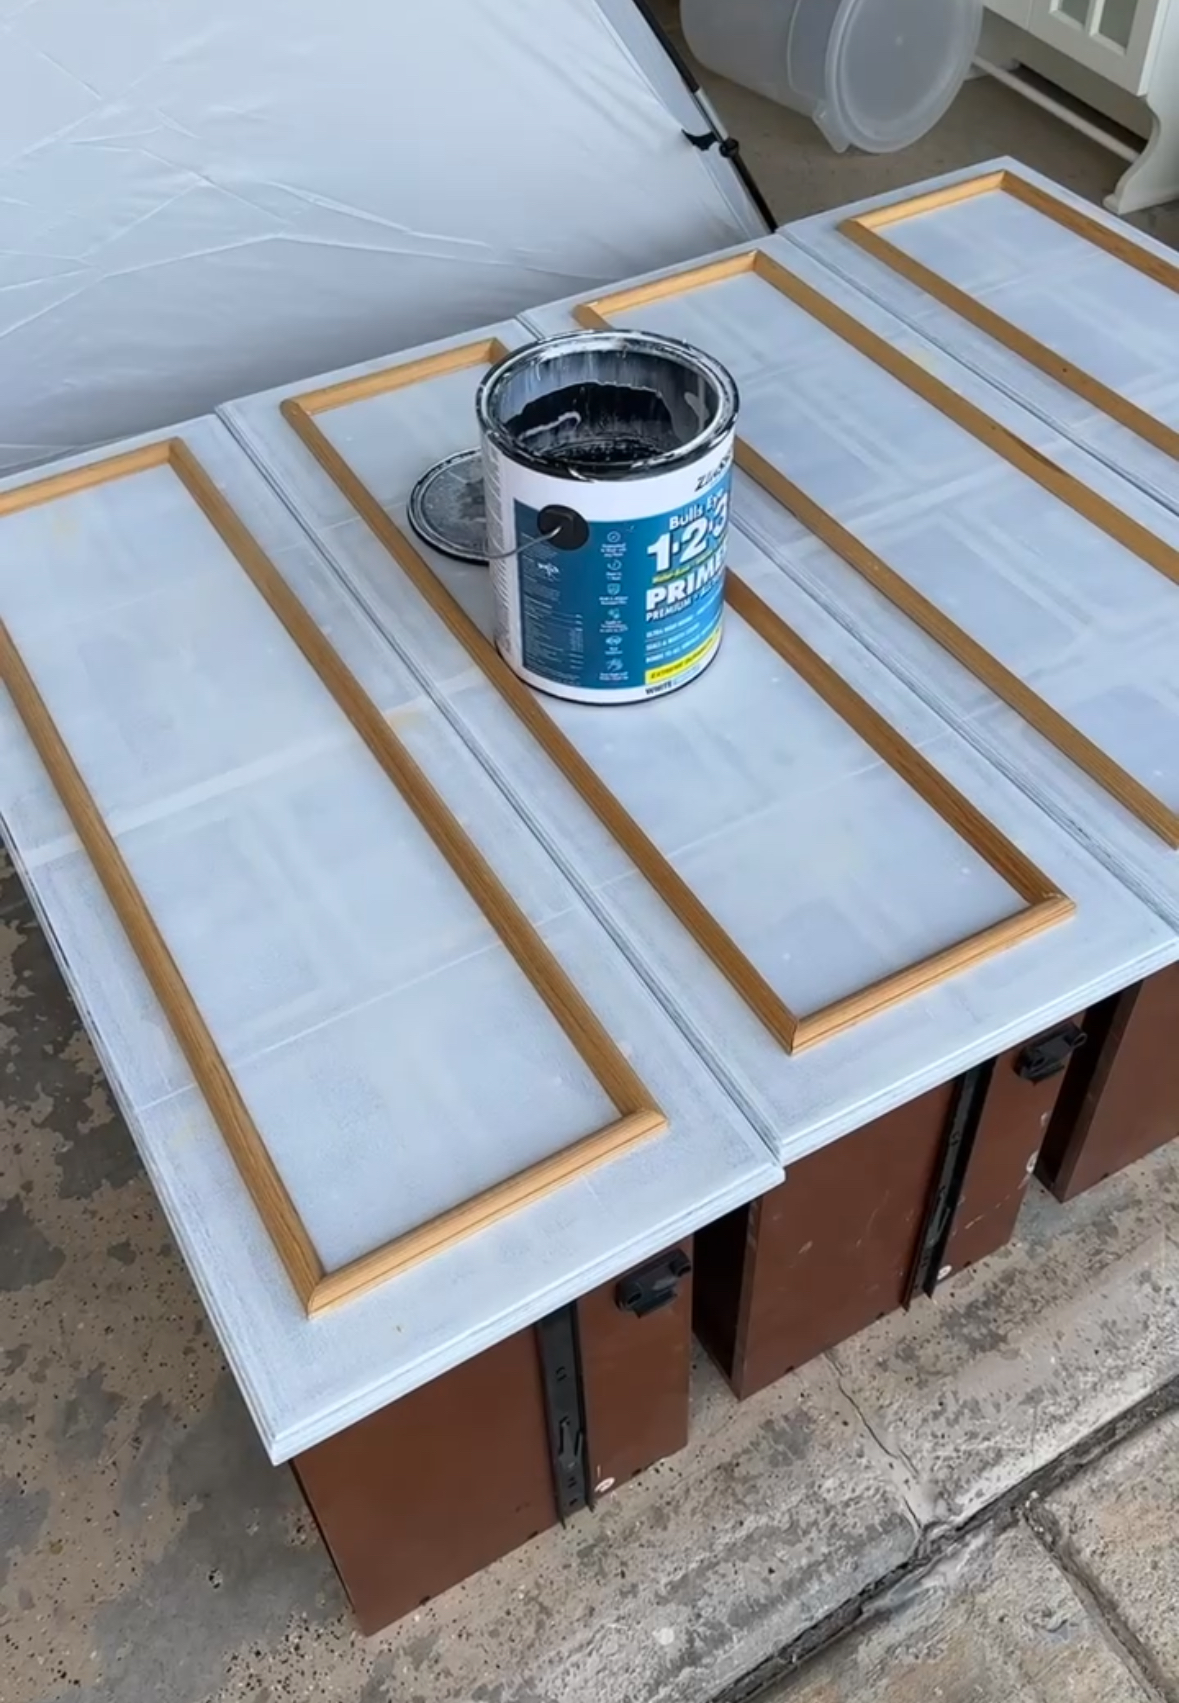
Step 4: Prime
Once the structure was ready, I grabbed a brush and roller and gave the entire piece a solid coat of liquid primer. It kept the project affordable and got the job done.
Normally, though, I like to use spray primer—it’s sooo much easier and faster to apply, especially for detailed furniture pieces. Either way, primer not only blocks stains but also creates a smooth base for your paint to grip.
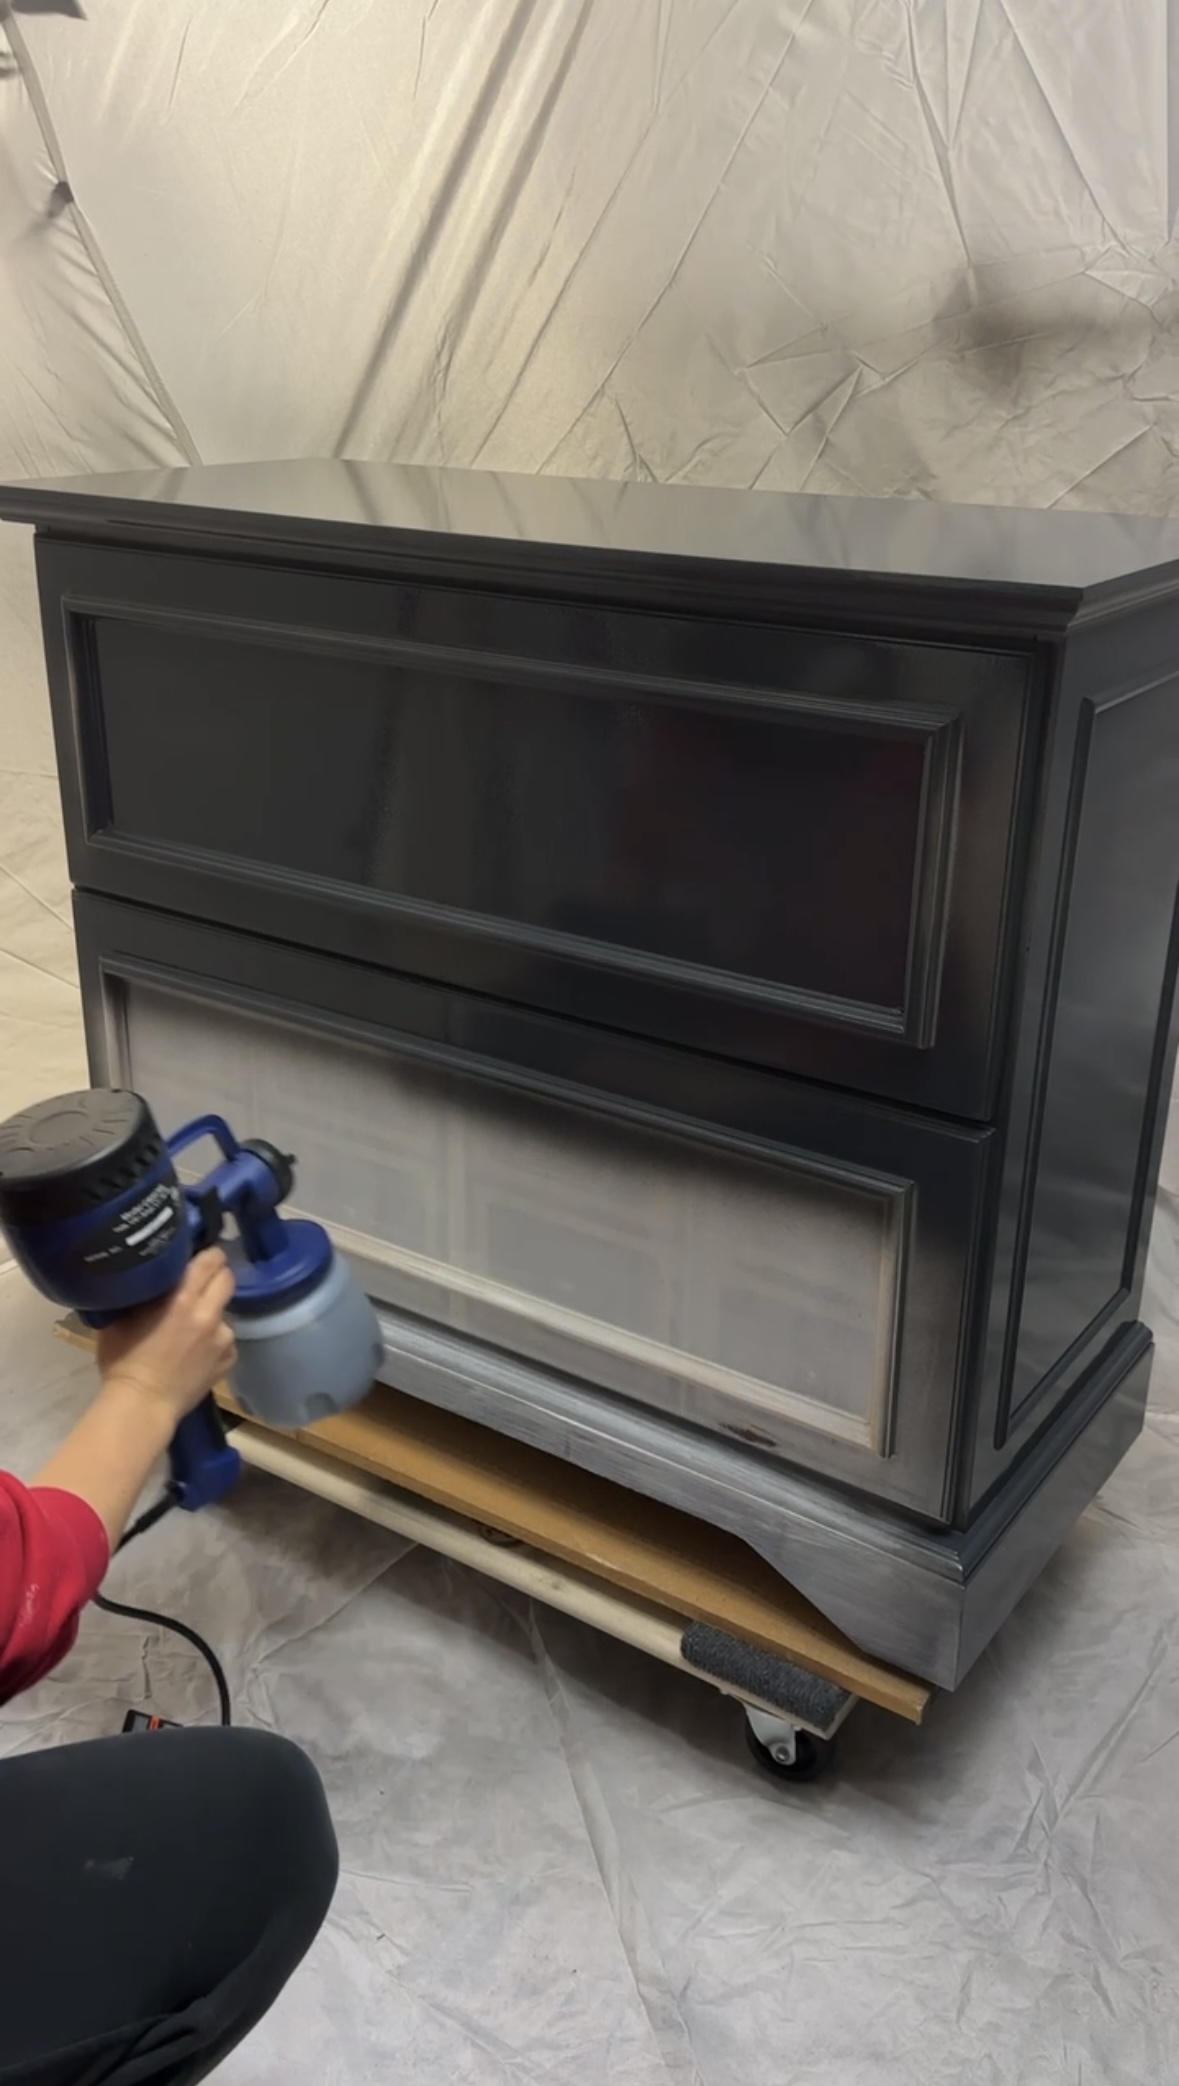
Step 5: Paint
Here’s where the magic happens. I wanted to keep a nod to the classic design, so I added new trim—mitered into neat little boxes—to frame out the drawers. Each piece was glued, weighted down, then finished with wood filler and caulk for seamless edges.
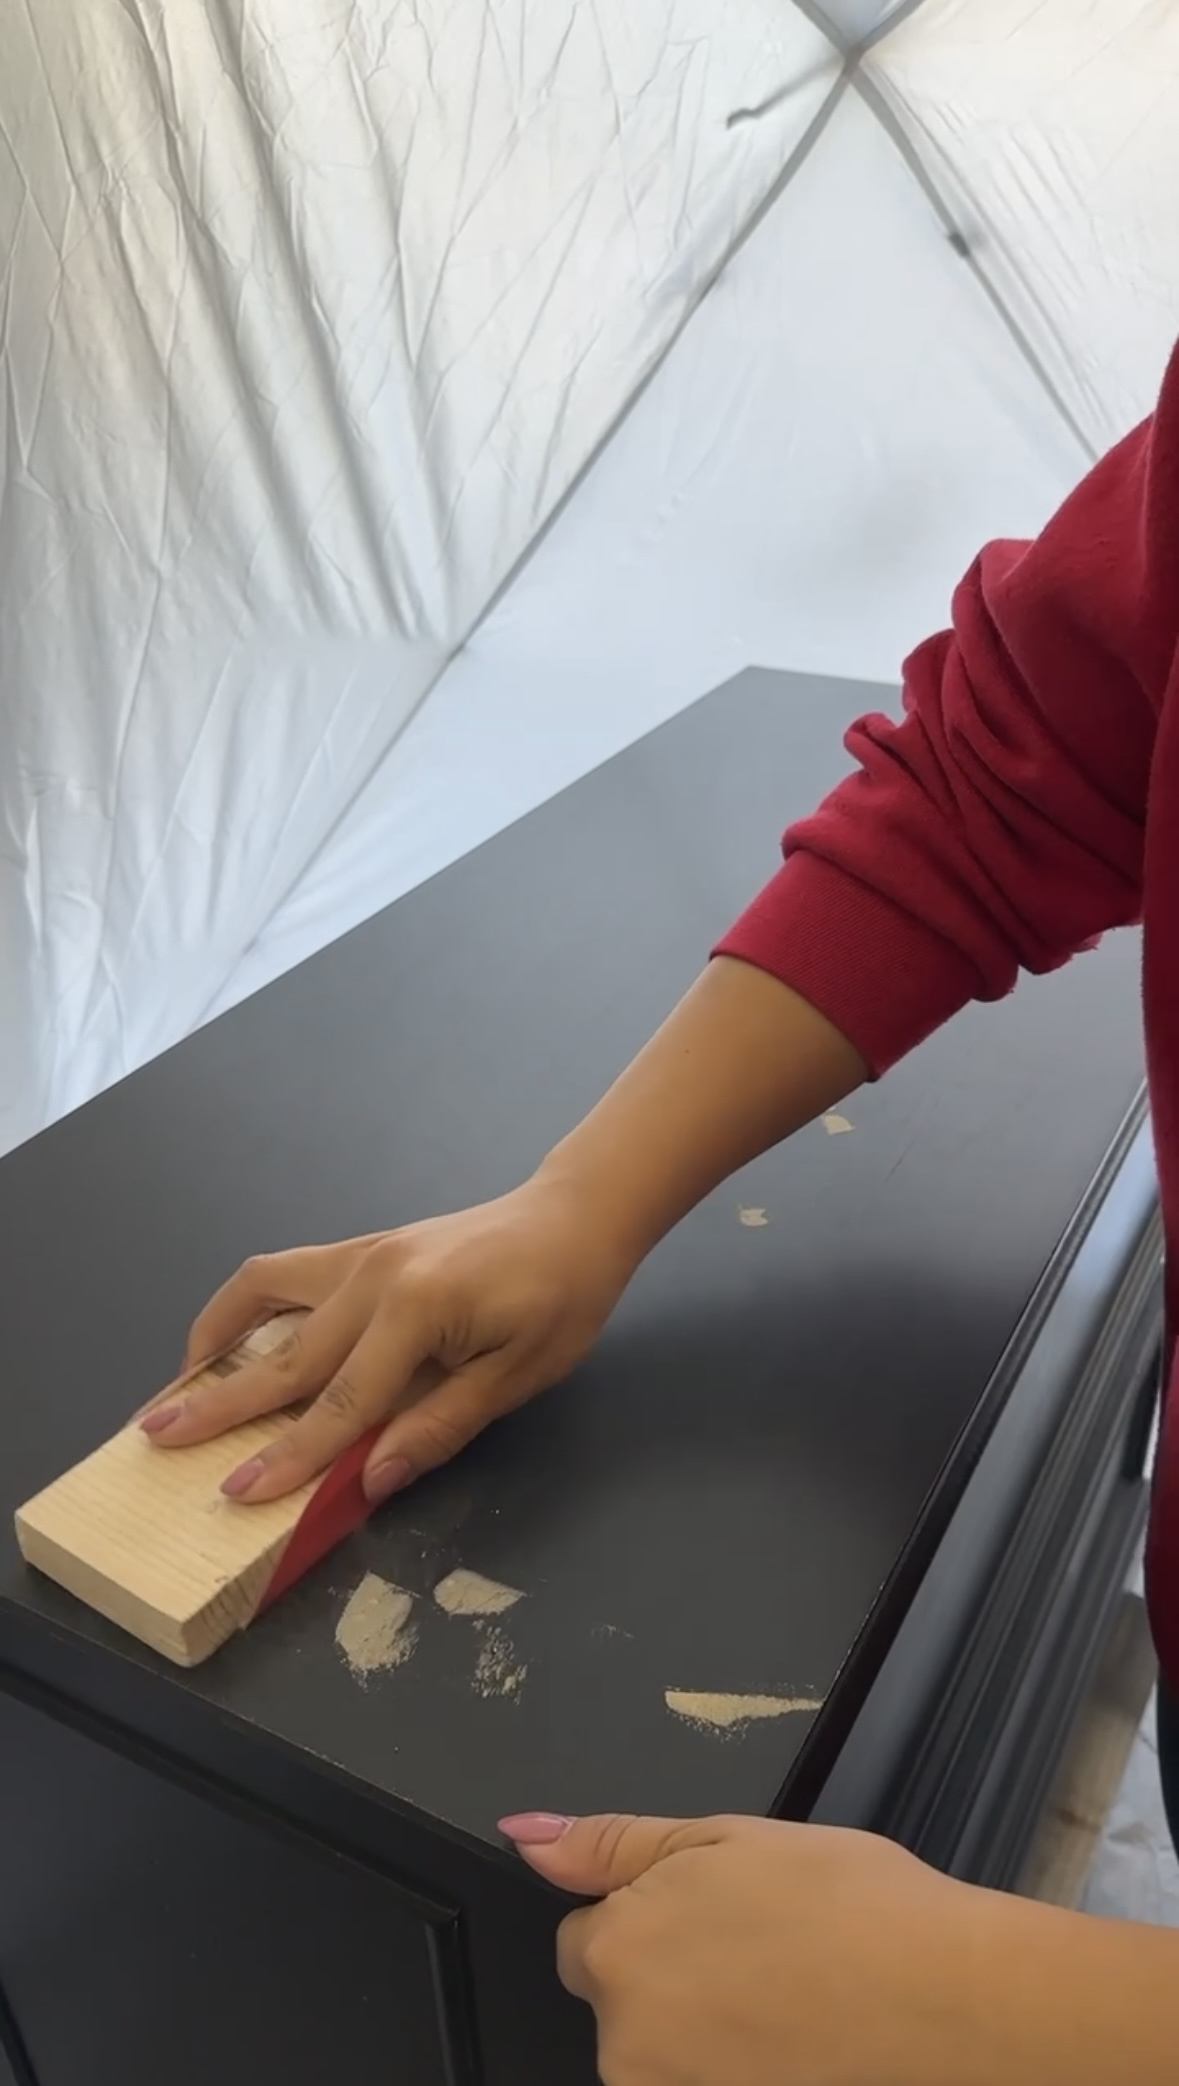
For the color, I loaded up my sprayer with a mix of paint and poly (yep, paint + sealer in one). My Finish Max sprayer laid down the smoothest sheen. Pro tip: always spot fill imperfections and lightly sand between coats if you want that factory-finish look.
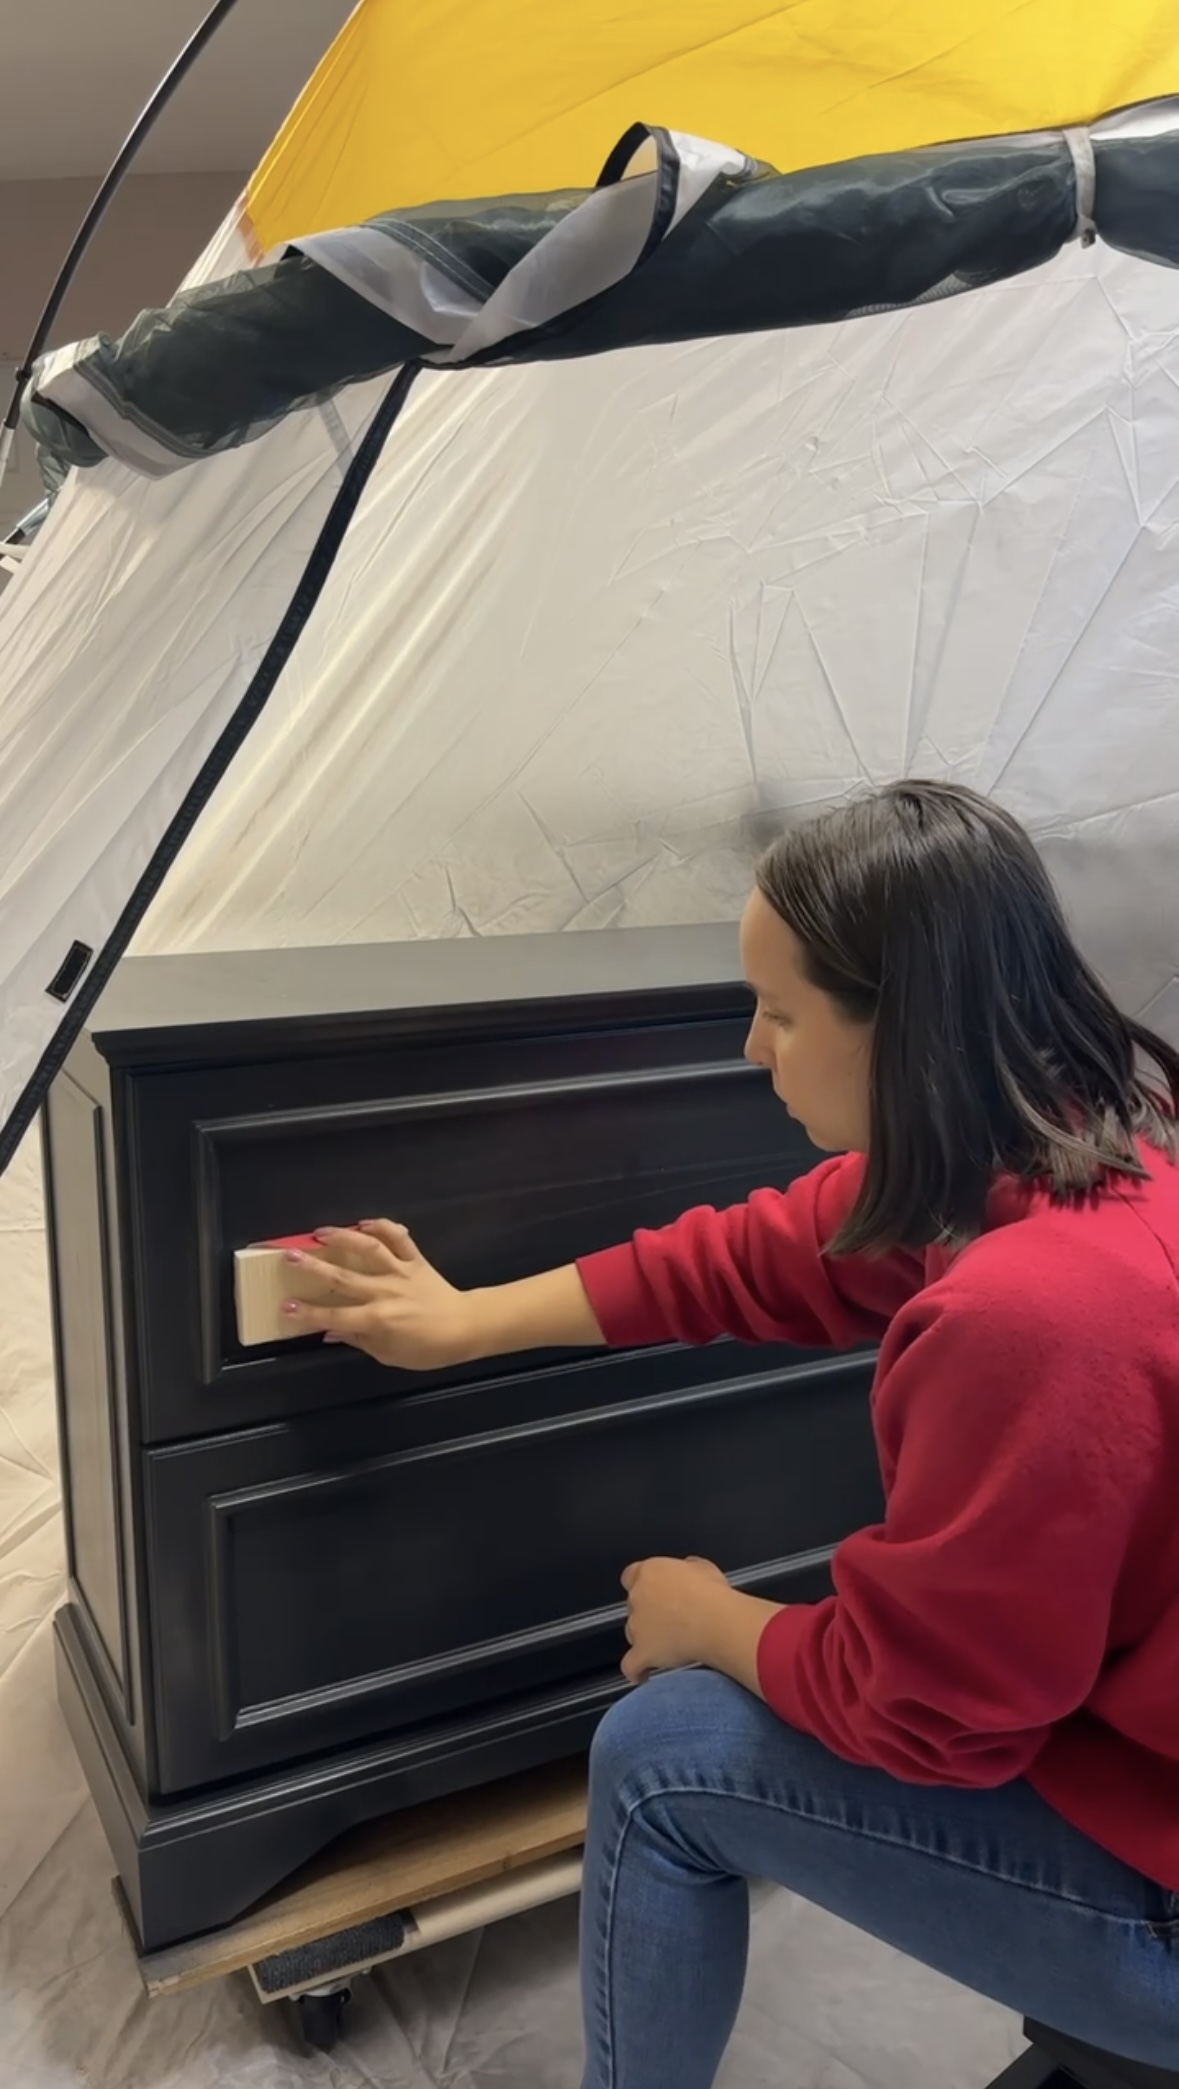
Step 6: Seal
Since I mixed poly right into the paint, these nightstands came out sealed, protected, and with the most gorgeous finish. Finally, I drilled new hardware holes and added these beautiful simple brass knobs that really tie everything together.
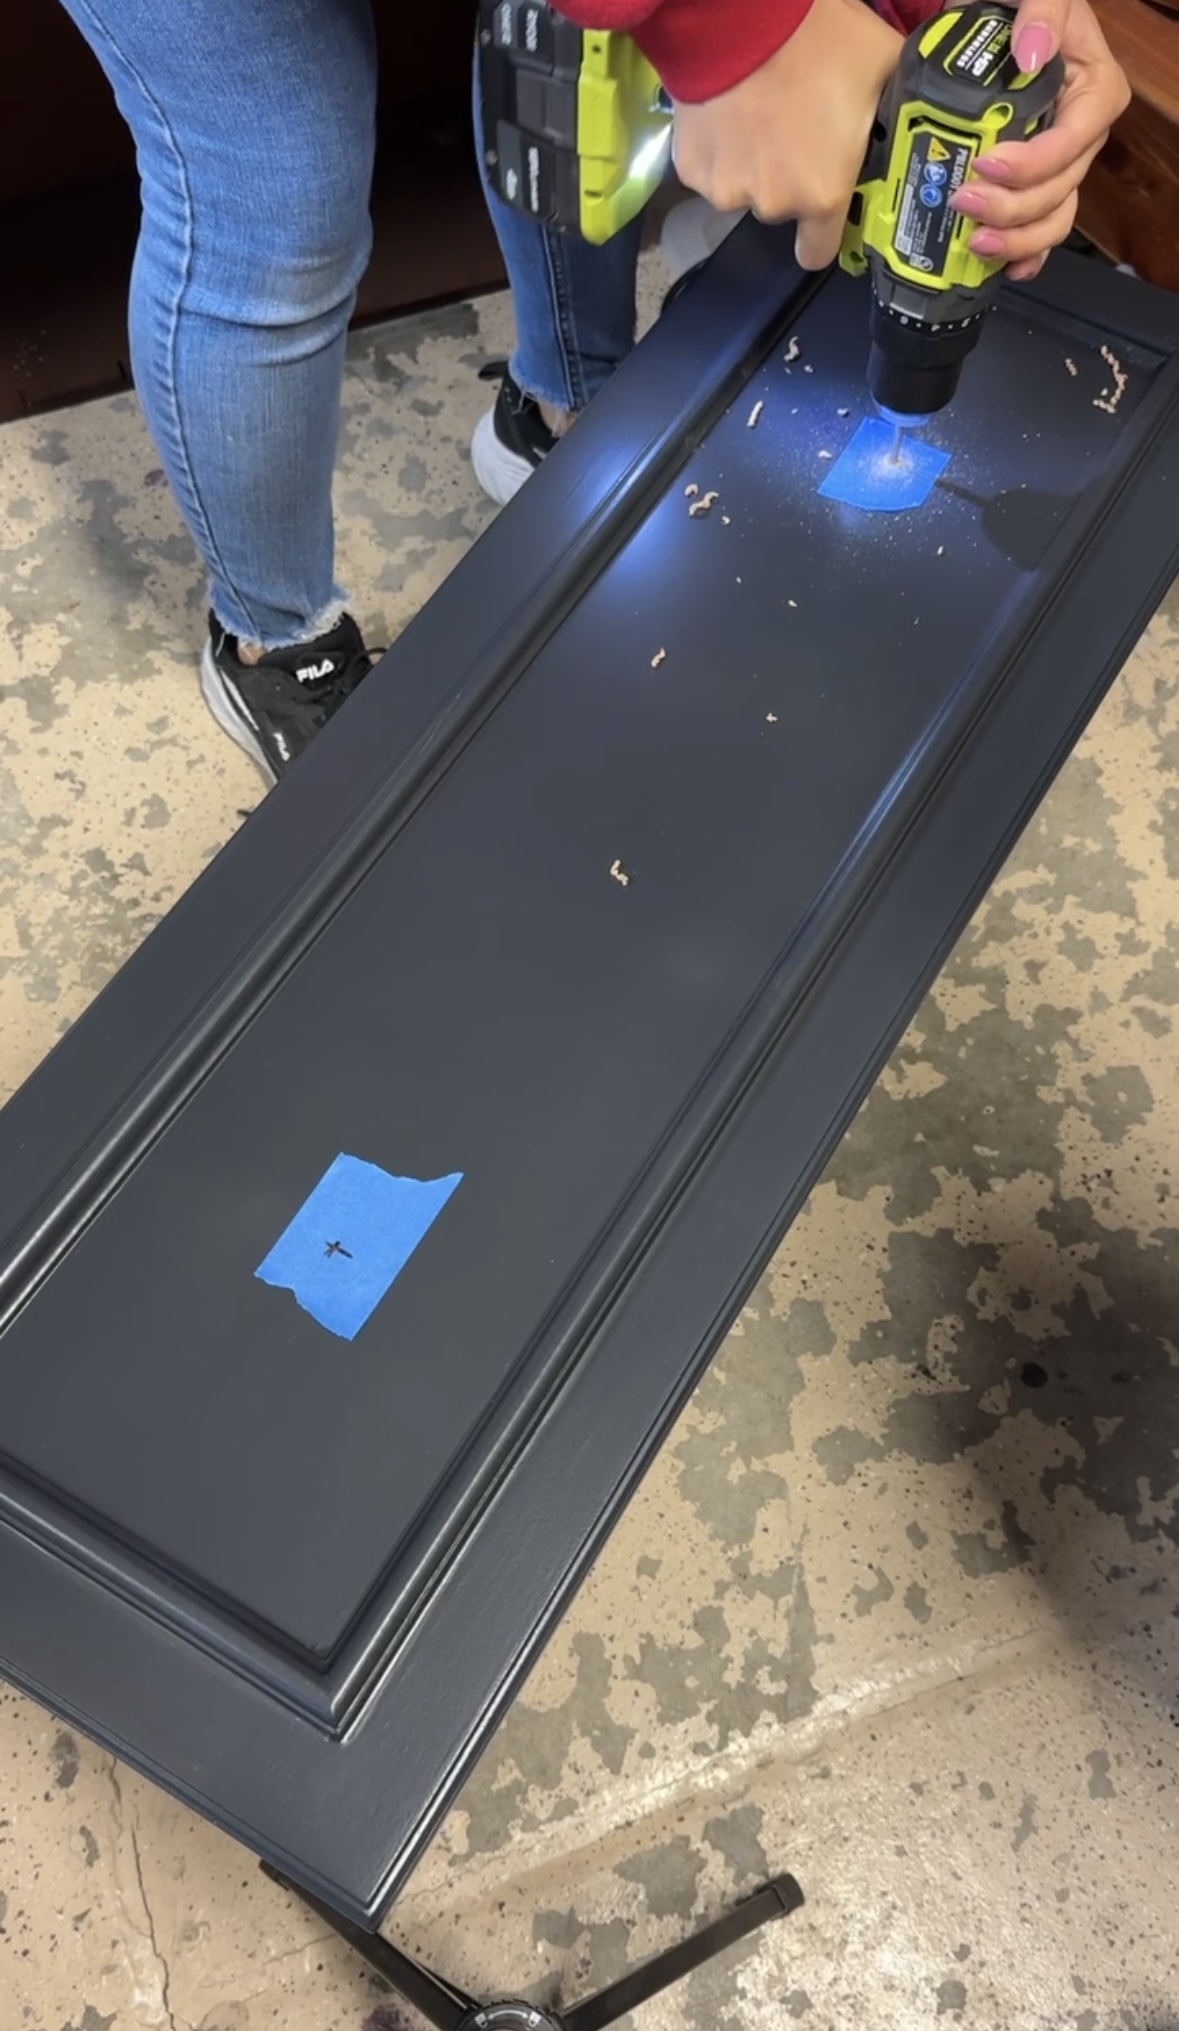
💡 Pro tip: Using a hardware jig makes it super easy to get perfect, consistent hardware measurements every time - no guesswork required.
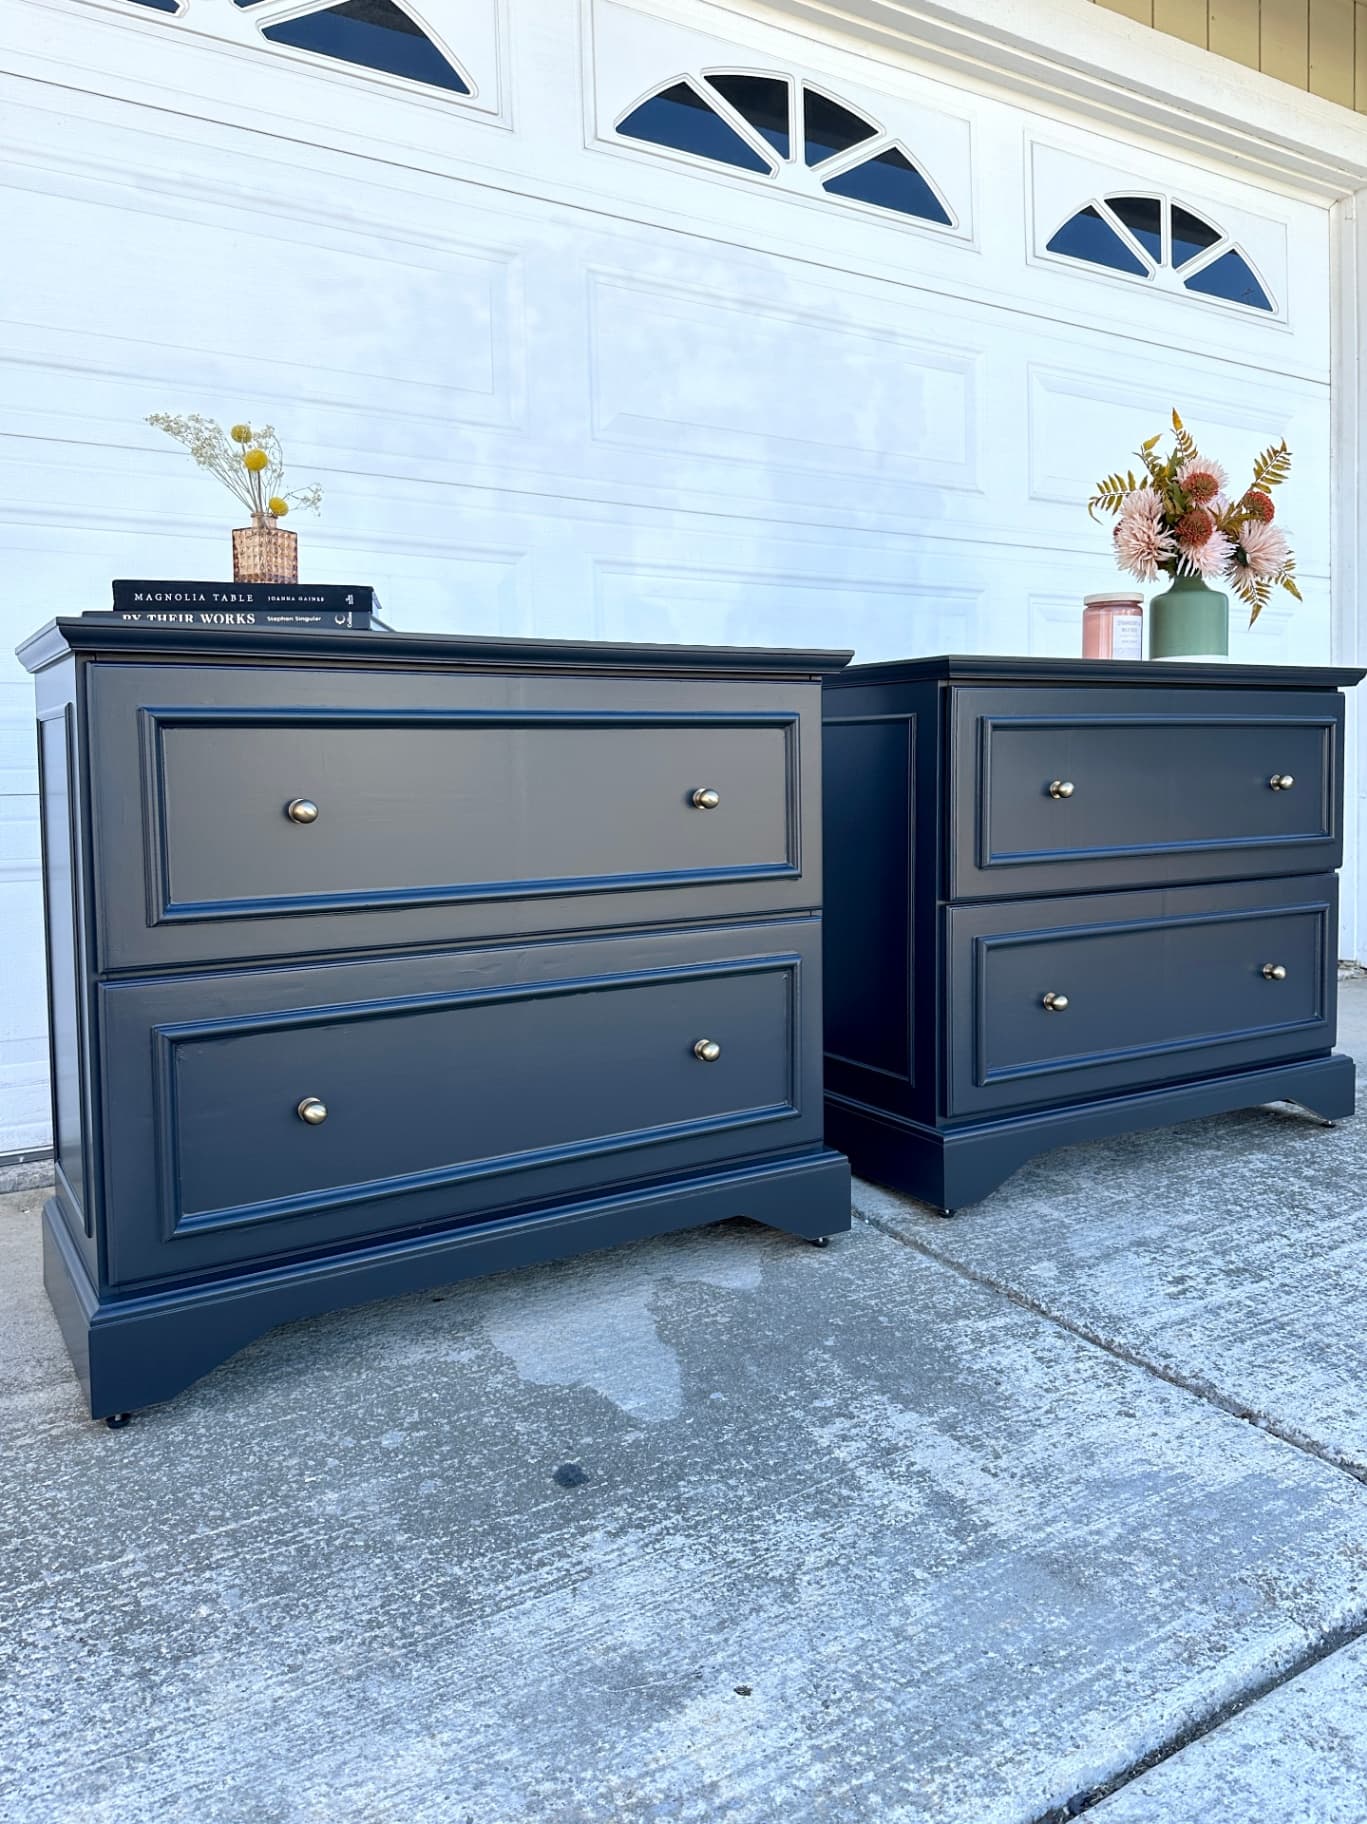
Before and After Results ✨
From nail-covered and non-functional to classic and modern, these nightstands are now versatile pieces that could fit into almost any bedroom style. The clean lines, fresh paint, and brass accents really make them pop.
Here’s a reminder of the before—and now the after: a total transformation.

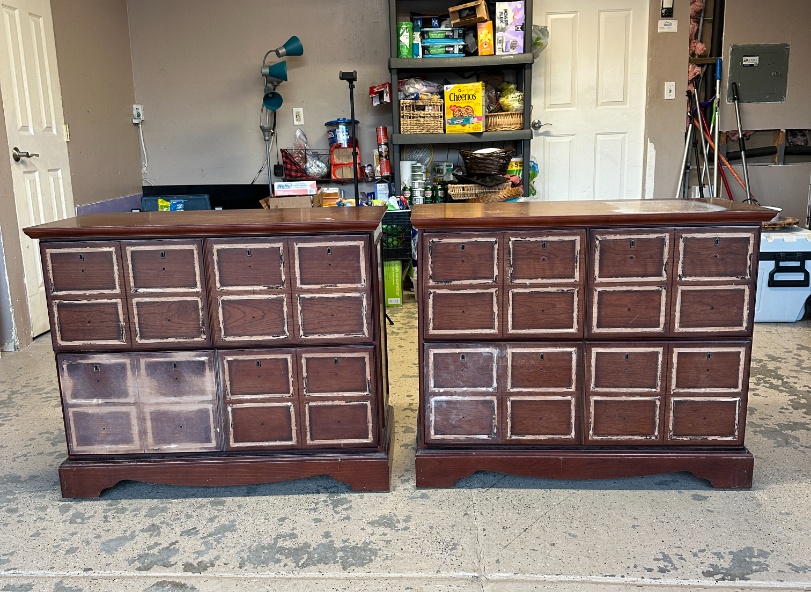
📸 Nothing beats a good side-by-side. The before vs. after photos really show just how dramatic this nightstand makeover turned out.
Looking for more furniture flip ideas? Check out my painted nightstand makeover for a clean, classic way to update dated wood furniture.
And don’t forget to 📌 pin this project to save it for later!