DIY Outdoor Patio Furniture (Chairs + Couch) for Under $150 in Lumber
Build your own outdoor patio furniture with this easy DIY guide! Learn how to make chairs and a couch for under $150 in lumber using simple tools and beginner-friendly steps.
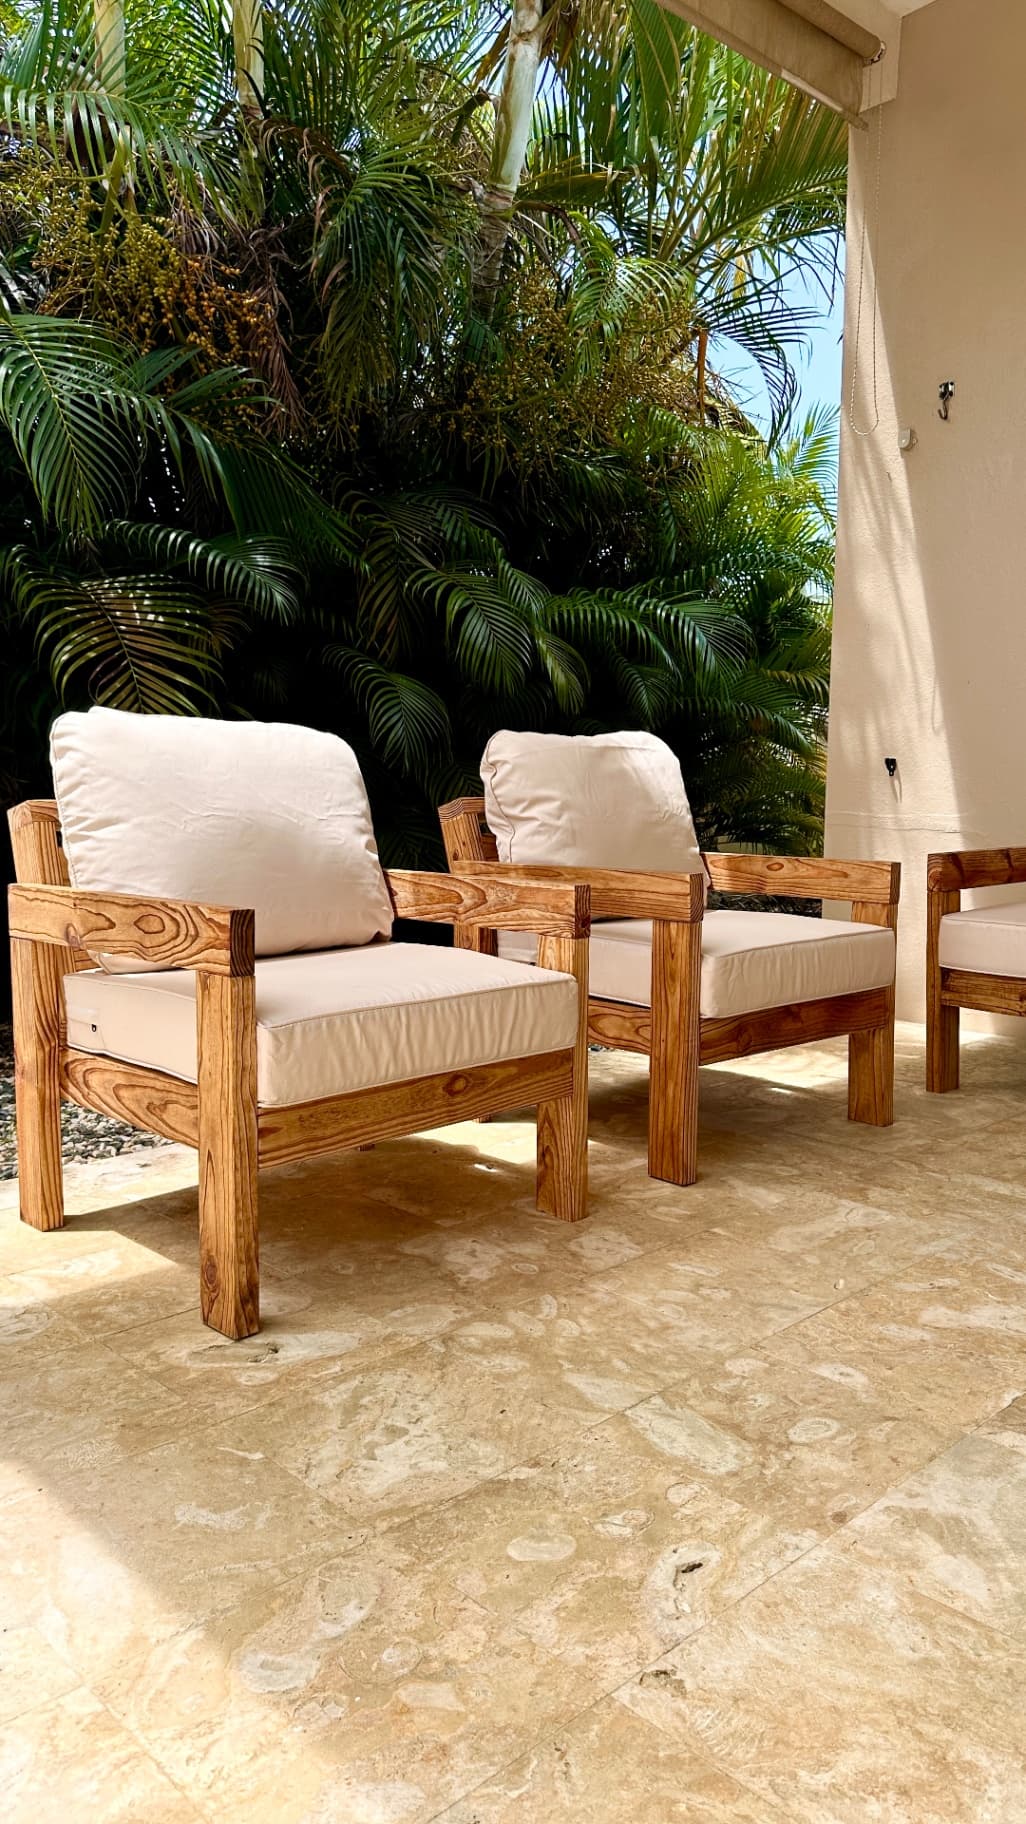
DIY Outdoor Patio Furniture (Chairs + Couch) for Under $150 in Lumber
If you’ve been looking for affordable DIY outdoor furniture, this build is one of my favorite projects I’ve ever done. I made an entire patio chair and couch set using simple construction lumber - each chair cost around $30 and the four-seater couch was under $90!
In this blog, I’ll walk you through exactly how to build your own outdoor patio furniture, including the cut list breakdown, assembly steps, and finishing process so you can recreate this setup for your own space.
👉 Want the exact plans? I’ve created FREE step-by-step plans that you can follow along with here with the full cut list and lumber details.
Materials List
Sandpaper (up to 220 grit)
Brad nails (optional)
Outdoor cushions (24x24” seat, 24x19” back)
Tools List
Clamps (regular and corner clamps recommended)
Dowel jig (highly recommended for clean joints)
Brad nailer (optional)
Foam brushes or rags (for applying finish)
If you’re new to DIY, don’t worry - this build uses very standard tools, and I’ve linked beginner-friendly options for everything above.
Pocket Hole Screw Size Guide
When using pocket holes, choosing the right screw size is key - using the wrong one can weaken joints or split your wood.
I’ve included a helpful chart below that shows exactly which pocket hole screw length to use based on your material thickness.
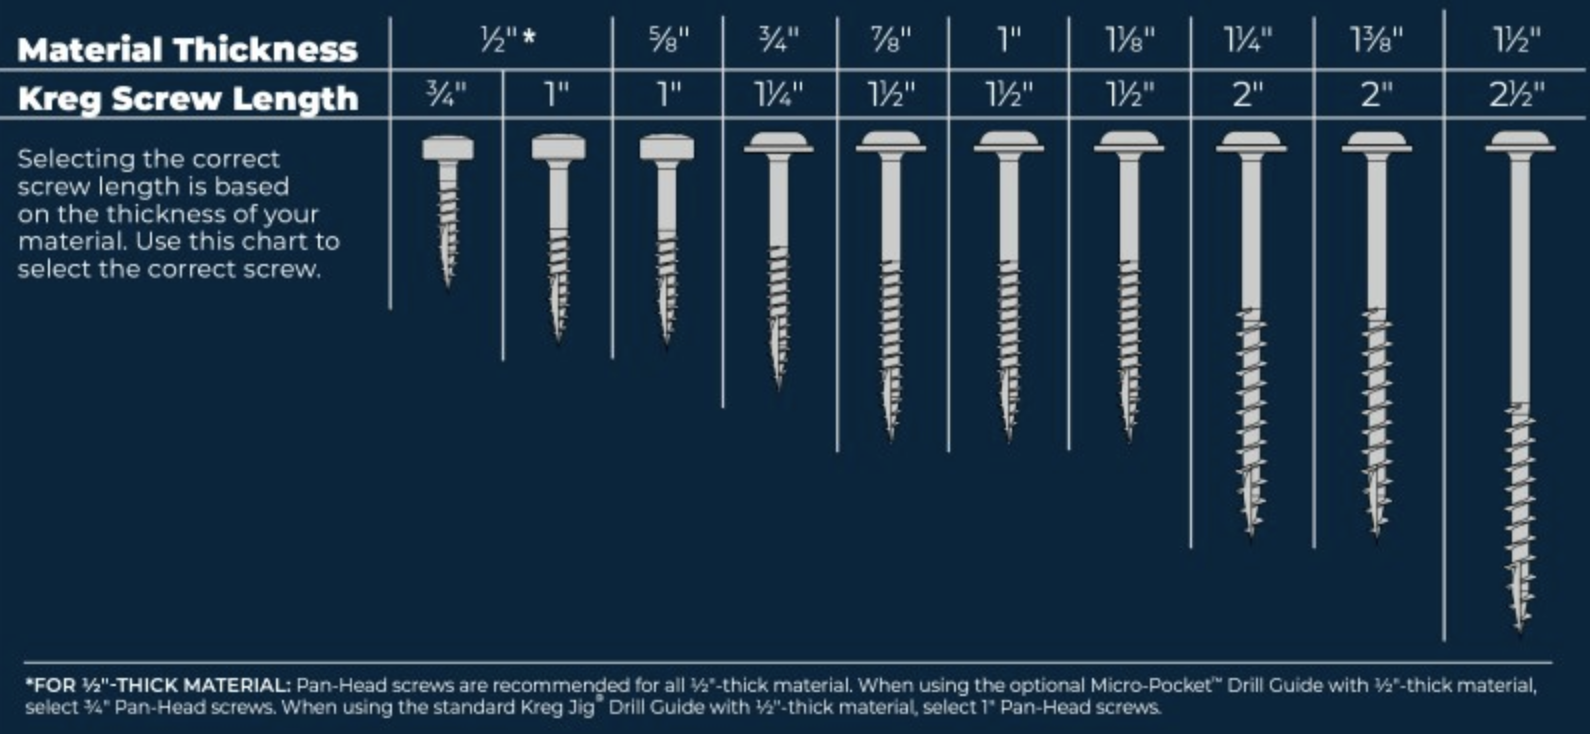
For this build, I used:
2.5” pocket hole screws for 2x4s
1.25” pocket hole screws for 1x material
This is a great reference to save for future projects too.
Prefer Video?
I filmed the full build step-by-step if you want to follow along visually—especially helpful for things like assembly and angles. You can watch it here:
👉 Watch the full build on YouTube
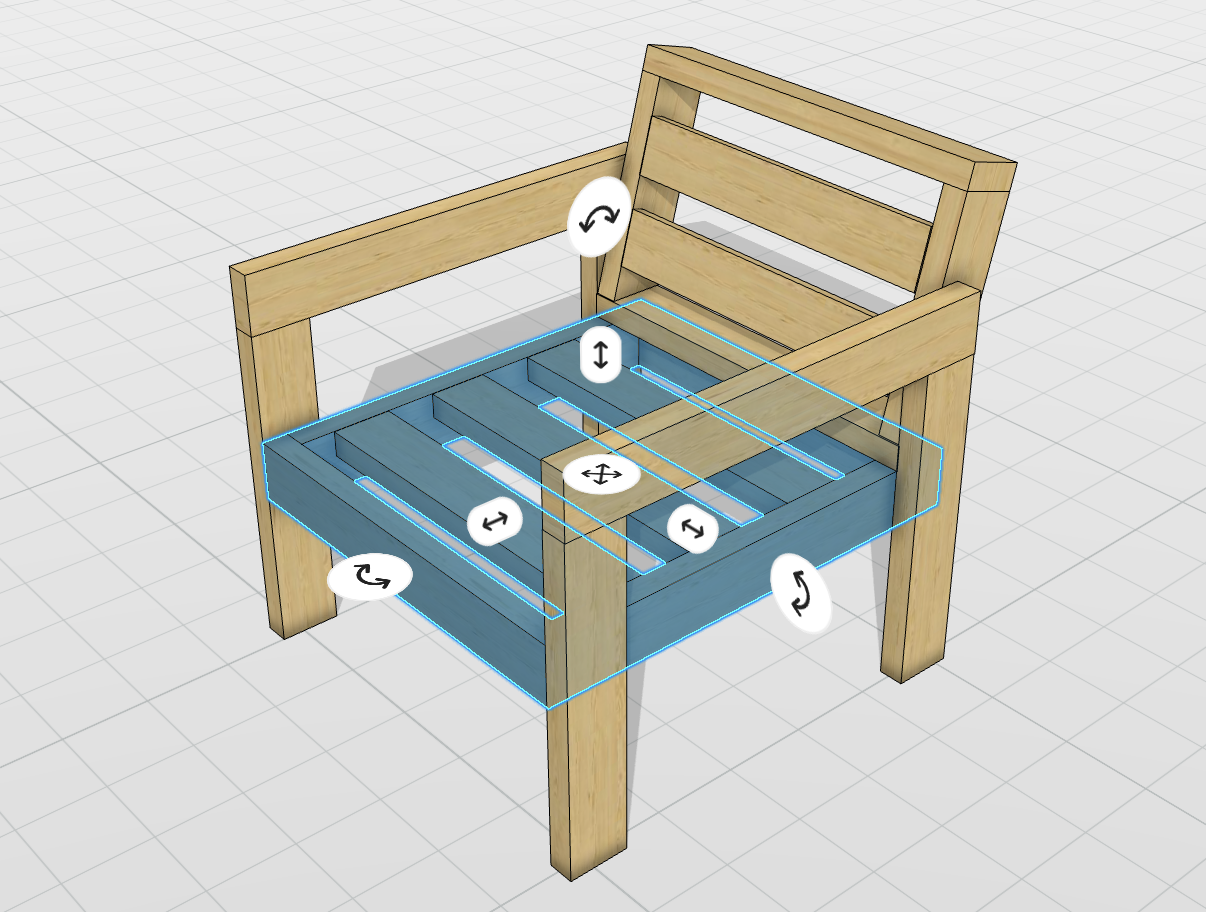
How This DIY Patio Furniture Is Designed
Before you start building, the most important step is choosing your cushions first - this will determine the overall size and proportions of your furniture. I based this entire DIY patio furniture design around relatively standard cushion sizes, which made sourcing them a lot easier and kept everything looking proportional and comfortable.
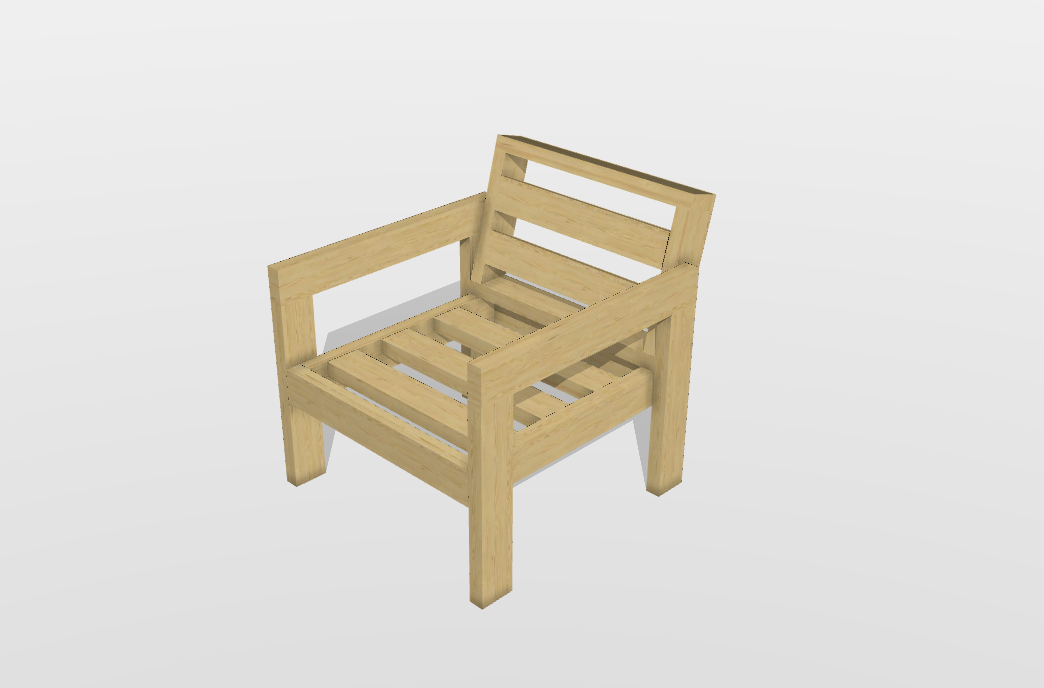
Each piece in this set (both the chairs and the couch) is built the same way using three main components:
The seat frame
The back frame (angled slightly for comfort)
The arms/legs (a single horseshoe-shaped piece per side)
This modular approach makes the build really beginner-friendly and easy to customize, whether you want to make a single chair, a loveseat, or a full outdoor couch.
For reference, here are the cushion sizes I used for this build:
Seat cushions: 24” x 24”
Back cushions: 24” x 19”
These are fairly common outdoor cushion sizes, so you should be able to find similar options online without too much trouble. If you choose different dimensions, just adjust your cut list accordingly to match your cushions.
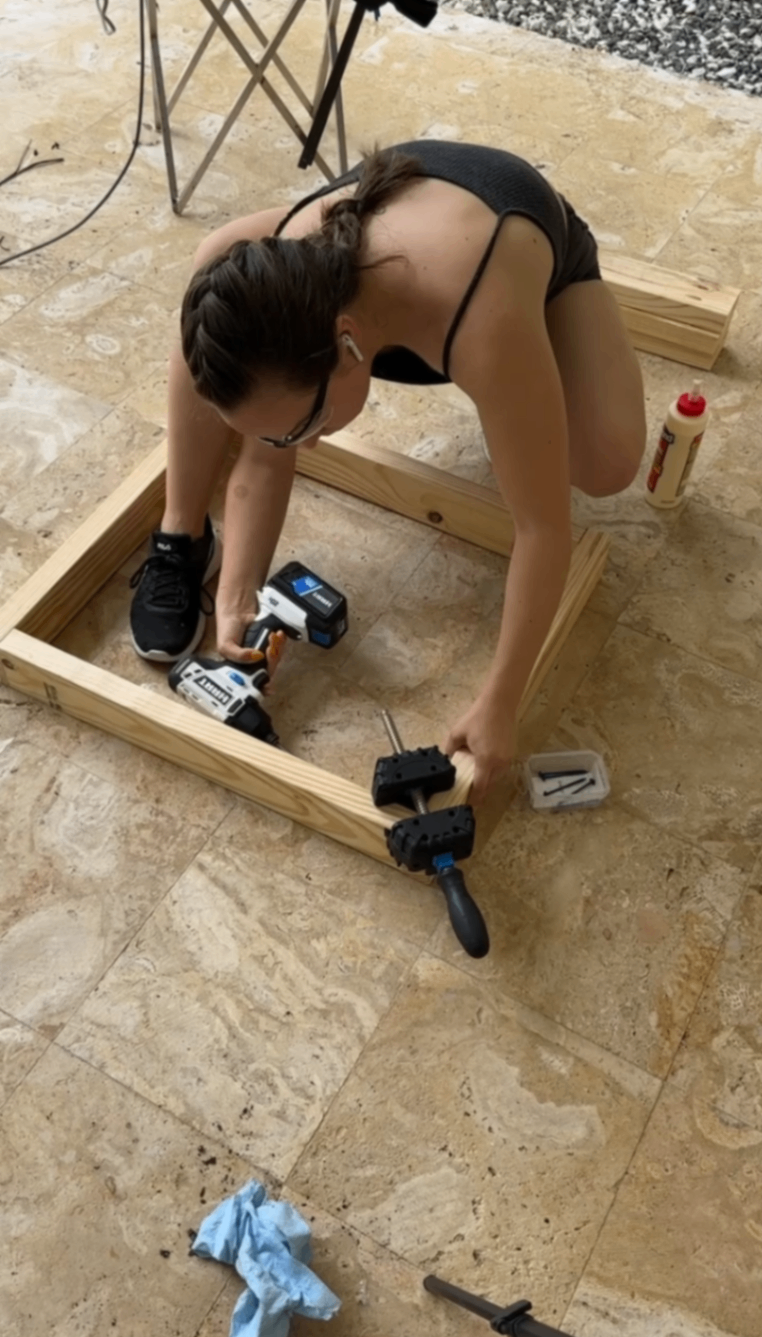
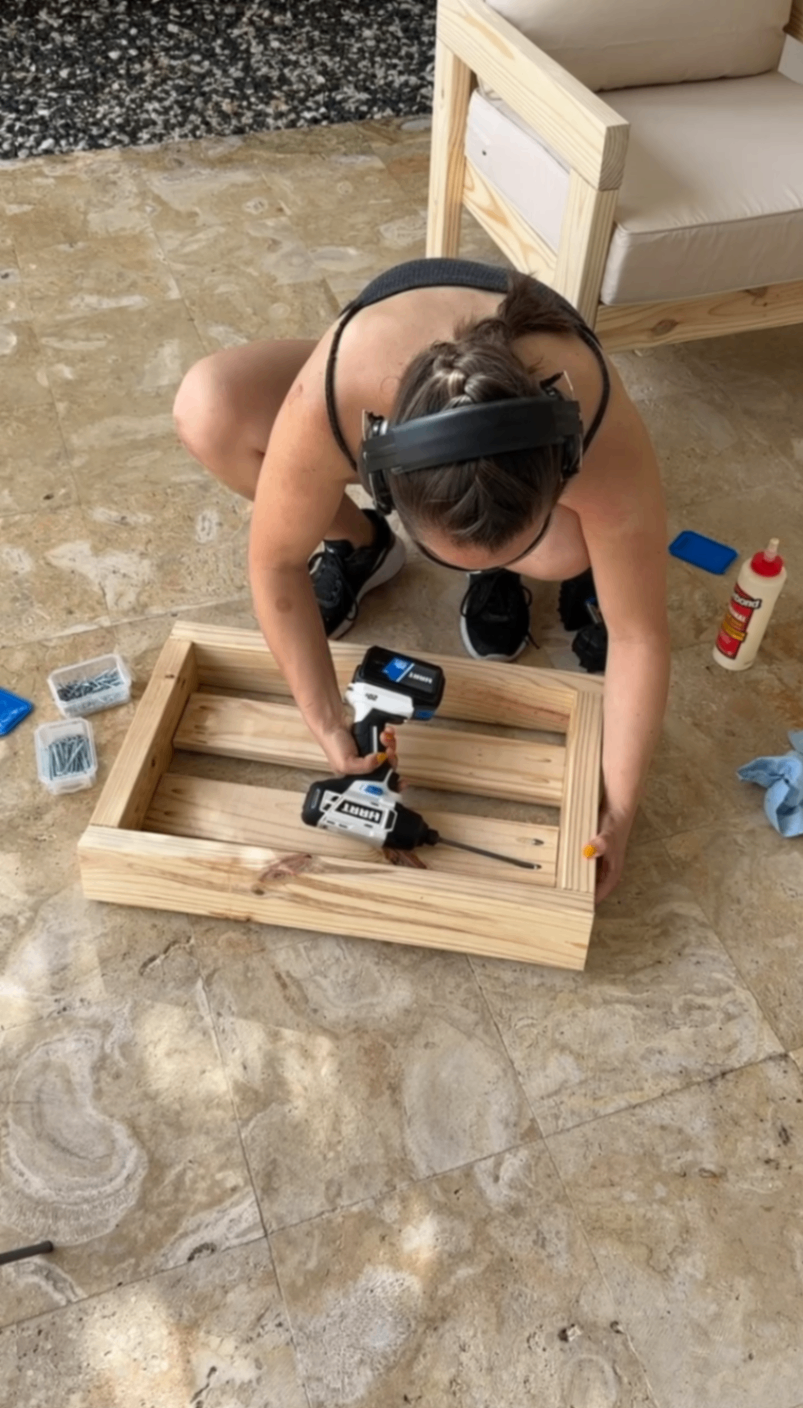
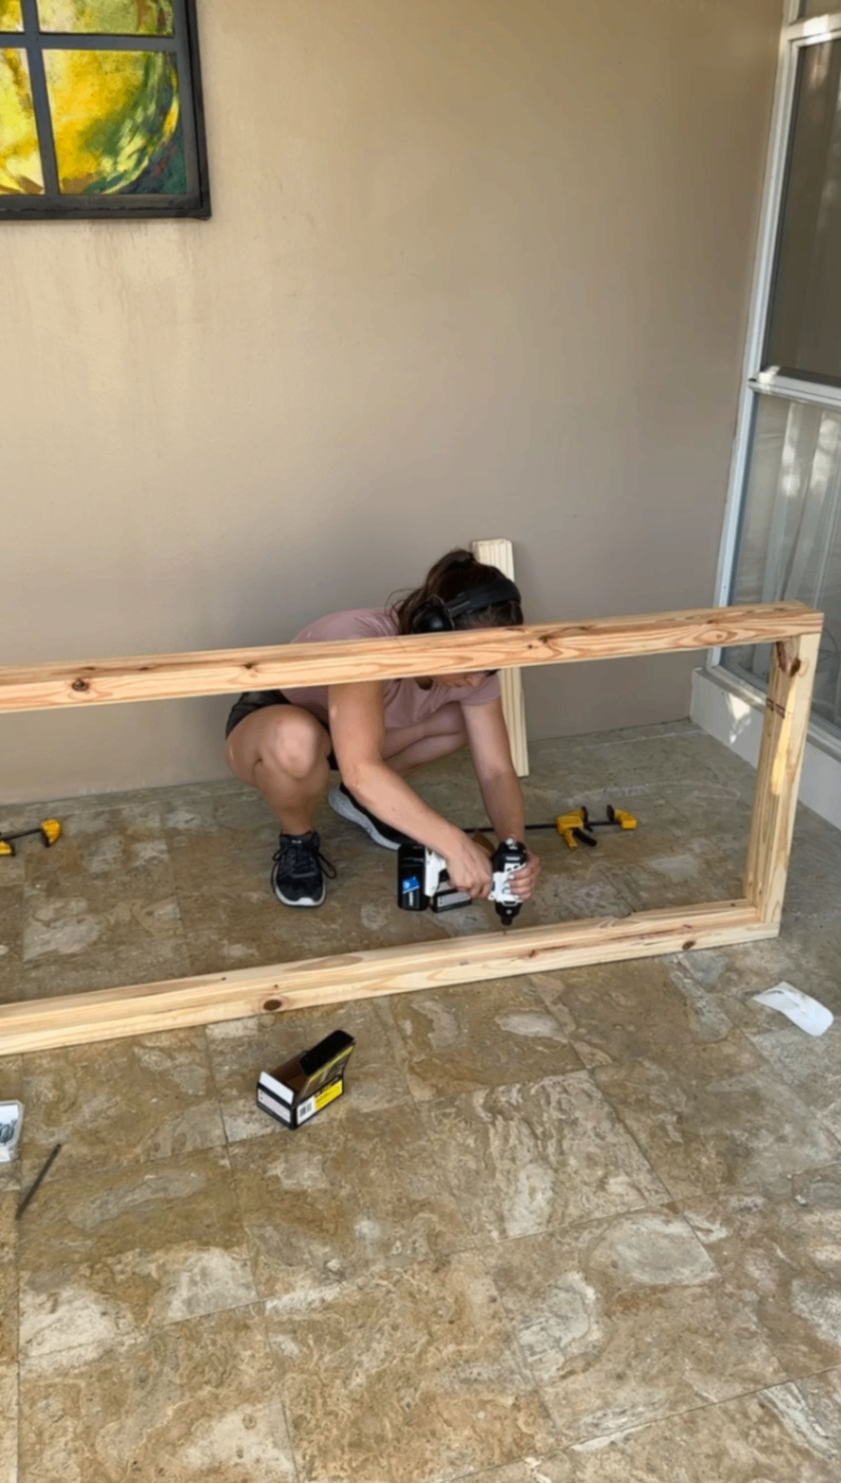
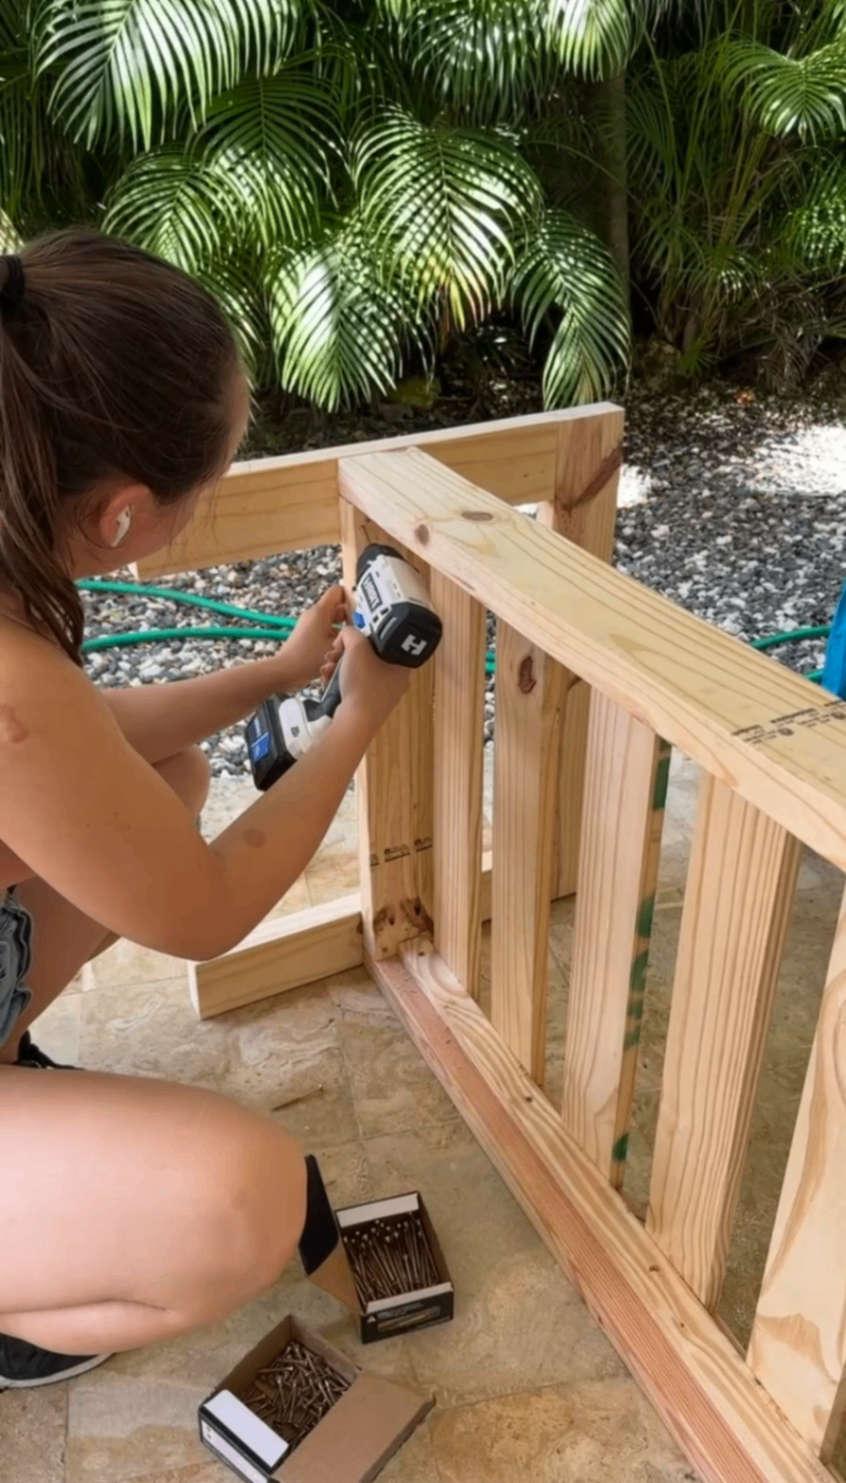
Step 1: Build the Seat Frame
The seat frame is the foundation of your DIY patio furniture, so this is where everything starts to come together. For this build, I used standard, affordable construction lumber (just basic 2x4s from the hardware store) - nothing fancy. Once it’s sanded and finished, it ends up looking way more elevated than you’d expect from such budget-friendly materials.
Start by assembling a simple rectangular frame using your 2x4s:
Drill pocket holes and attach everything using wood glue and 2.5” pocket hole screws
Use corner clamps to keep your corners square as you assemble
Double check your measurements here - this frame determines how your cushions will fit
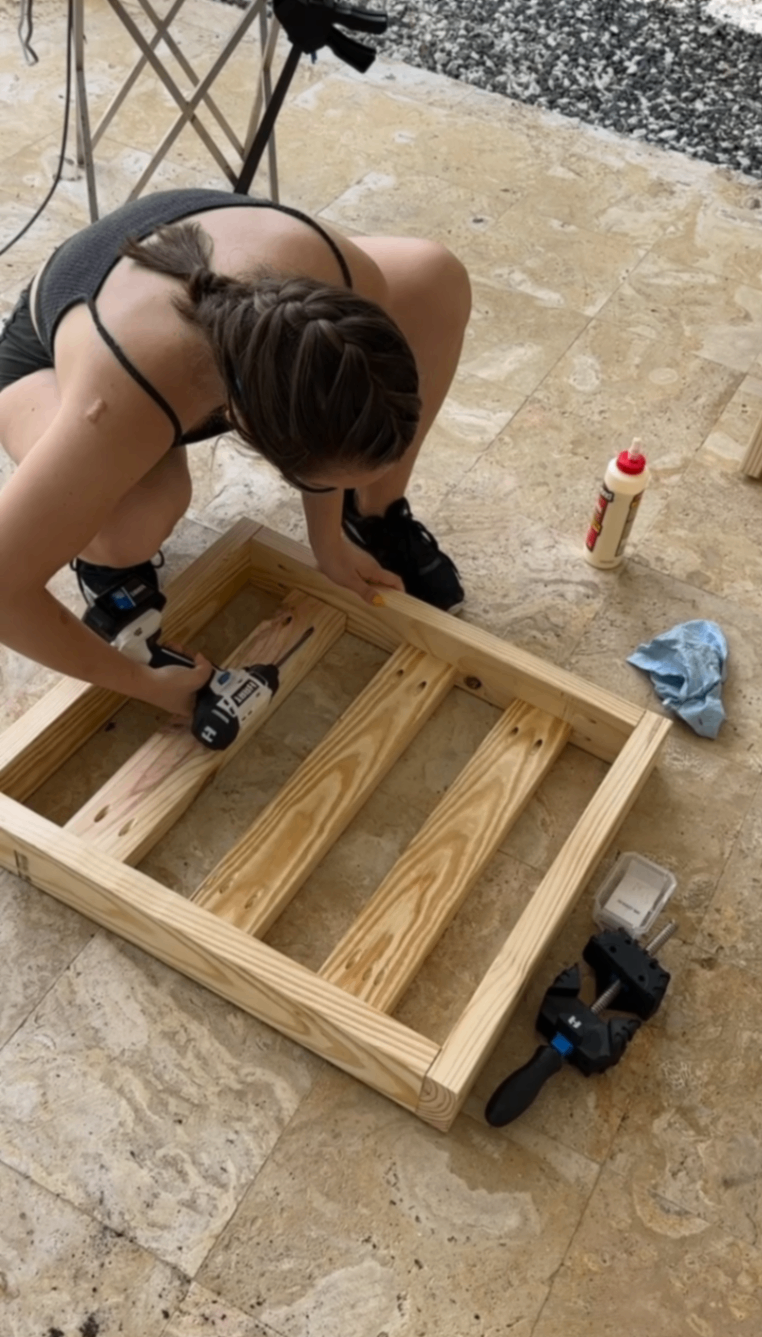
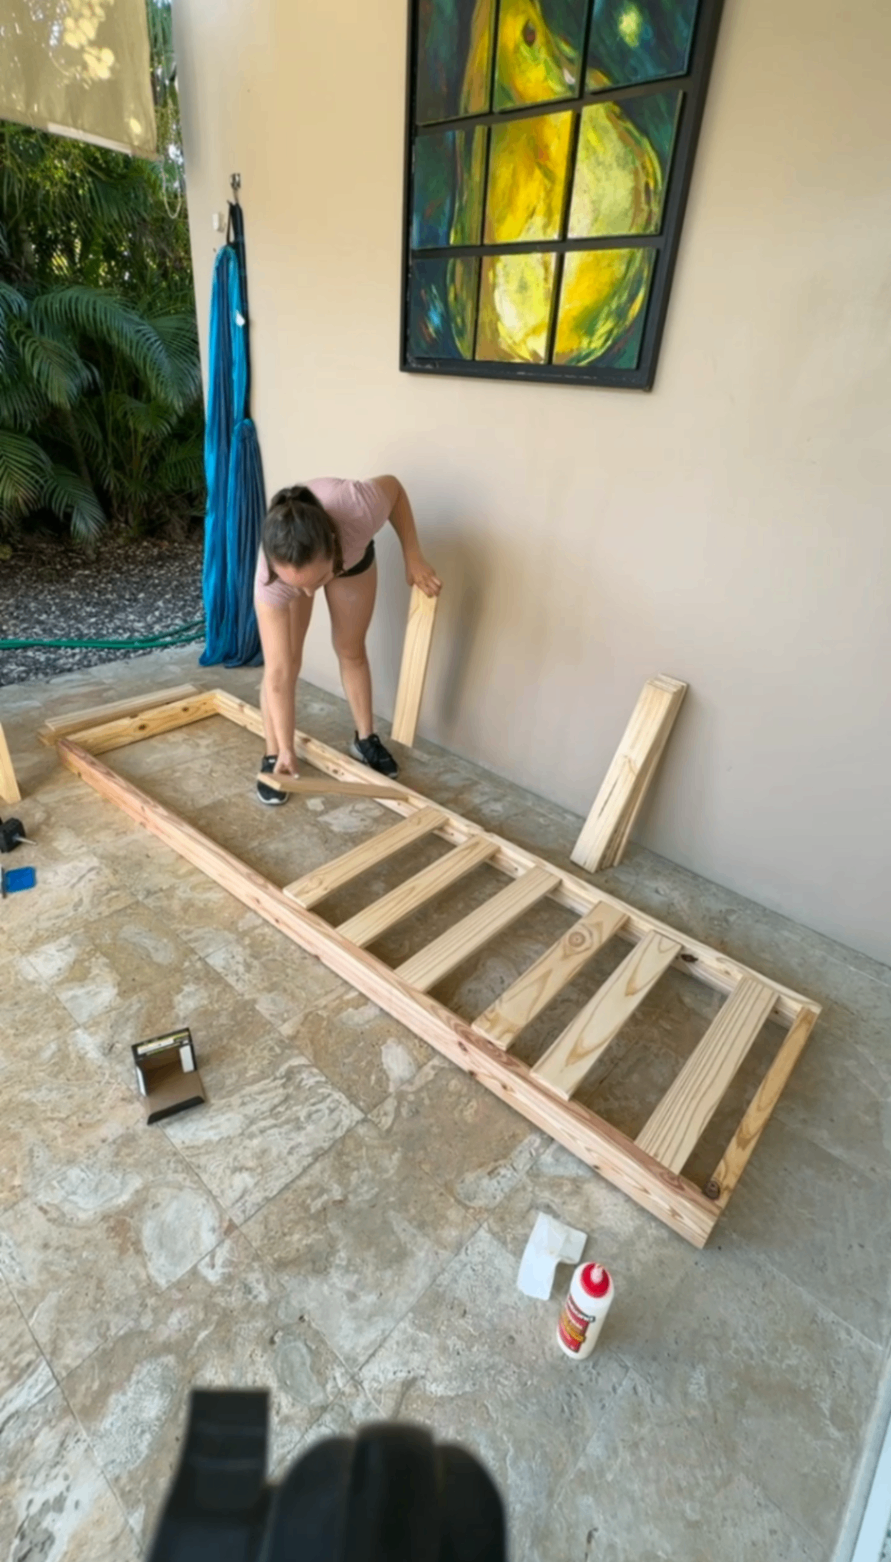
Once your outer frame is built, add your 2x4 slats across the inside to support the seat cushion.
You can find the full cut list and exact measurements in my free plans linked here.
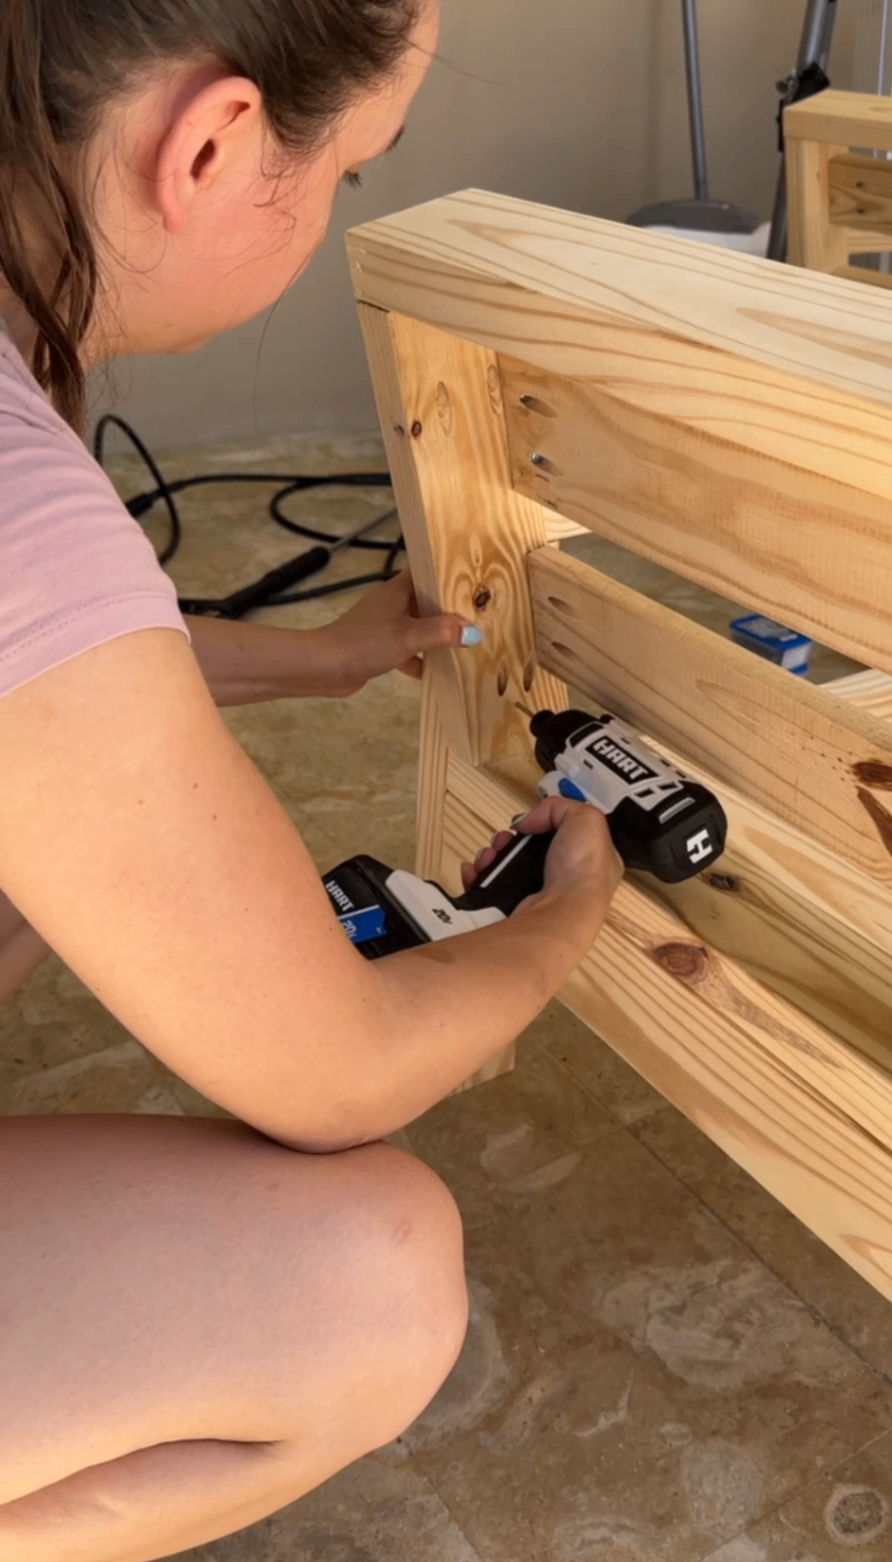
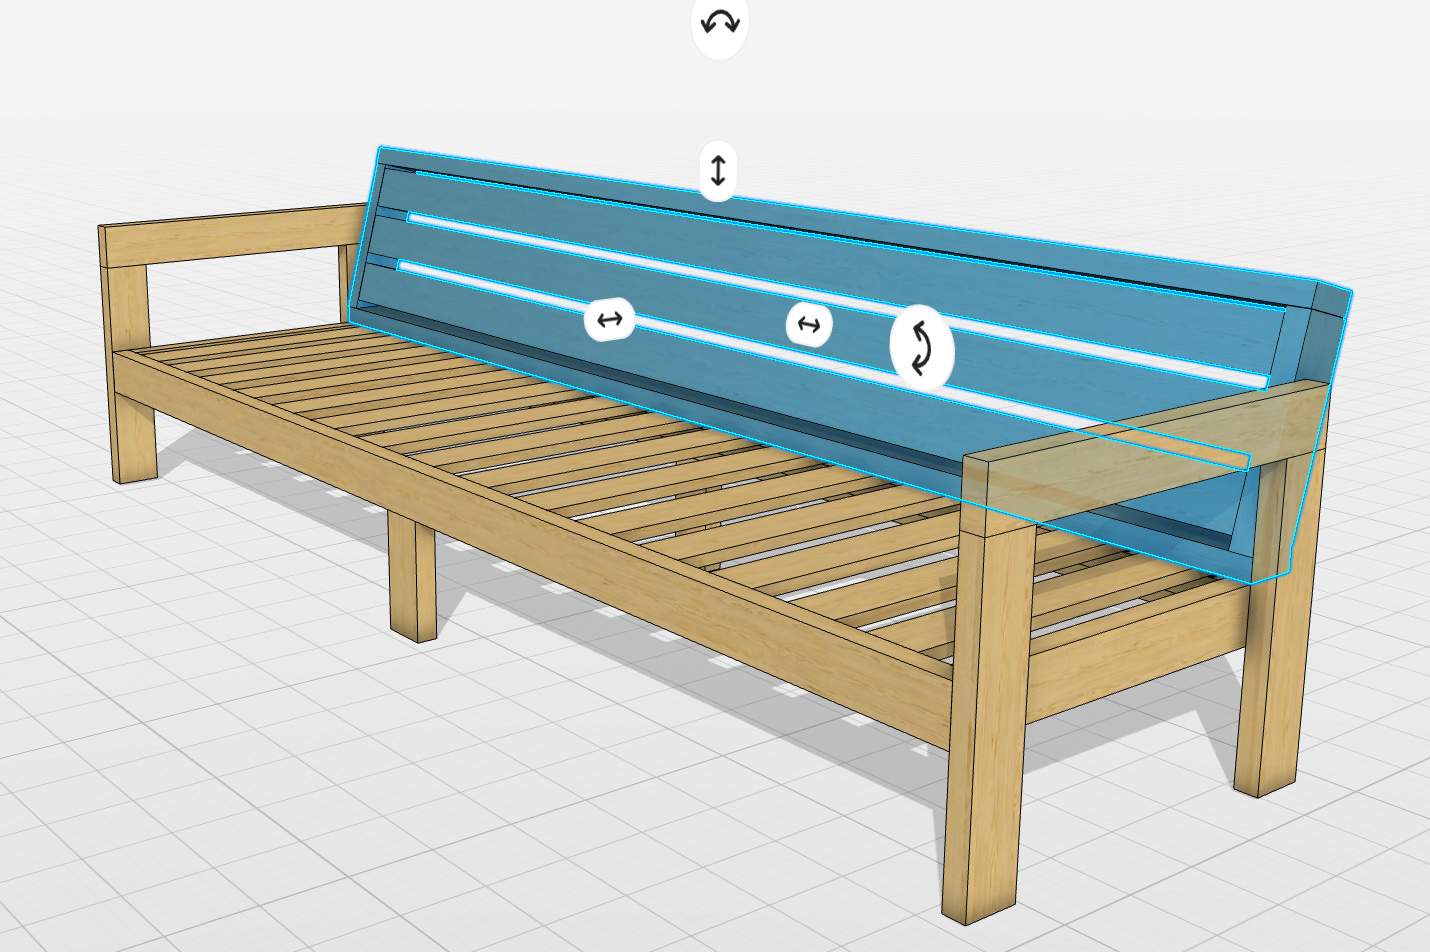
Step 2: Build the Angled Backrest
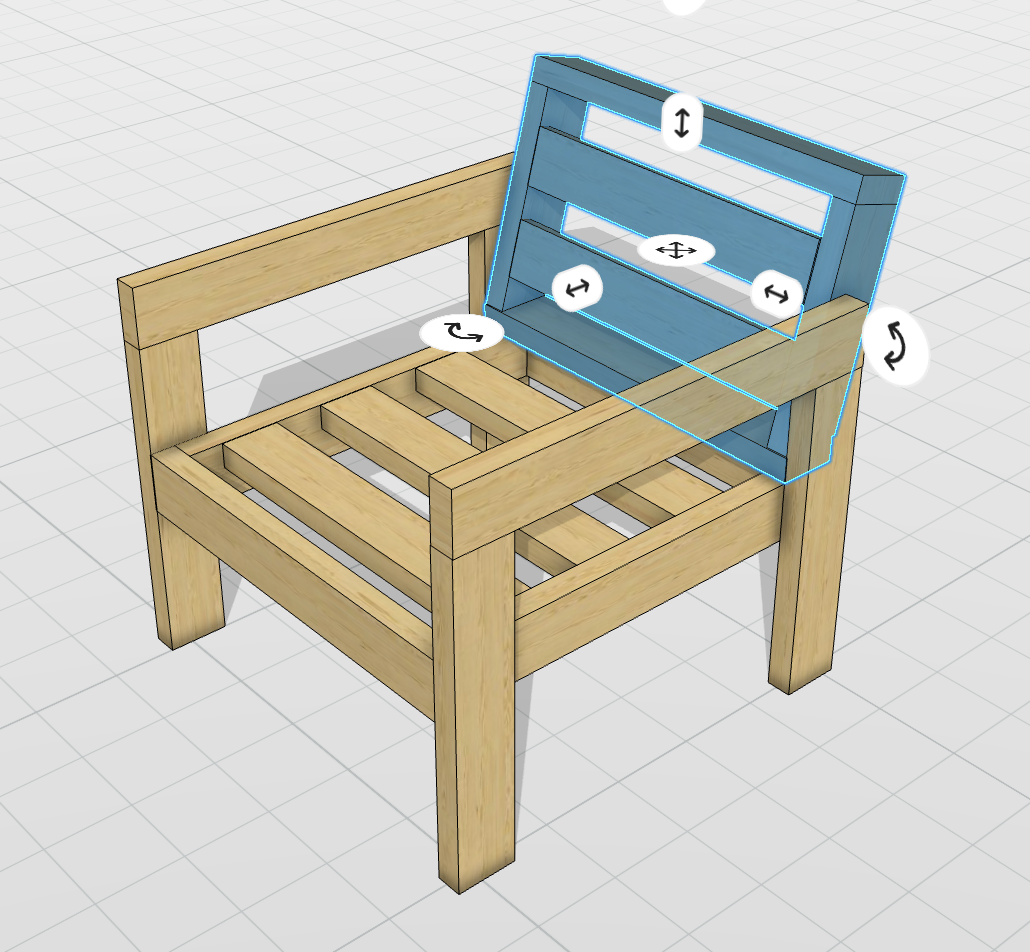
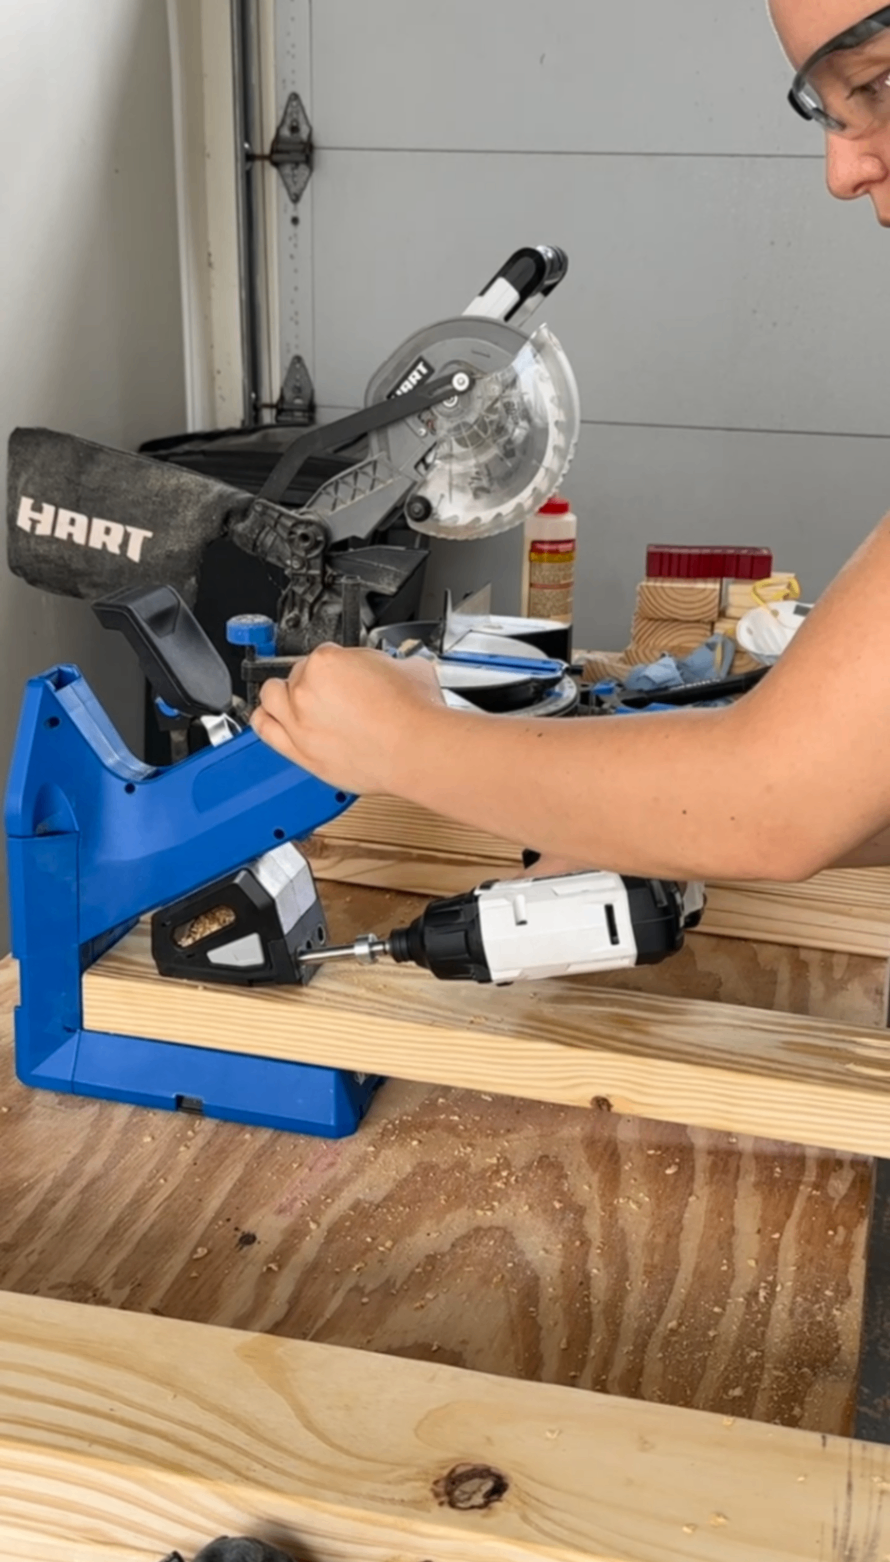
Next up is the backrest, and this is one of the details that really makes this DIY patio furniture set feel custom and comfortable. When I was designing this, I knew I didn’t want a straight 90° back, SO I built in a slight recline by cutting the side pieces with my miter saw at a 15° angle - and I'm SO glad I did. It makes a huge difference in how comfortable these chairs and the couch actually are.
To build the back:
Cut your side pieces with a 15° angle to create the recline
Assemble the outer frame using wood glue and pocket hole screws
Add your slats across the frame for support
For the chairs, I used 1x4s for the back slats since they don’t need to support as much weight as the seat. When attaching these, I used 1.25” pocket hole screws, which are the correct size for 1x material (see chart from above).

If you’re building the couch version, you can scale this up slightly and use 2x4s for the slats for extra support across the longer span - just switch back to 2.5” pocket hole screws for those thicker boards.
Overall, this step is very similar to building the seat frame, just with the added angle. Take your time lining everything up so the back sits evenly - it’ll pay off when everything comes together in the final assembly.
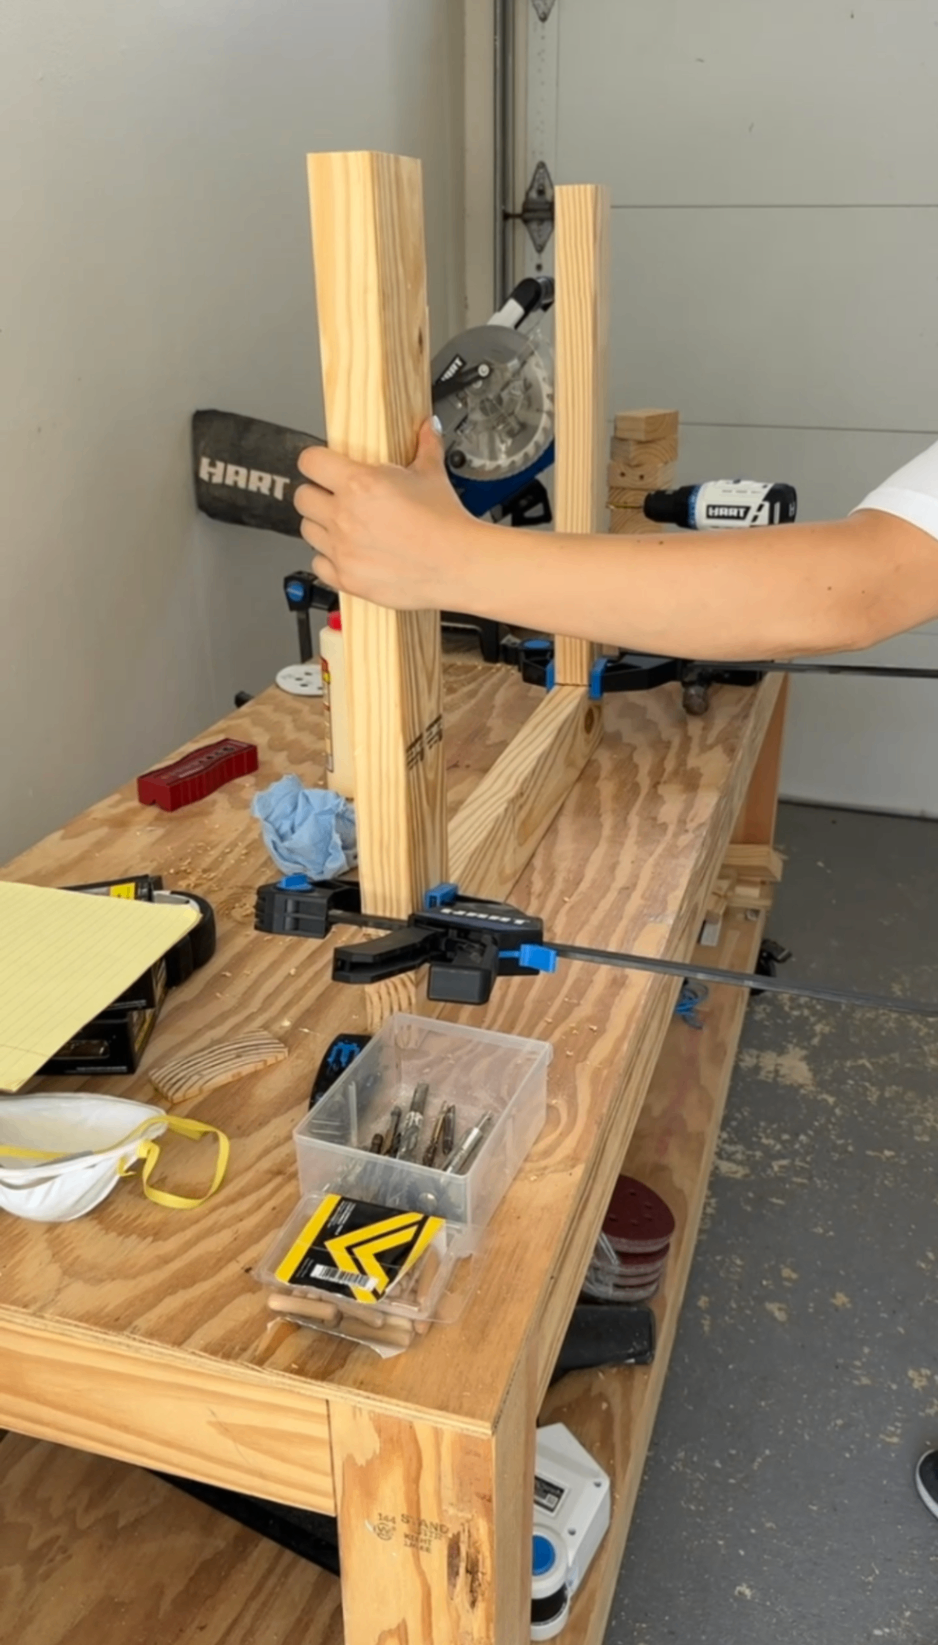
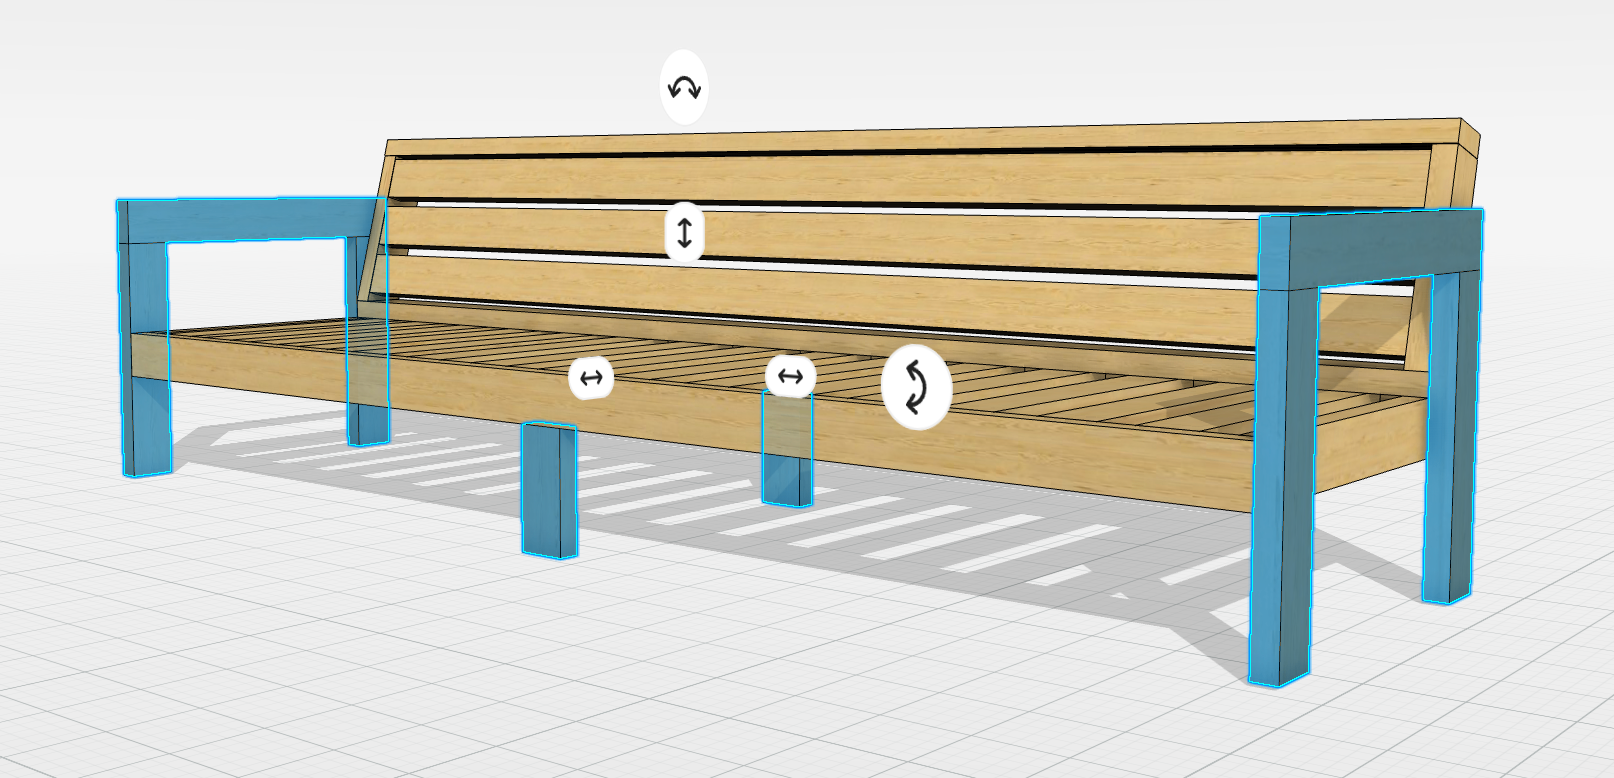
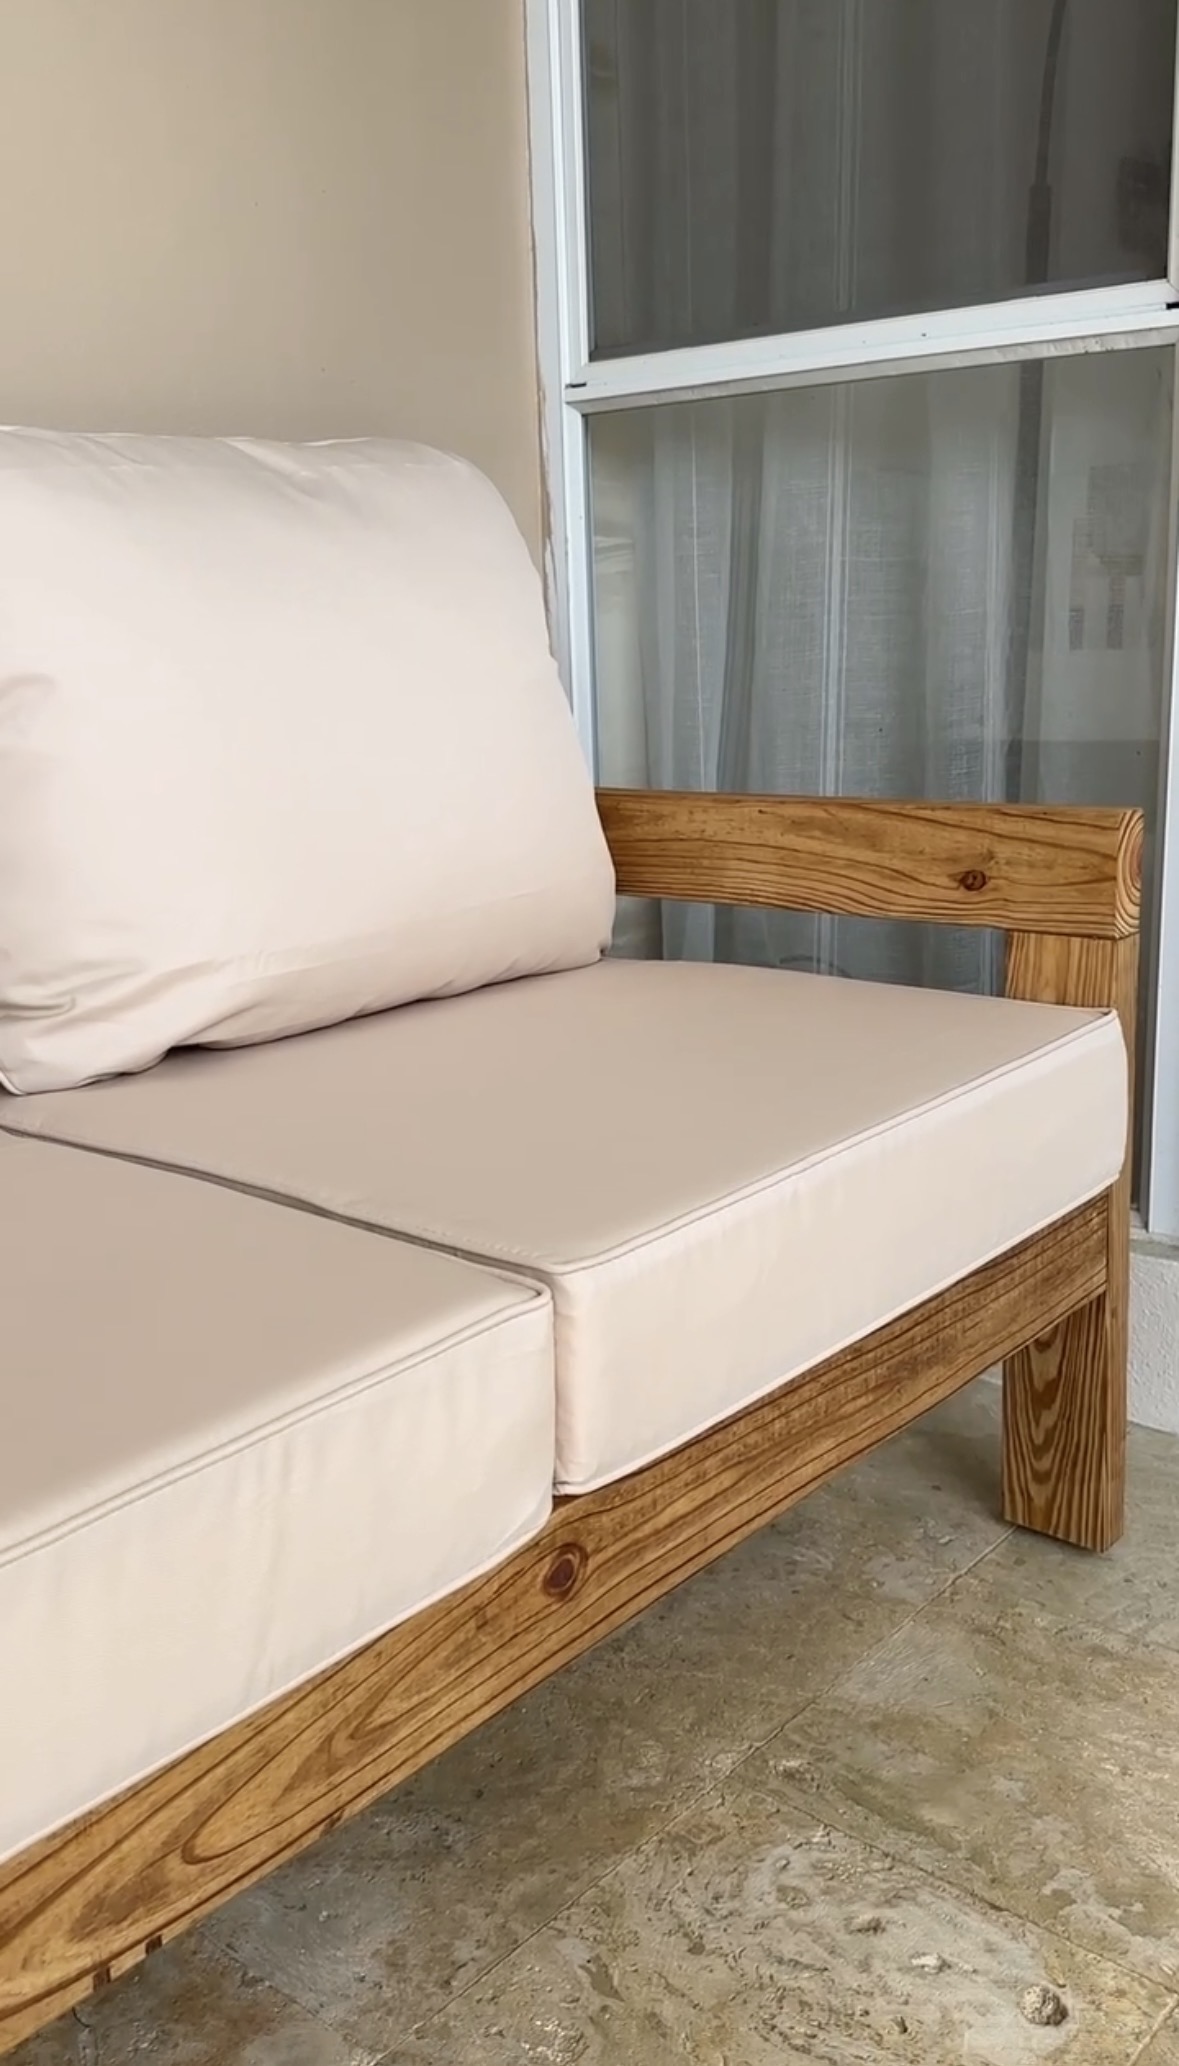
Step 3: Build the Arms + Legs
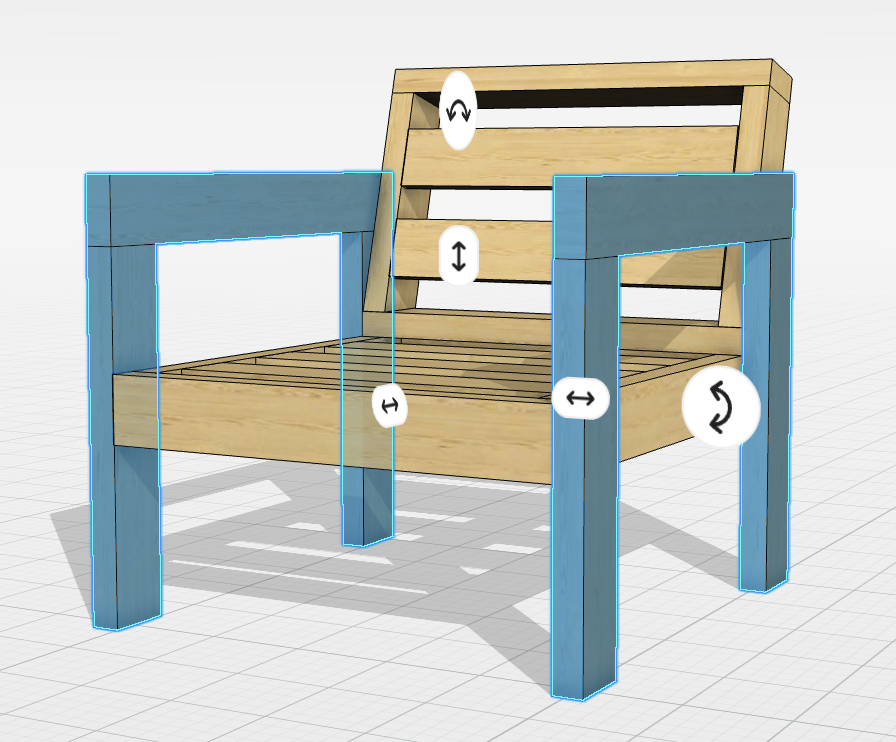
The arms and legs are one continuous piece in this design, forming a sort of horseshoe shape that wraps around the seat. This is what gives the furniture that clean, modern look and makes it feel more like a custom build.
For this part, I wanted the joints to be both strong and visually clean, so instead of using pocket holes (which would be pretty visible here no matter where I placed them), I used wood dowel pins to join the pieces together. This creates a much more seamless finish and keeps everything looking polished.
Cut your pieces to size for the arm/leg shape
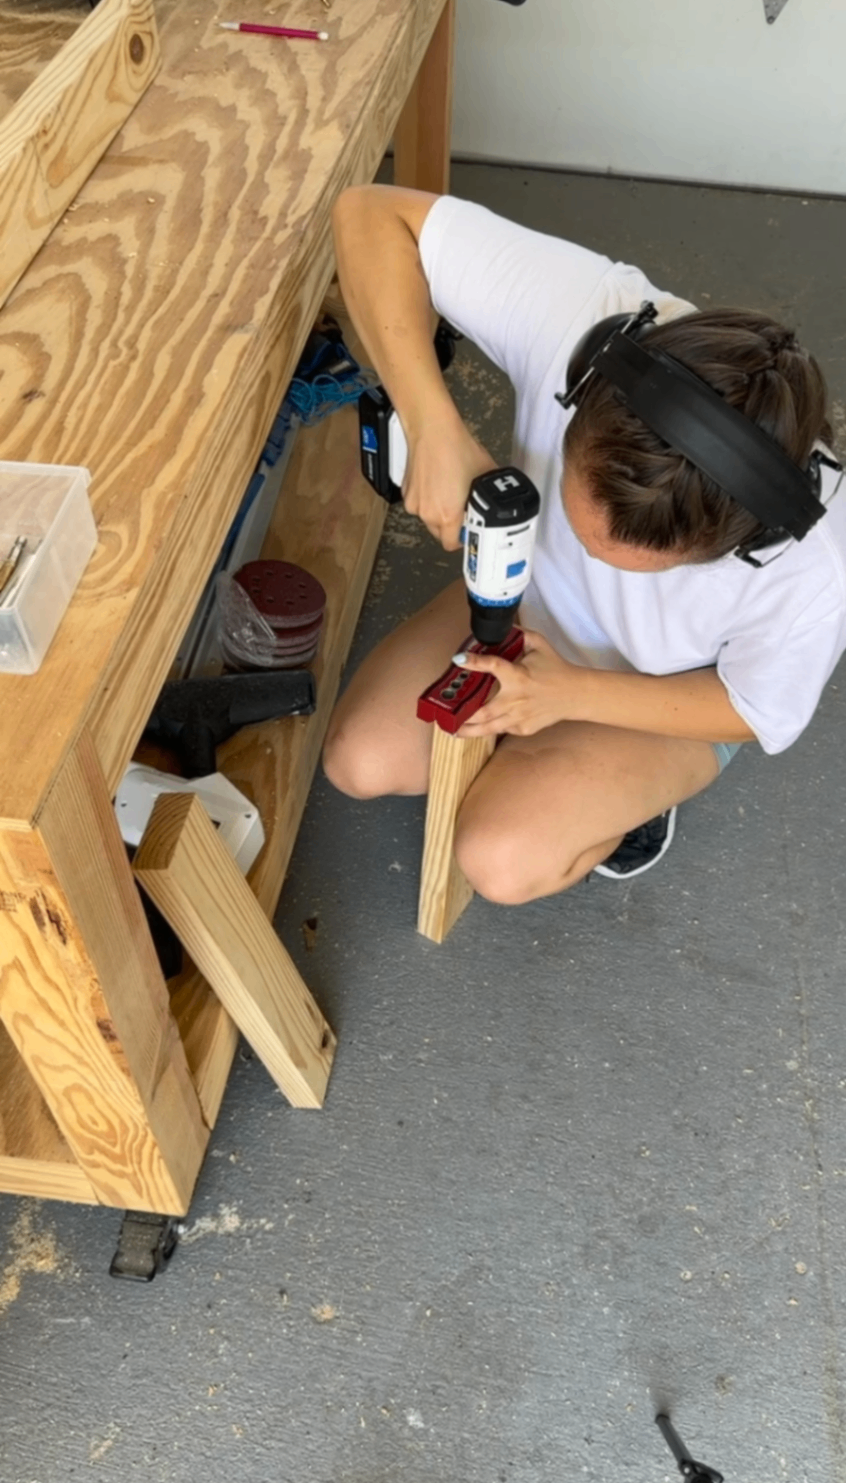
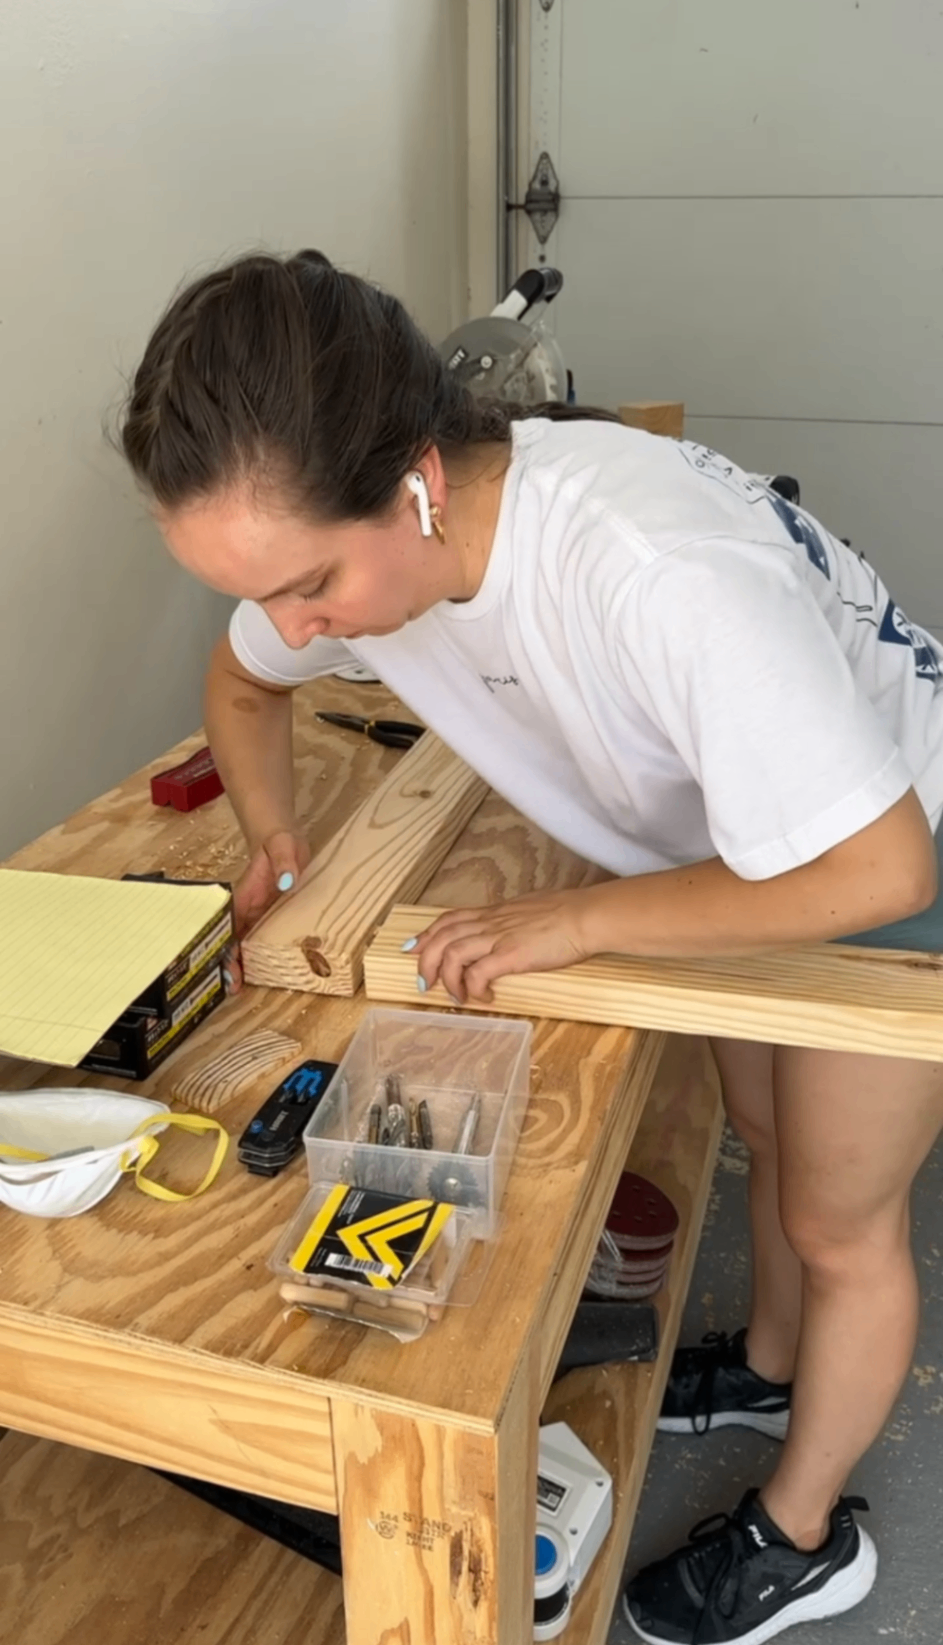
And I’m going to say it again - use a dowel jig 😅 I didn’t have one on hand and was way too impatient to wait for one to ship (all the way to Puerto Rico where I was living when I made this), so I made it work. But it would have been so much easier and more accurate with a jig.
This step takes a little more patience than the others, but it’s worth it. These pieces are a big part of the overall structure and design, so getting clean, sturdy joints here will make the final assembly go much smoother - and your finished piece look way more high-end.
Step 4: Sand Everything Smooth
Before assembling everything, now is the best time to sand all your pieces. This step makes a huge difference in how your DIY patio furniture looks and feels, especially since we’re using basic construction lumber.
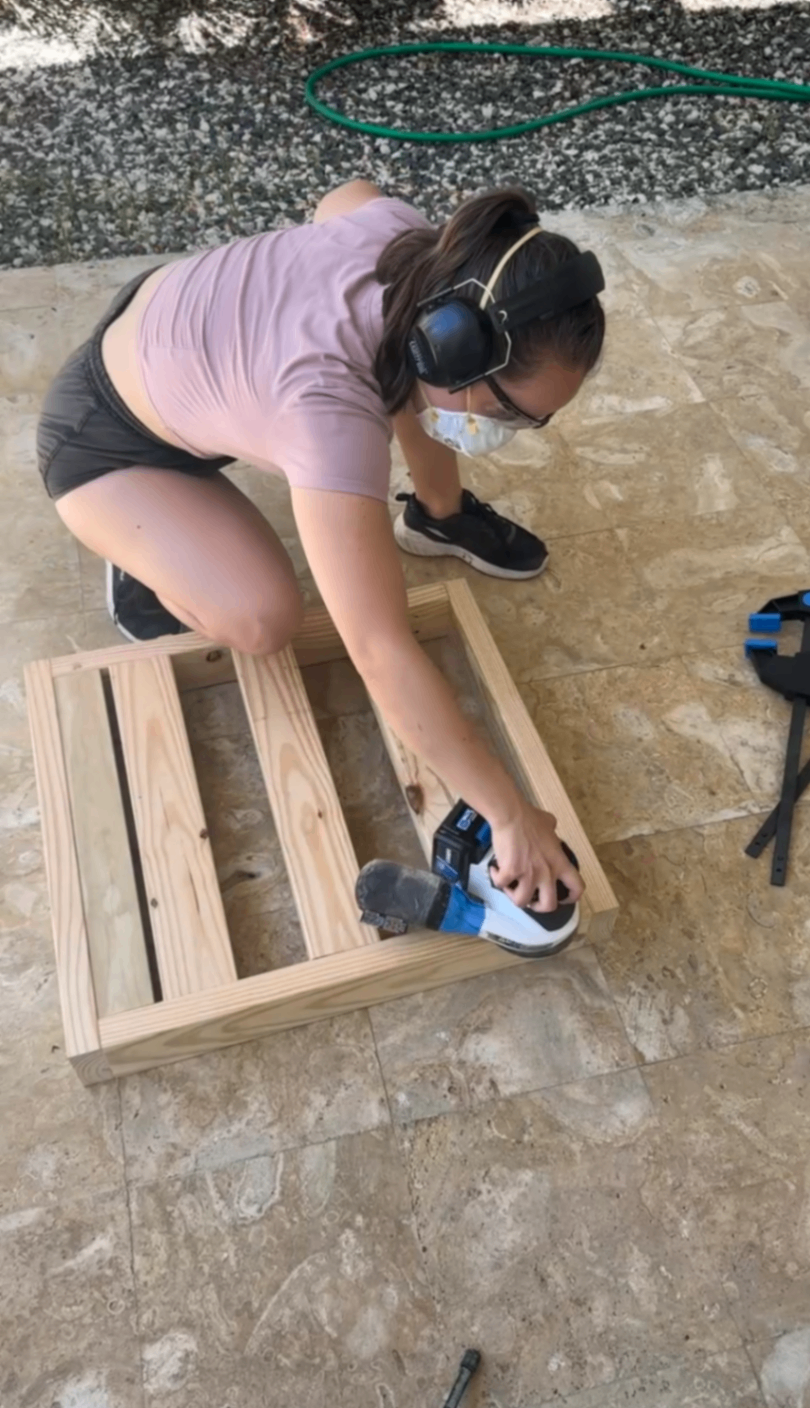
Start with a lower grit (80–120) to smooth rough areas
Work your way up incrementally to 220 grit for a clean finish
Lightly round over edges so nothing feels sharp
If you’re using a really low grit, be careful not to press too hard - this can create “pigtails” (those little swirl marks that show up in the wood). Let the sander do the work and keep steady, even pressure.
I did a couple rounds of sanding to clean up rough spots and stamps from the wood, and it’s 100% worth the effort. This is what takes the build from looking like raw lumber to something much more polished.
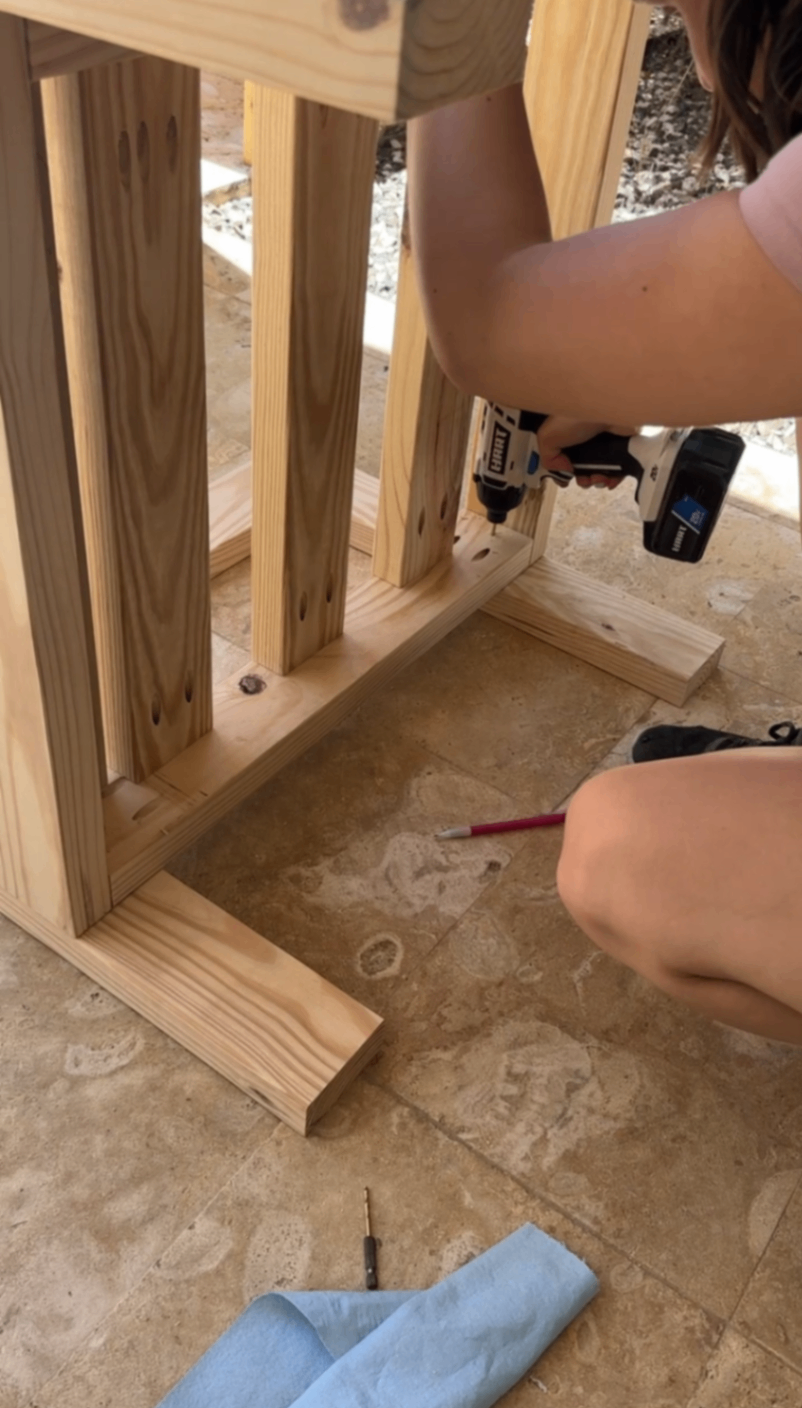
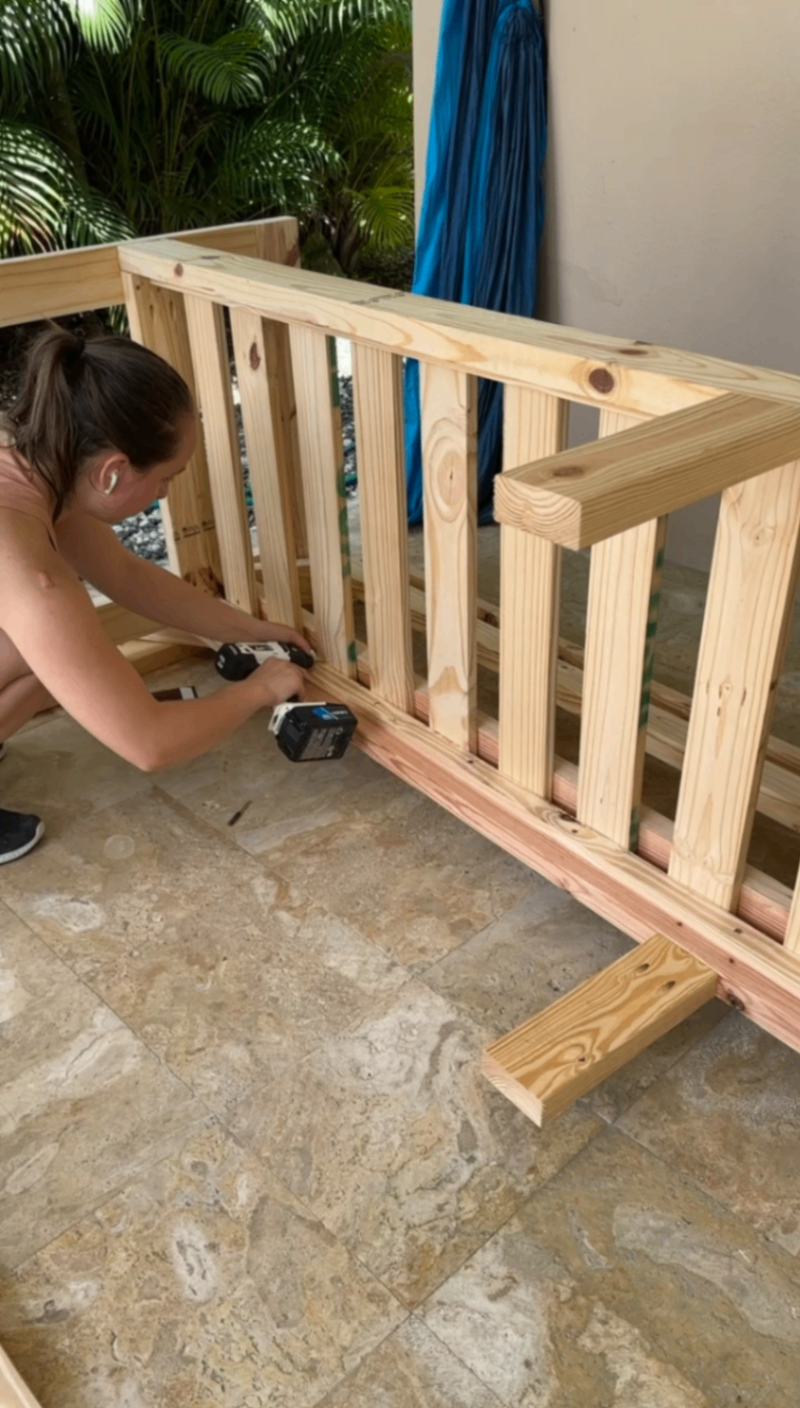
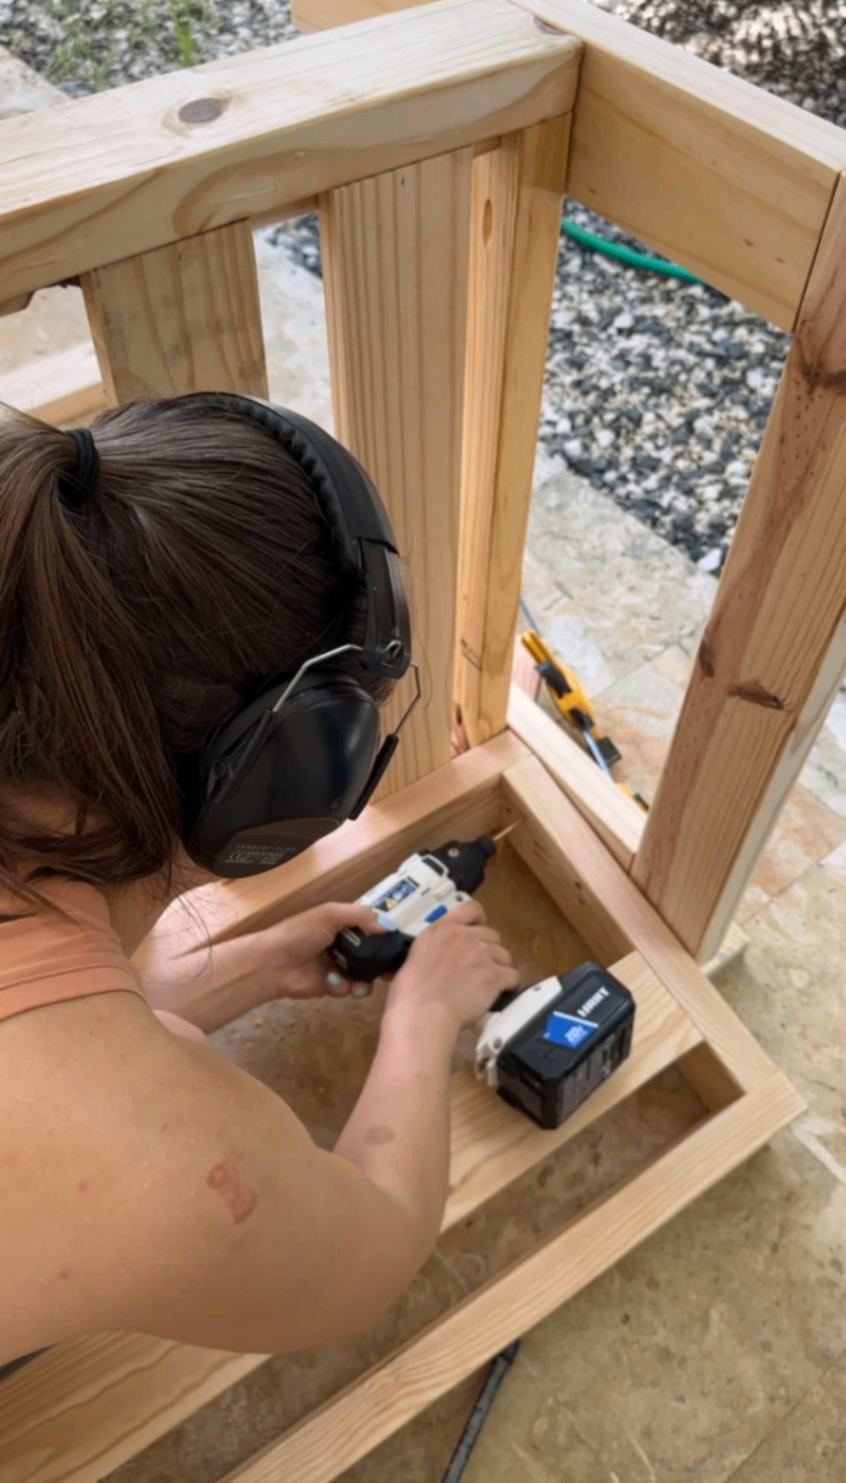
Step 5: Assemble the Chair
Now for the fun part - bringing everything together! At this point, all your components are built, and you’ll start to see your DIY patio chair really take shape.
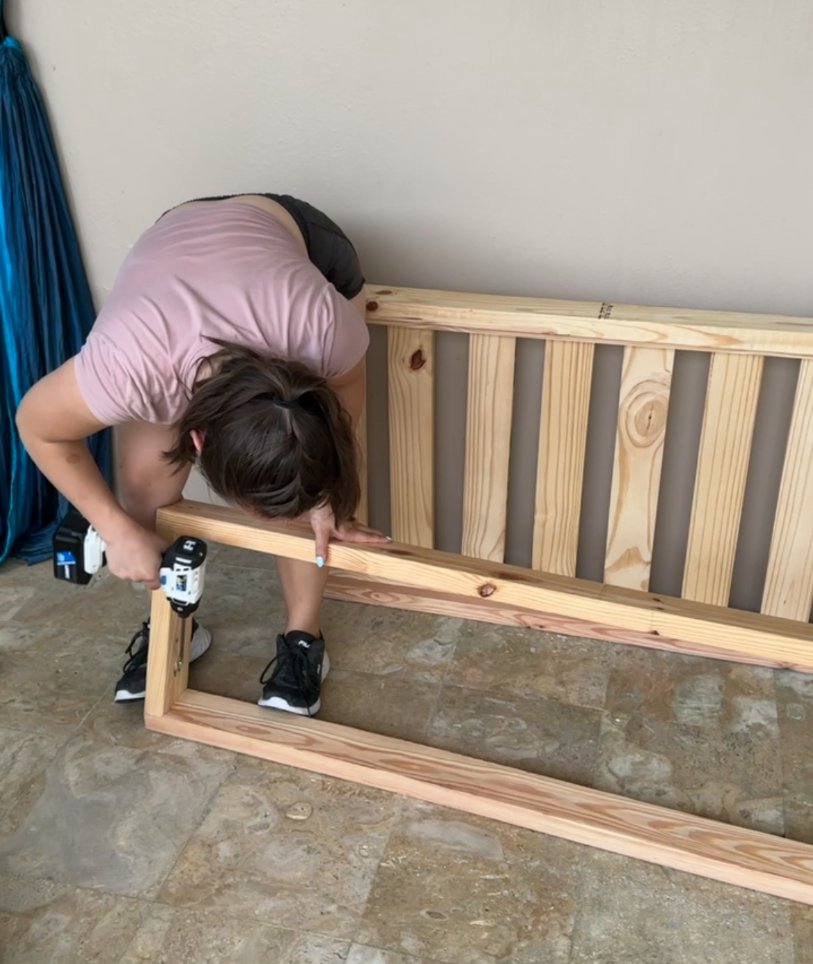
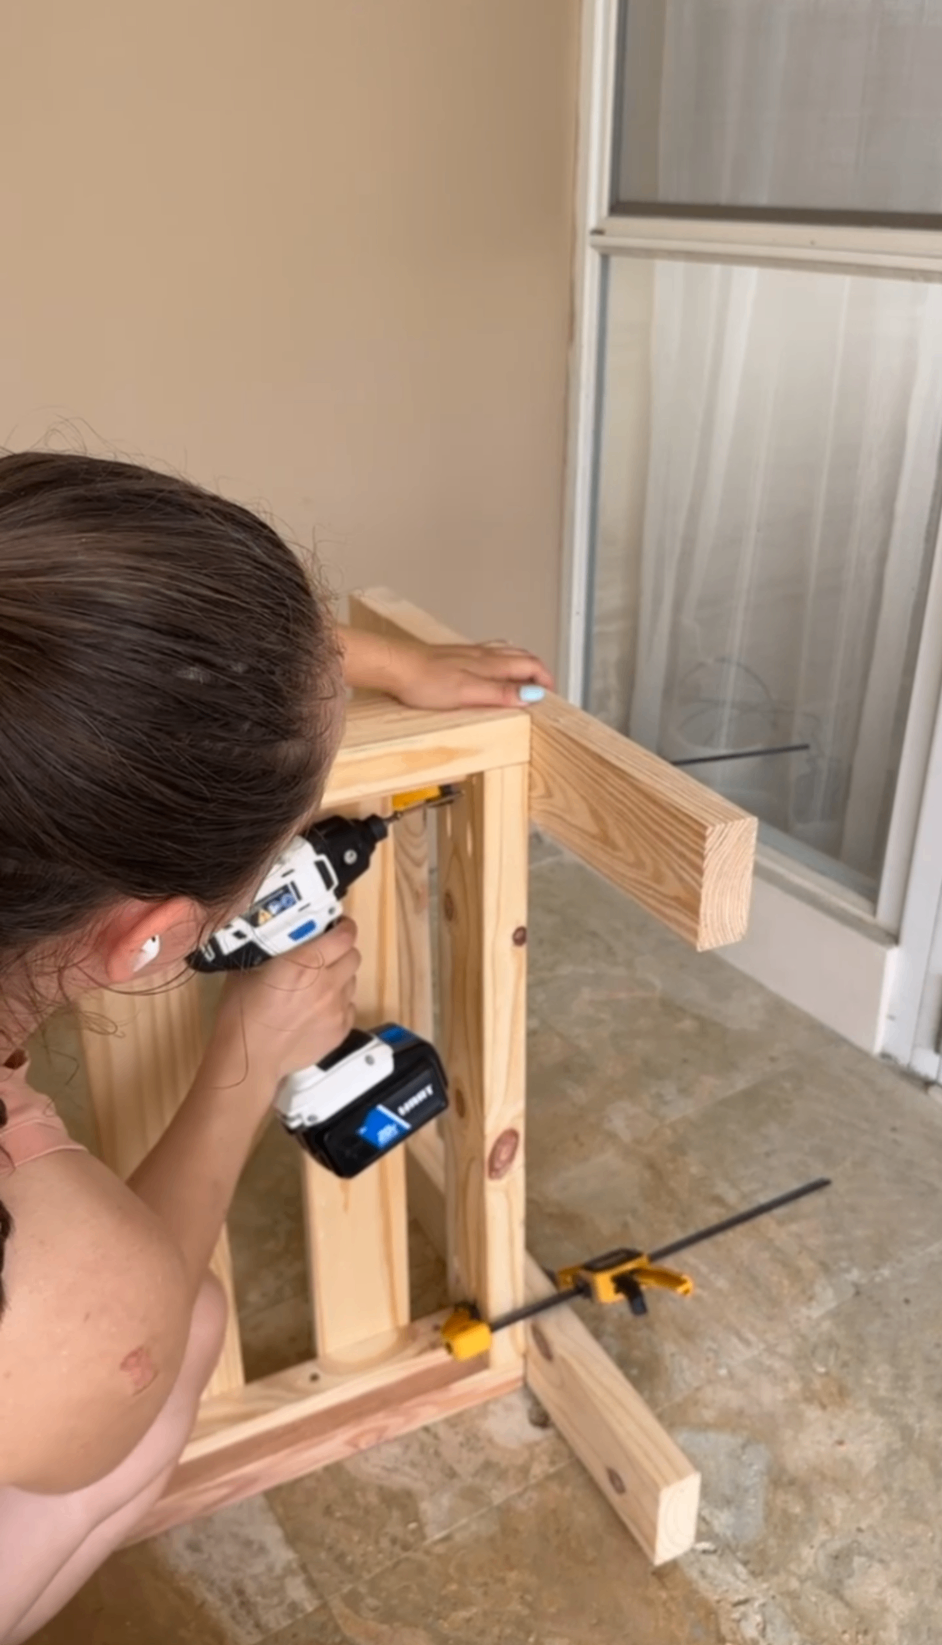
Start by attaching the arms/legs to the seat frame:
Measure and mark about 8.5” up from the ground for where the bottom of the seat should sit
Pre-drill then switch to impact driver to secure with construction screws (one in each corner to start)
Once both sides are attached, it’s time to install the backrest:
Line up the bottom of the back so it sits flush with the rear of the seat
Screw through the rear slat into the back frame
Reinforce by attaching the back to the arms
with a couple screws on each side
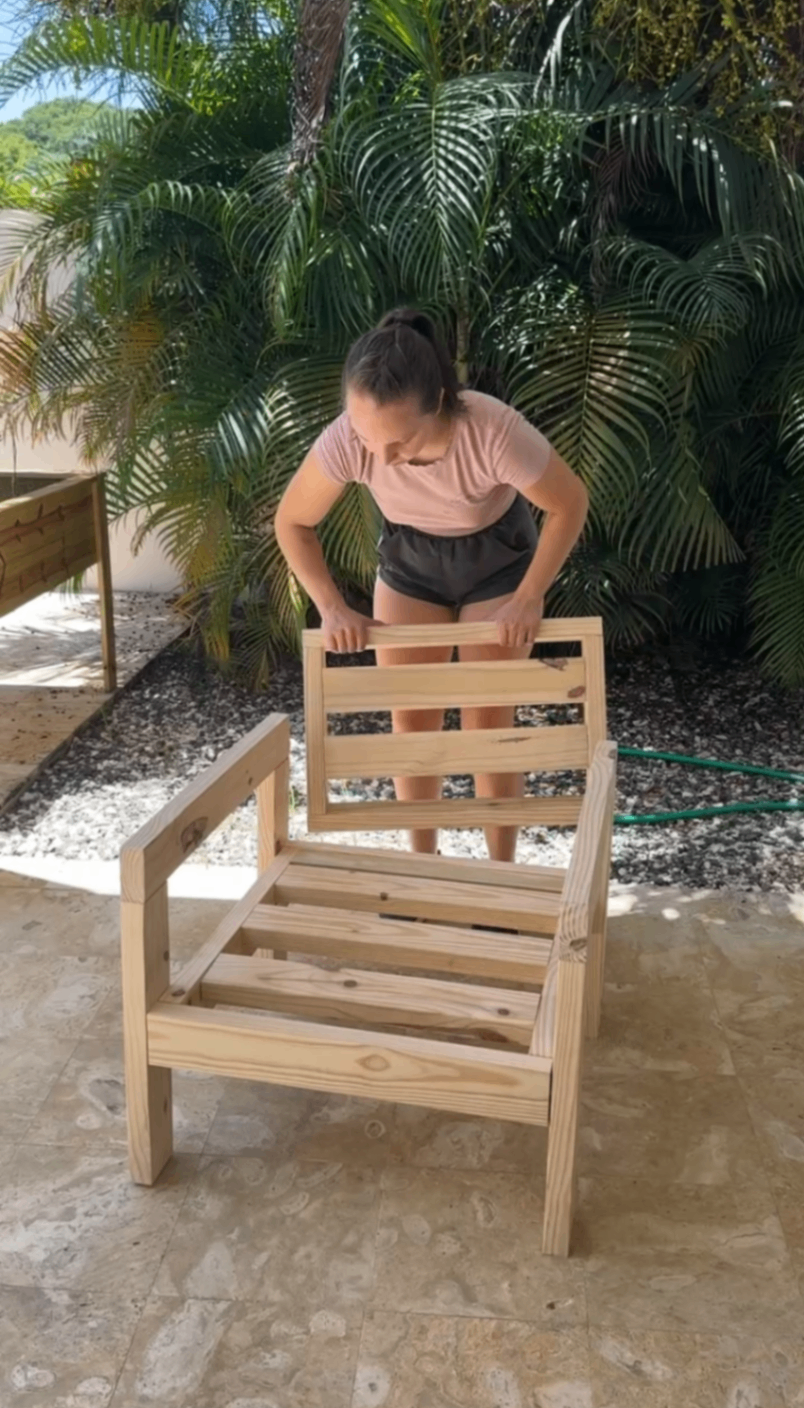

Take your time here to make sure everything is square and aligned before fully tightening your screws - this step really determines how clean and sturdy your final piece feels.
Once it’s assembled, you should have a fully formed chair. It comes together surprisingly quickly at this stage!
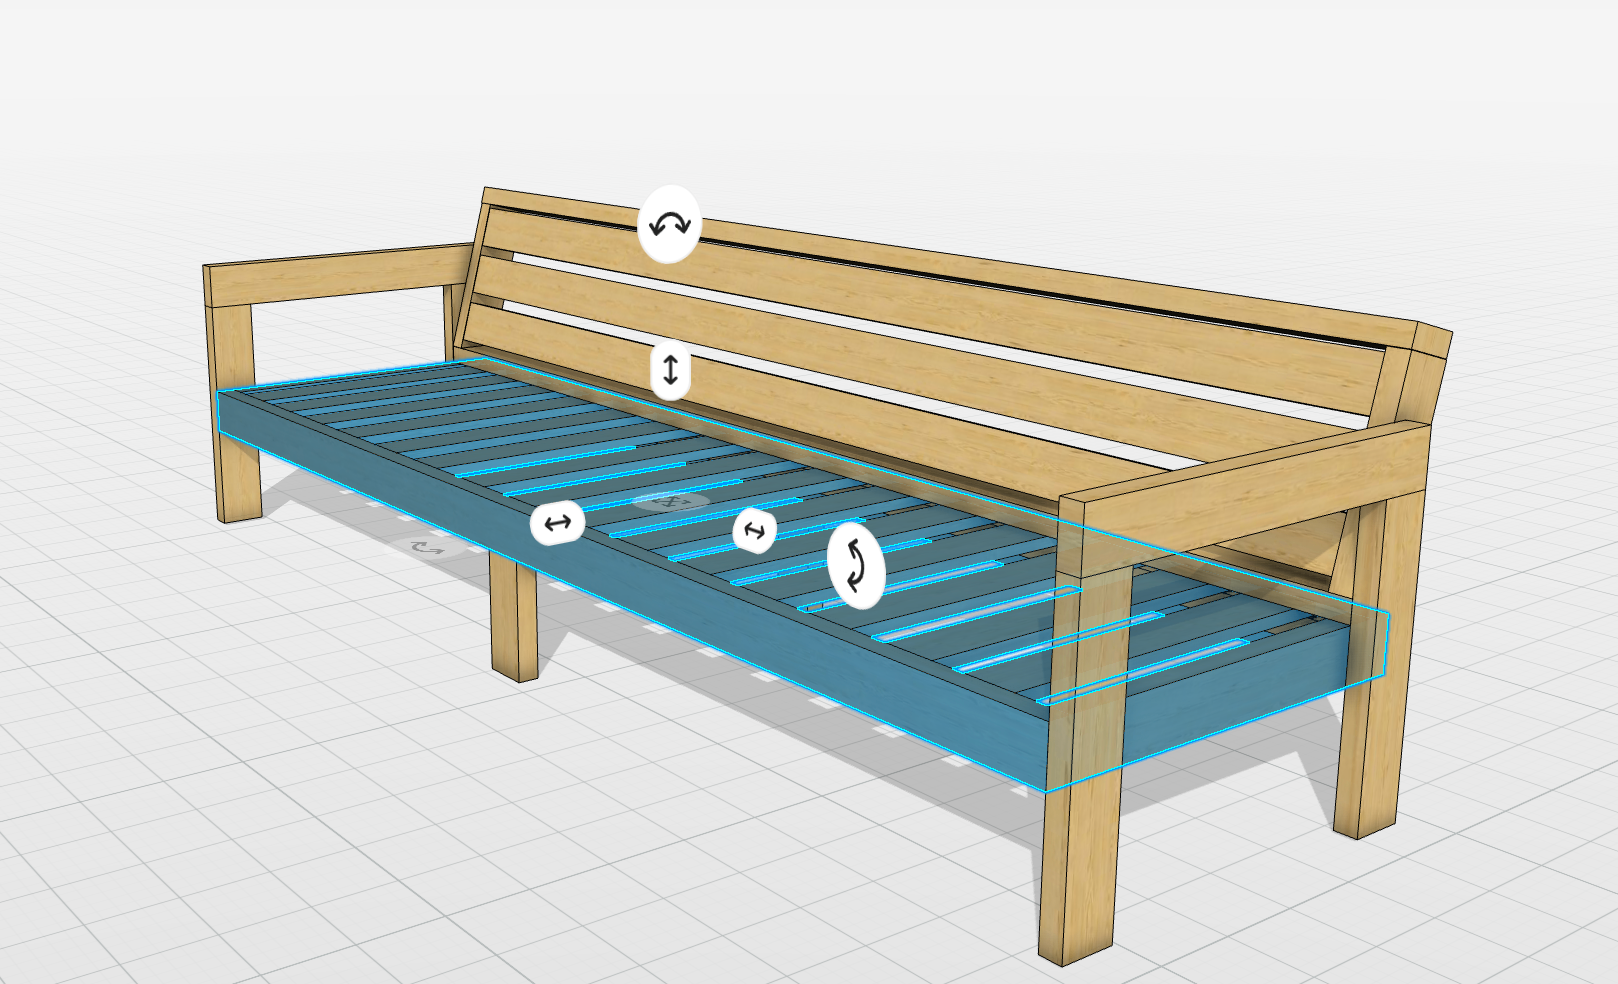
Step 6: Build the Couch Version
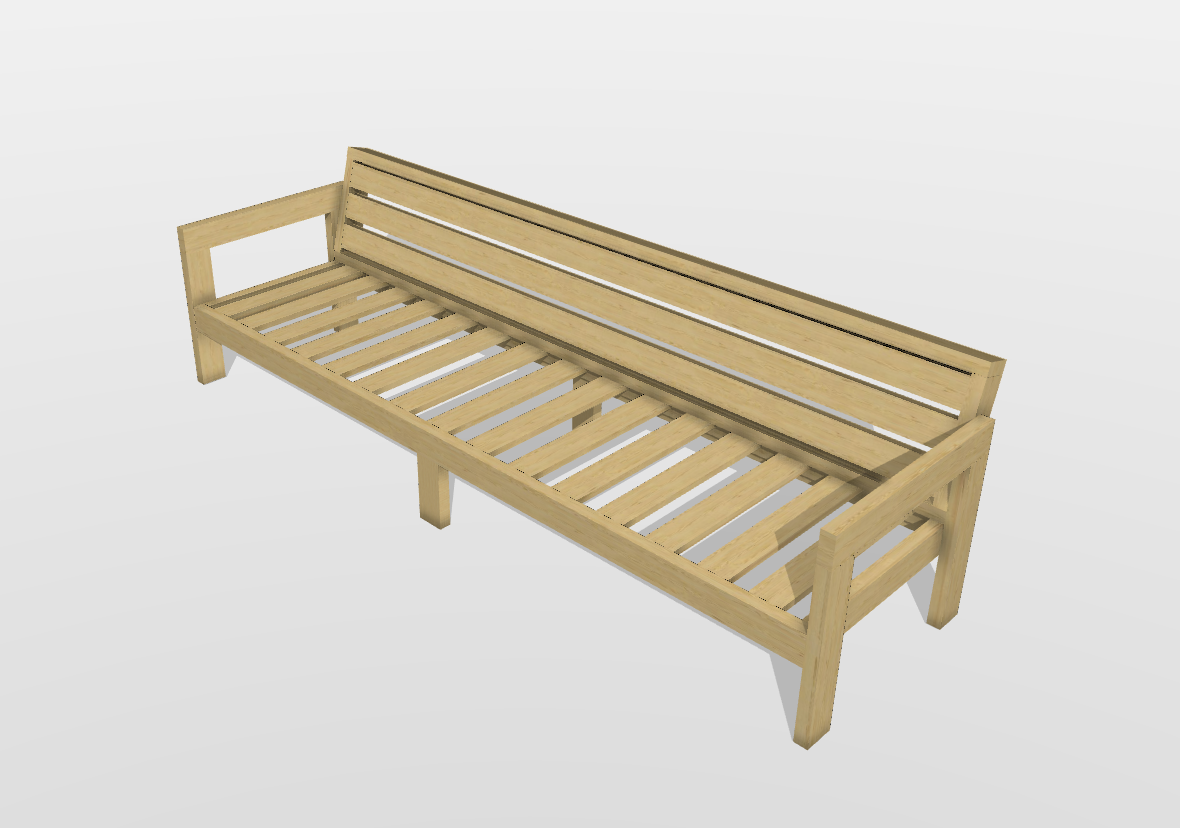
The couch is built exactly like the chairs - just scaled up. This makes it really easy to customize based on your space, whether you want a loveseat, 3-seater, or full outdoor couch.
For my build, I made a four-seater at 99” long using the same 24” cushions. It’s made up of the same three components: the seat, back, and arms/legs.
Again, for the full cut list, details, and exact measurements, check out my free build plans here!
For the seat frame:
Build the outer frame as before
Instead of adding pocket holes to EVERY slat (there are a lot), assemble it more like a bed frame
Attach horizontal support boards (cleats) along the inside of the frame
Then lay your slats across those supports and secure them with nails and a brad nailer or screws
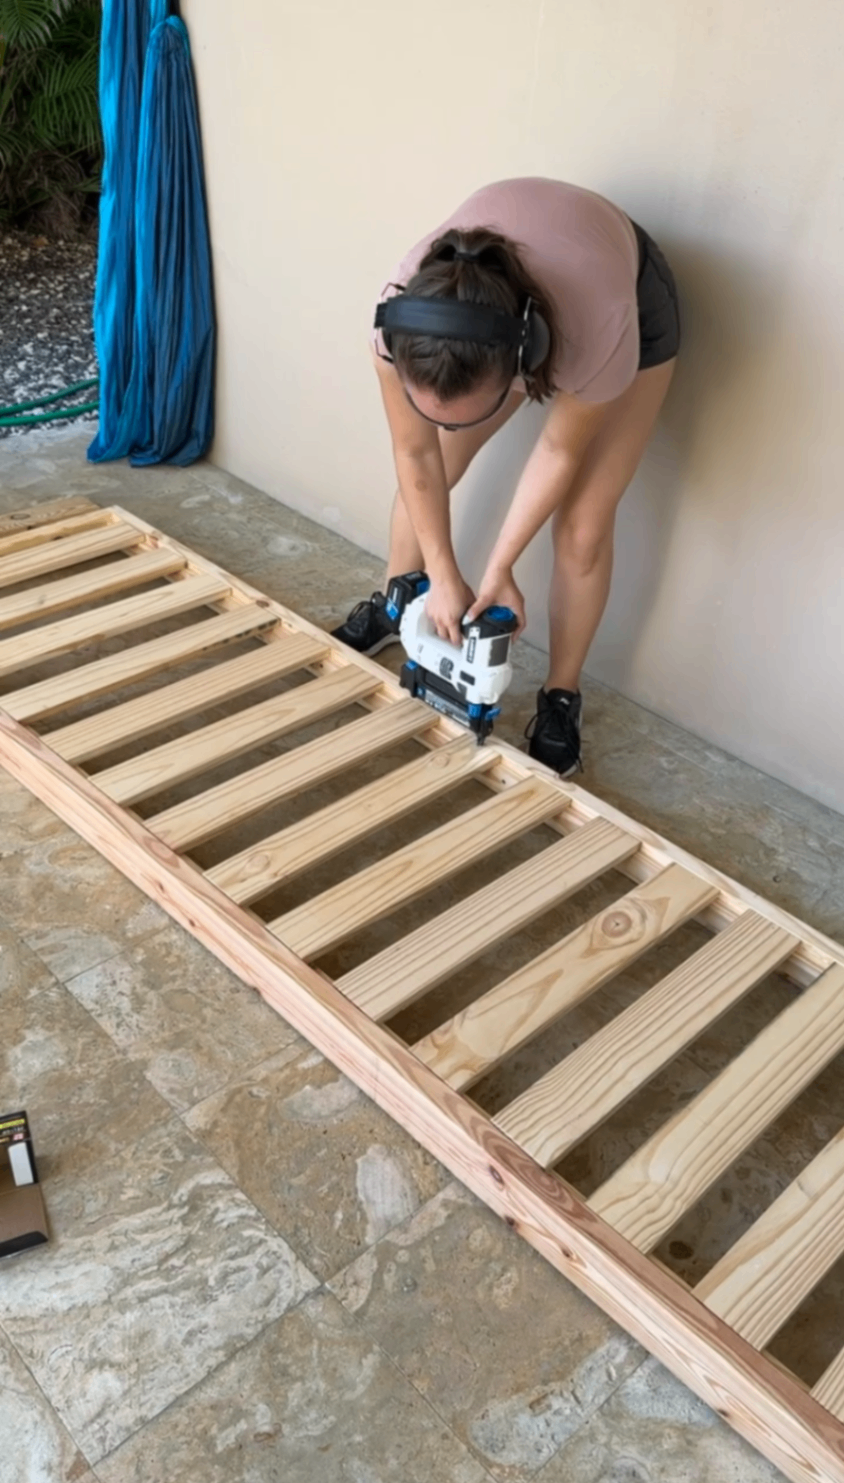
This method is much faster and still plenty strong for a piece this size.
Because of the longer span, I also added a couple extra support legs in the middle to prevent sagging over time.
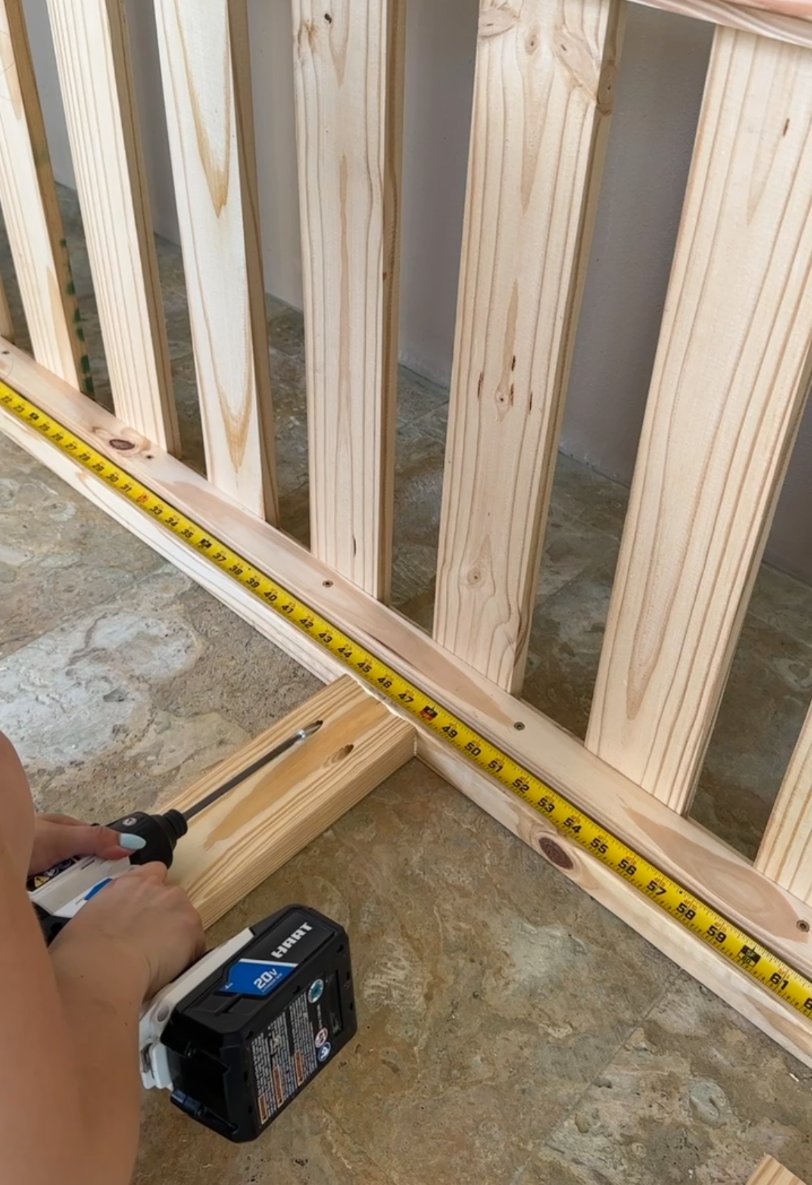
For the back:
Use the same 15° angled sides for that comfortable recline
Build the frame and add slats (I used 2x4s here for extra strength)
Wait to install the bottom slat until after attaching the back - it makes positioning much easier, trust me
Then assemble everything the same way as the chairs: attach the arms to the seat, secure the back (this time through the "bed frame" style slats underneath), and install the final back slat.
Once you’ve built the chairs, this part comes together quickly and really completes the set.
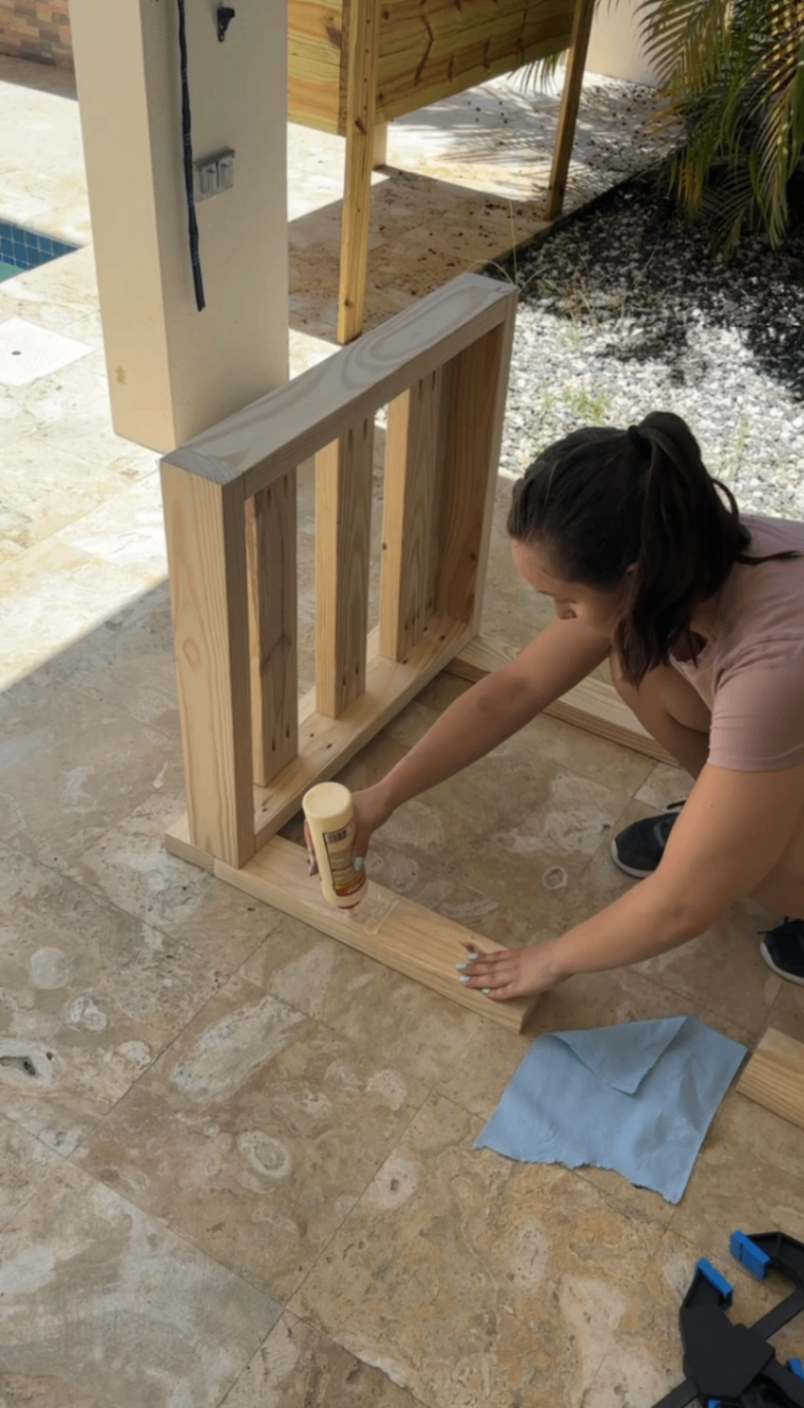
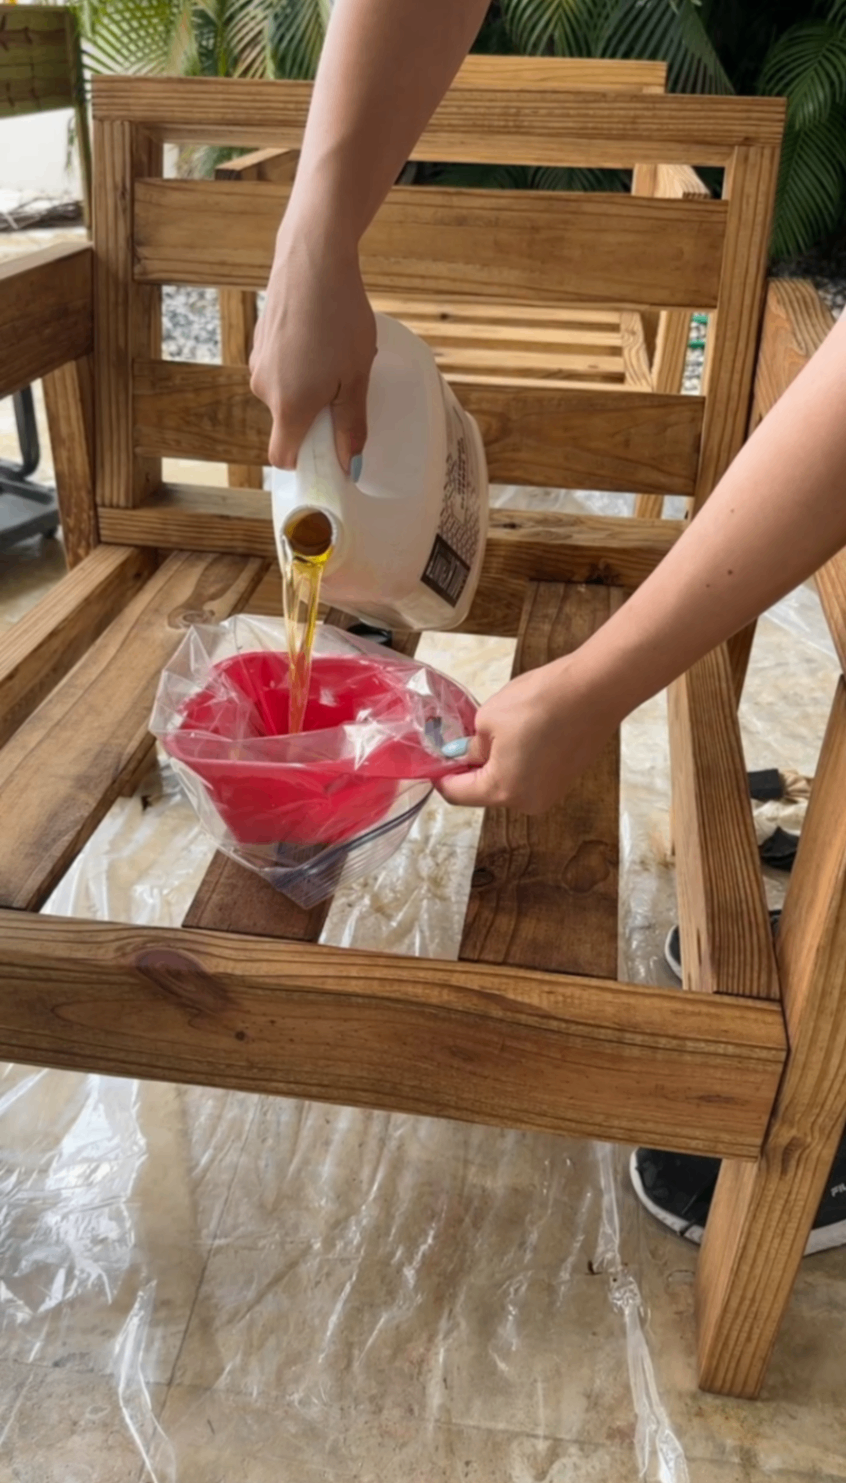
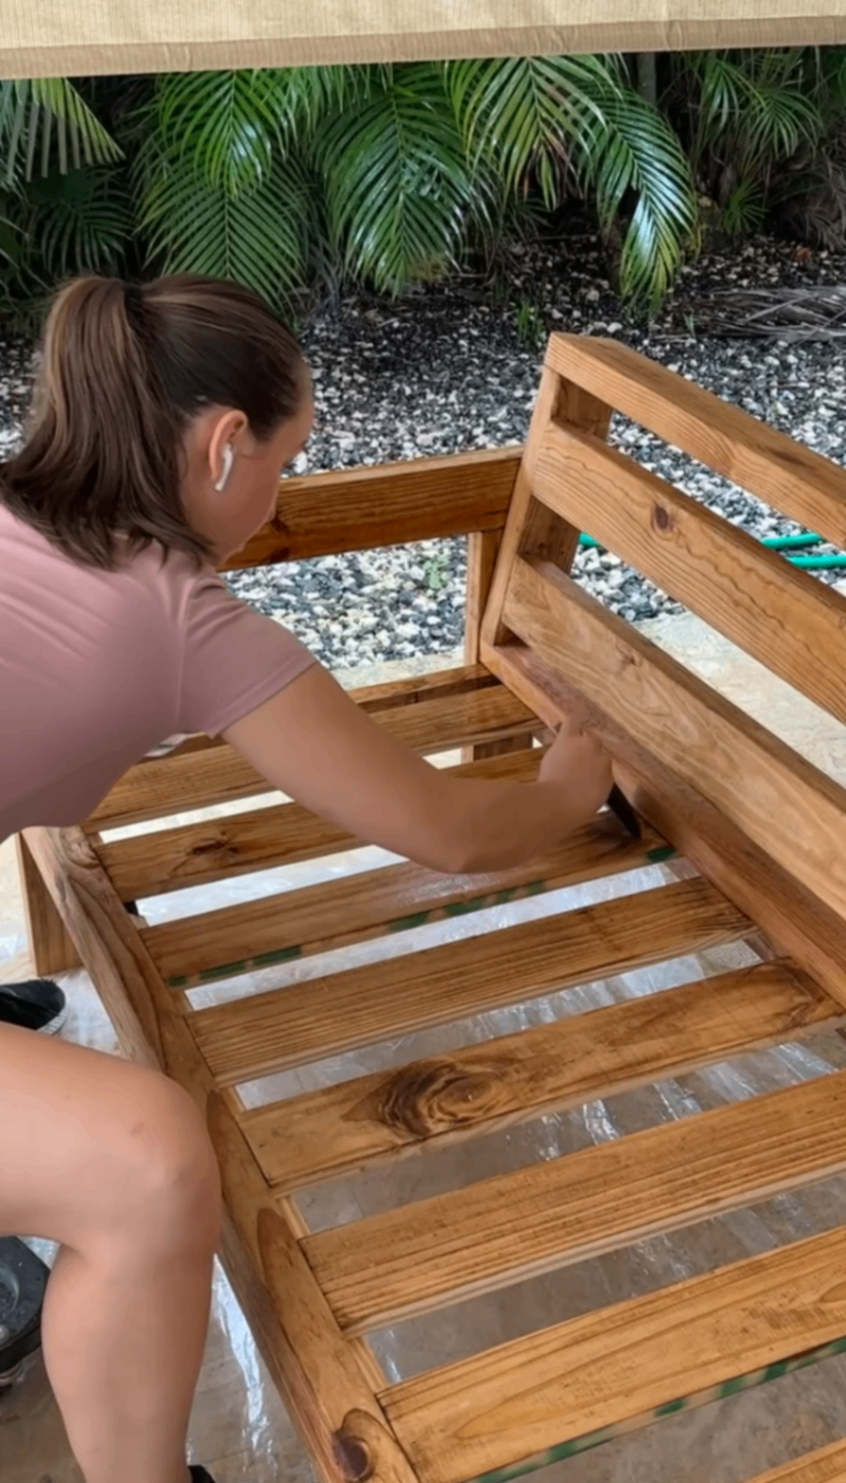
Step 7: Finishing for Outdoor Use
Now for the part that really brings everything to life - finishing! This is what gives your DIY patio furniture that warm tone and protects it from the elements.
For this build, I used RMP Co's Dark Tung Oil for color and their Outdoor Defense Oil as a protective top coat. I’ve used their products on a ton of my projects and always love them. They’re easy to apply, non-toxic, and give a really beautiful, natural-looking finish.
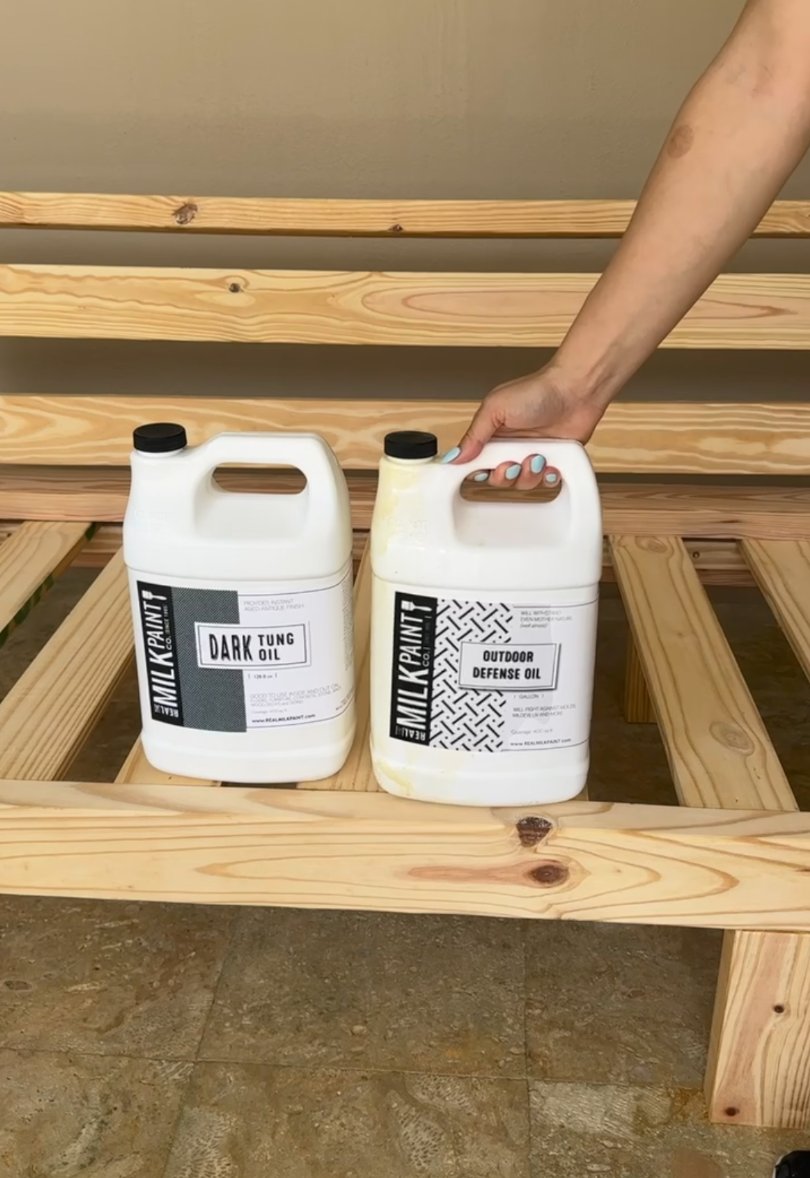
Apply the Dark Tung Oil like a stain to add color
Follow up with a few coats of Outdoor Defense Oil for protection
You can use code BUILDINGBRIDGET10 for 10% off your RMP Co order if you want to try them.
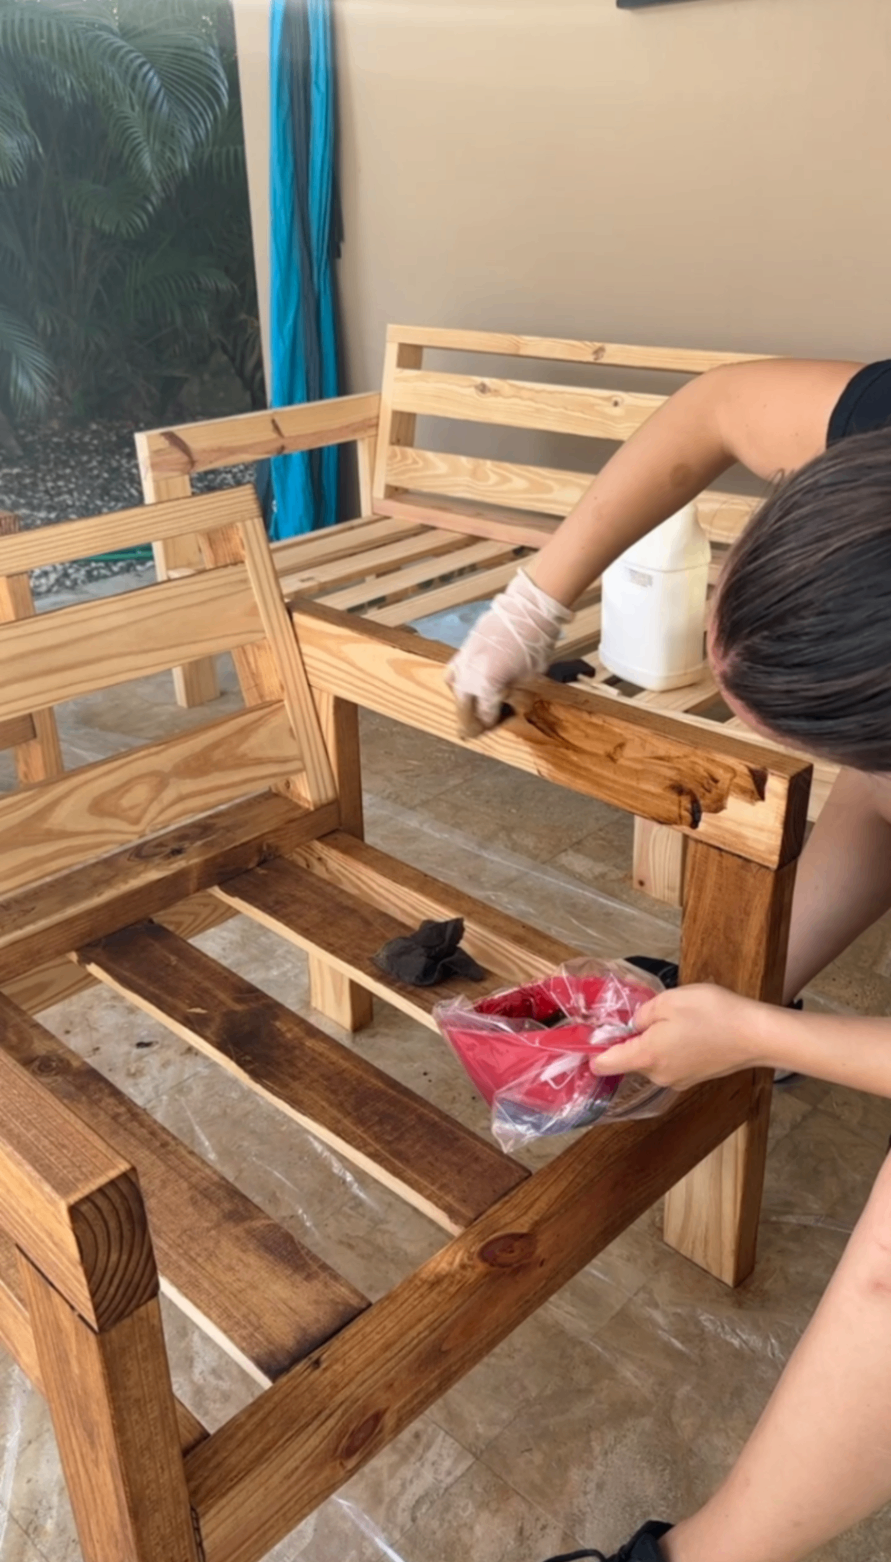
Pro Tip (this is huge):
End grain absorbs way more stain and gets darker.
To fix that:
Pre-soak end grain with a clear oil or wood conditioner (I used the Outdoor Defense Oil here)
Apply stain immediately after
Wipe off
This keeps your finish consistent across all pieces.
Step 8: Add Cushions (The Real Cost 👀)
Now for the final step - adding your cushions and bringing your DIY patio furniture to life!
And honestly, this ended up being the most expensive part of the project 😅 Outdoor cushions are NOT cheap, why did nobody tell me this?? You don't want to skimp too much though, this will determine how comfortable your patio set actually is.
For this build, I used:
These are pretty standard sizes, which is why I designed the furniture around them - it makes finding cushions much easier and ensures everything fits well.

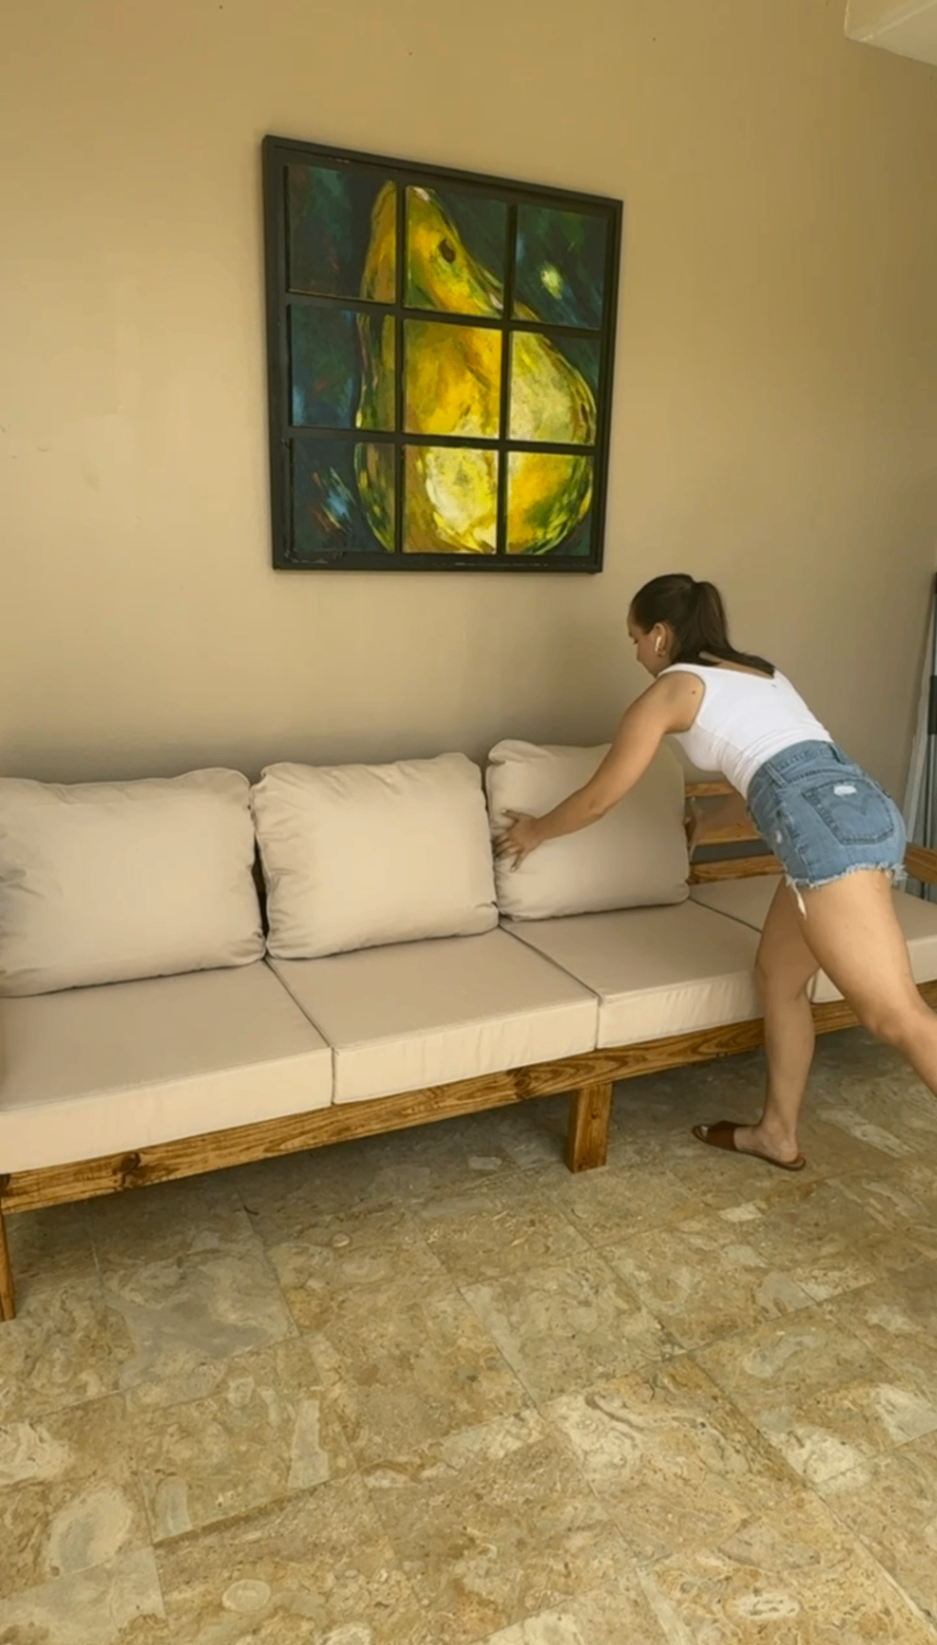
Once you add them in, the whole project really comes together and starts to feel like a finished outdoor space. I linked the exact cushions I used - they’re more affordable than some other options but still great quality! They feel nice and thick, have good support but aren't too firm, and visually look super high-end.
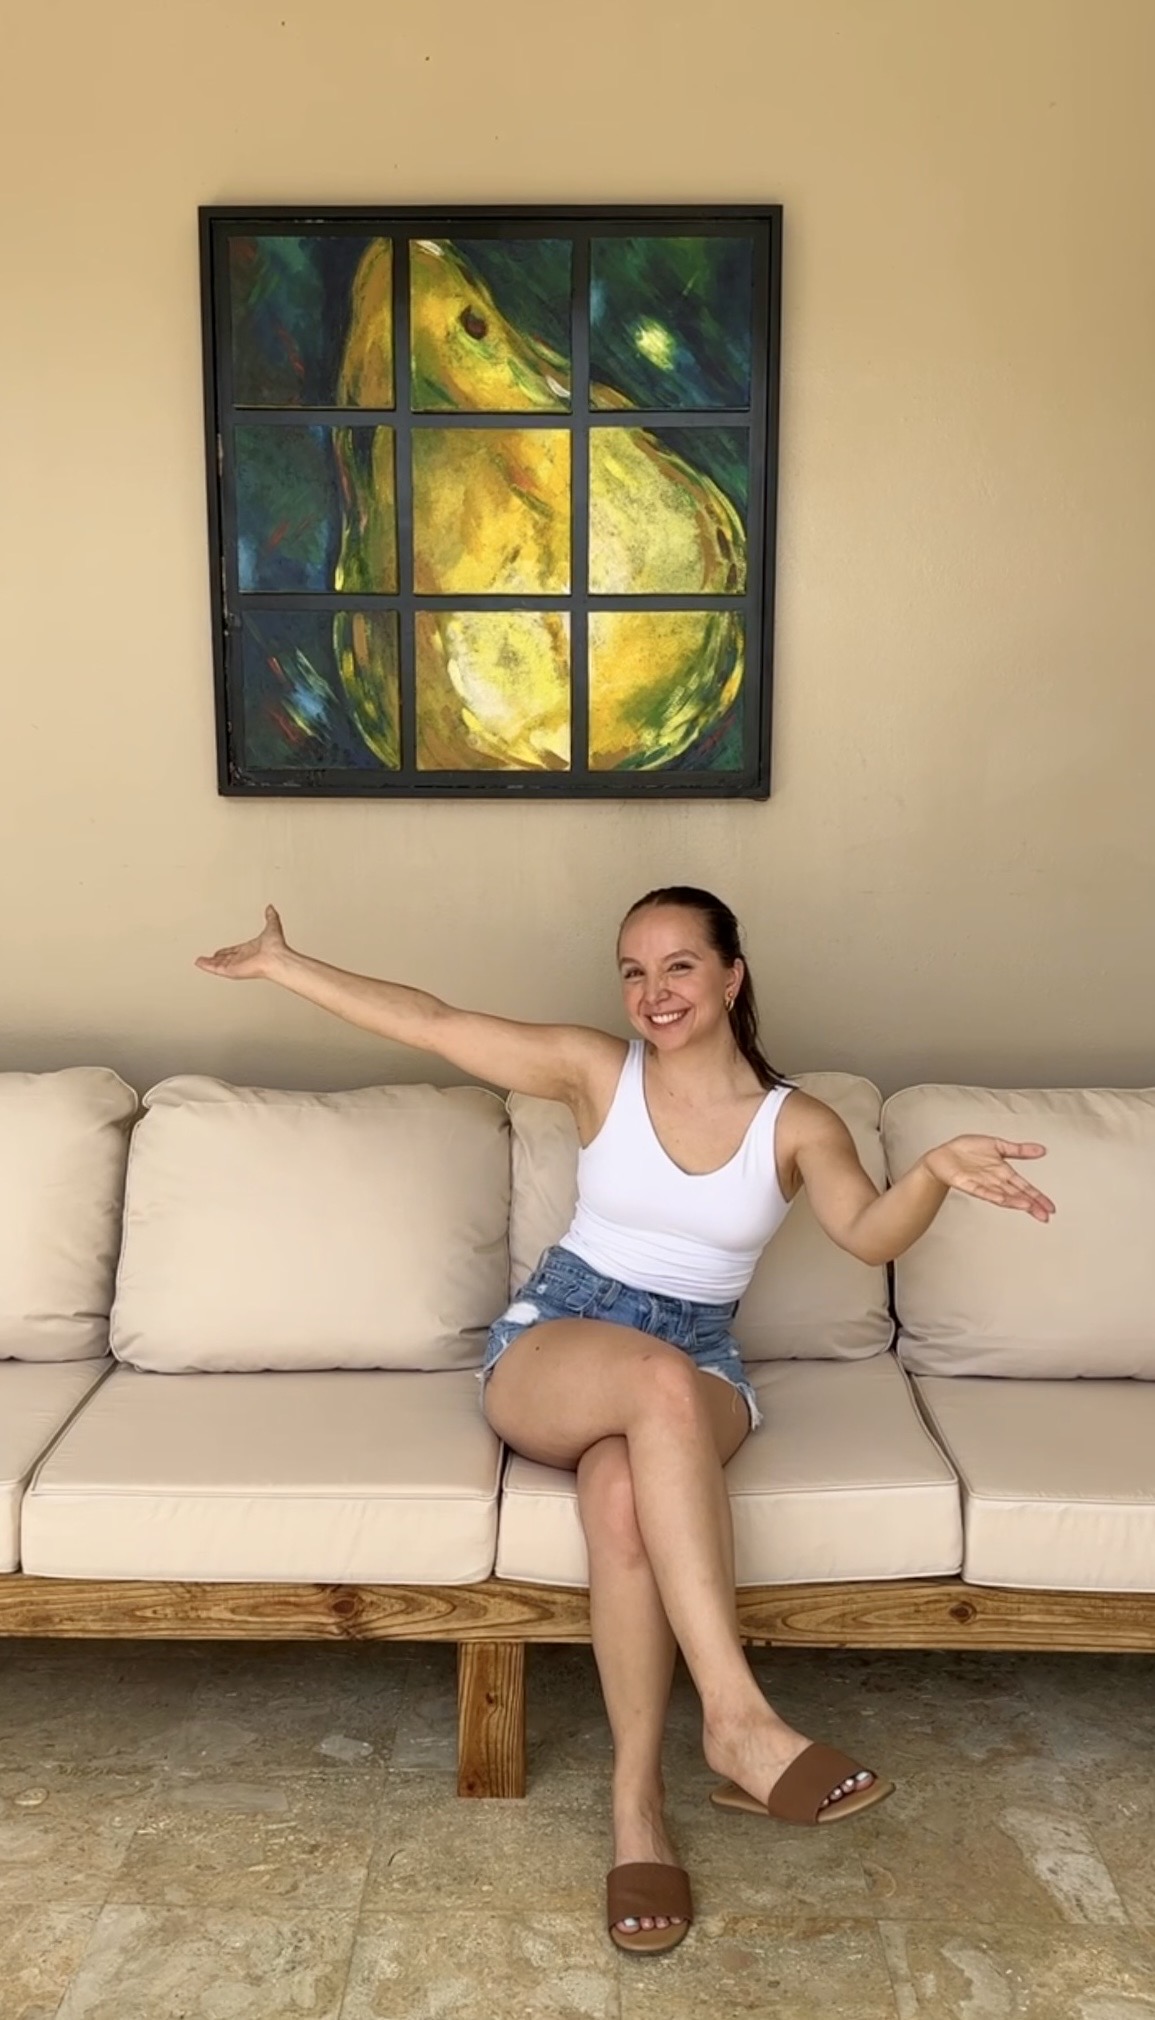
Final Result: A Custom Patio Set on a Budget
This project completely transformed my patio - and the best part is how customizable and beginner-friendly it is.
Make it a loveseat, 3-seater, or full sectional
Adjust dimensions to your space
Change finishes to match your style
And for the price? It’s hard to beat.

Final Thoughts
I love how this DIY patio furniture set came together - it completely upgraded my outdoor space and it’s one of those projects that looks way more expensive than it actually is. It’s also really customizable, so you can adjust the size, layout, or finish to fit your own patio.
Again, for the step-by-step breakdown with exact measurements and cut list, you can grab my FREE build plans here.
And if you end up building this, I’d love to see it! Tag me or send me photos - I always love seeing your takes on my projects!
📌 Save This for Later
Planning to build this later? Make sure to save it so you can come back to it when you’re ready:
👉 Pin this project on Pinterest
More DIY Projects You Might Like
If you’re working on upgrading your outdoor space, you might also like these:
Faux Wood Garage Door Makeover – a budget-friendly way to instantly boost curb appeal
Jasmine Diamond Trellis DIY – an easy project that adds structure and greenery to your exterior
These pair super well with this patio set if you’re looking to create a more finished, cohesive outdoor space!