DIY Slat Wall for a Kitchen Island (Budget MDF Tutorial + Step-by-Step Guide)
This DIY slat wall took a boring builder-grade wall and turned it into a custom, high-end statement feature using MDF, paint, and a brad nailer - all on a budget.
DIY Slat Wall Tutorial: How to Transform Any Boring Wall Into a Custom Statement
If you’ve been looking for an easy way to upgrade your home, a DIY slat wall might be exactly what you need. I recently tackled this project for some friends who wanted their kitchen island wall to feel more custom and intentional — and the transformation was unreal.
With a single sheet of MDF, some paint, and a weekend of work, you can create a sleek, modern accent wall that completely changes the feel of a space without blowing your budget. This tutorial breaks down exactly how to do it step by step.
What You’ll Need for a DIY Slat Wall
Here’s the full supply list so you can gather everything before you start. Materials needed:
½” MDF sheet (cut into 1” strips)
Kreg Rip-Cut Guide (or another straight-cutting guide)
Primer + paint (in your chosen color)
Why add a Slat Wall to a Kitchen?
If you’ve been looking for an easy way to upgrade your home, a DIY slat wall might be exactly what you need. I recently tackled this project for some friends who wanted their kitchen island wall to feel more custom and intentional — and the transformation was unreal.
With just some MDF, paint, and a weekend of work, you can create a sleek, modern accent wall that completely changes the feel of a space without blowing your budget. This tutorial breaks down exactly how to do it step by step.
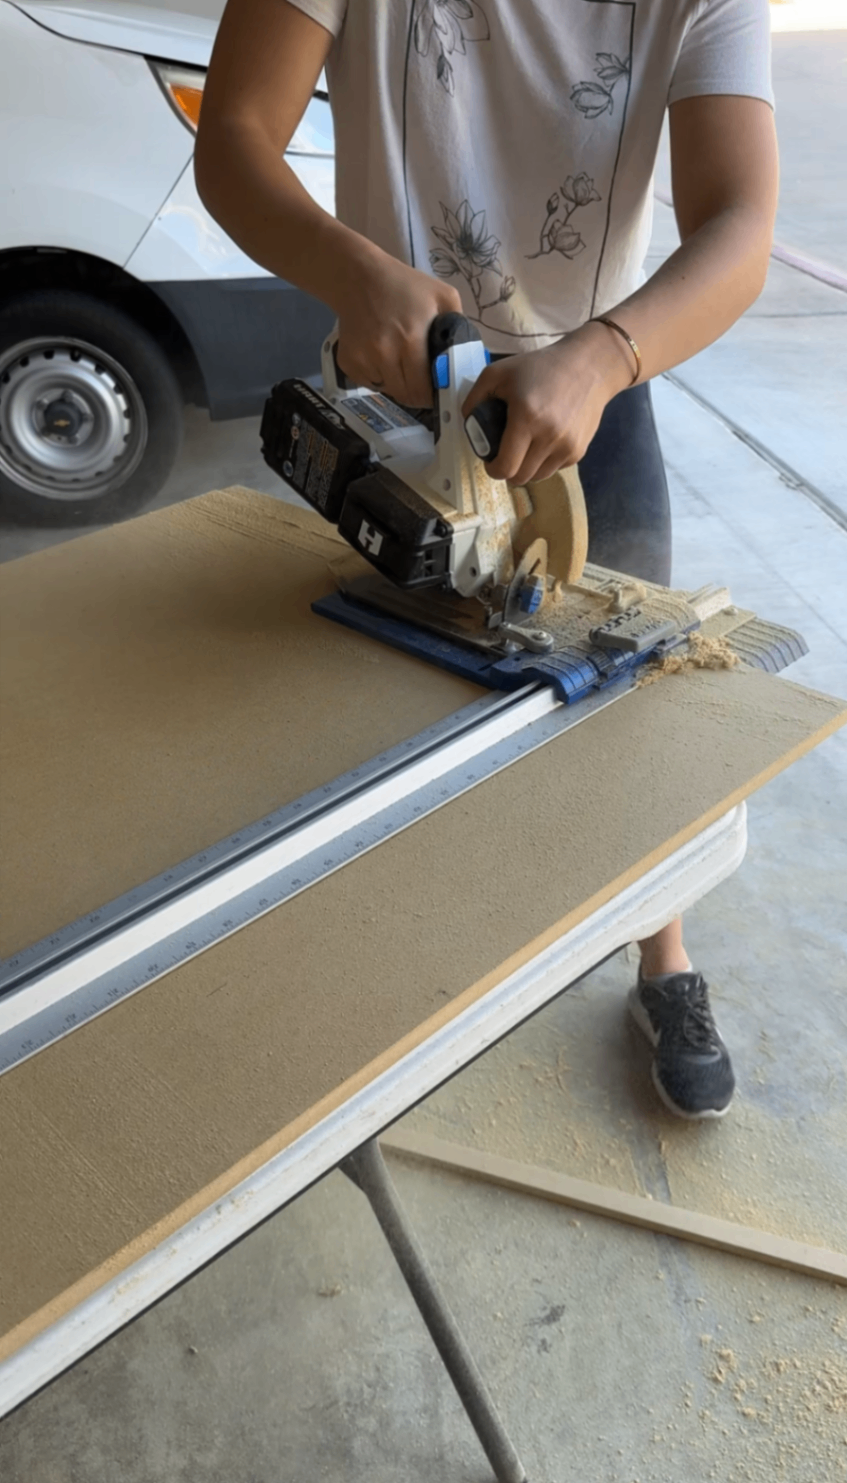
Step 1: Cutting Affordable DIY Slats
Instead of buying expensive slats, I used a single ½” MDF sheet and cut it into 1” strips using a circular saw with a Kreg Rip-Cut guide. This setup keeps the cuts straight and consistent — which is especially important when you’re cutting dozens (or in my case, over 100) slats.
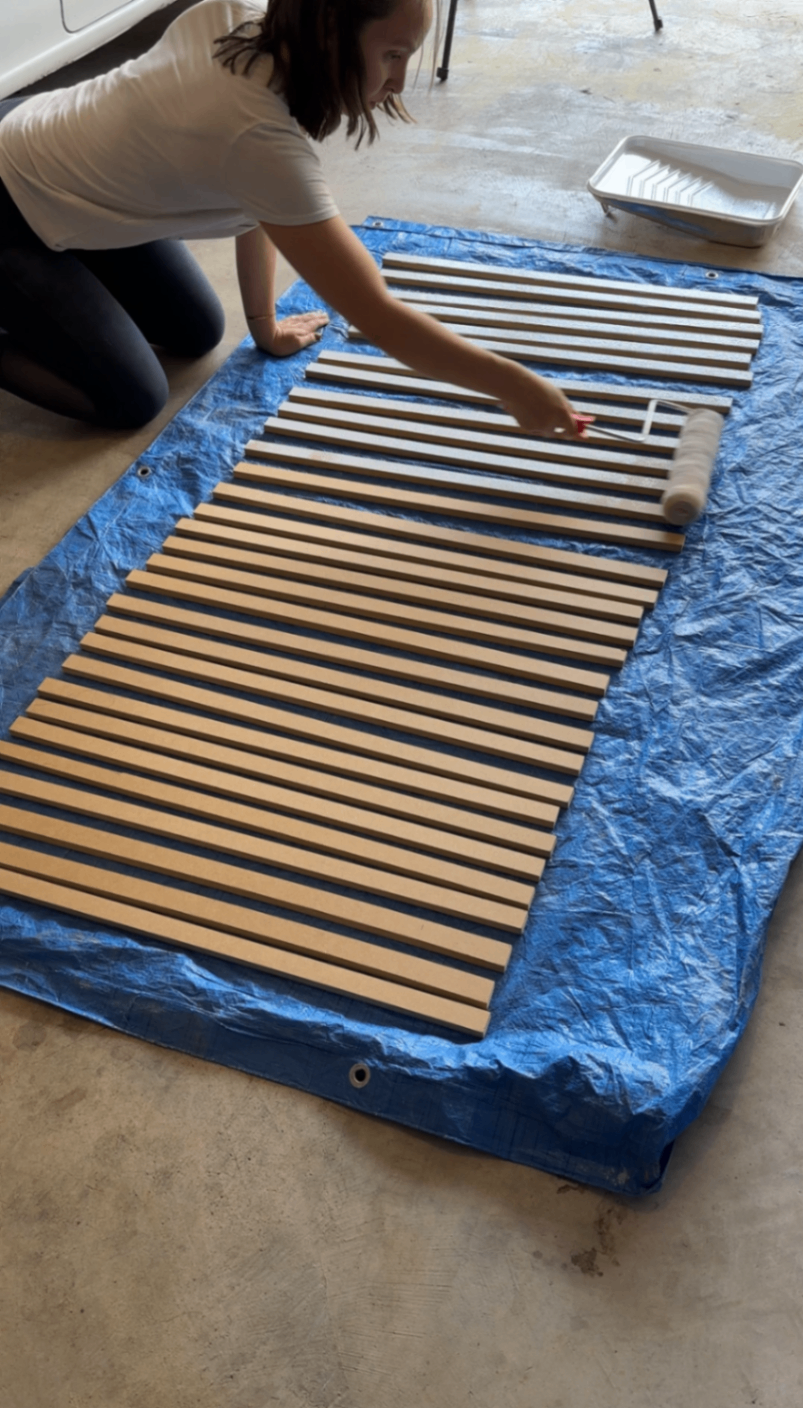
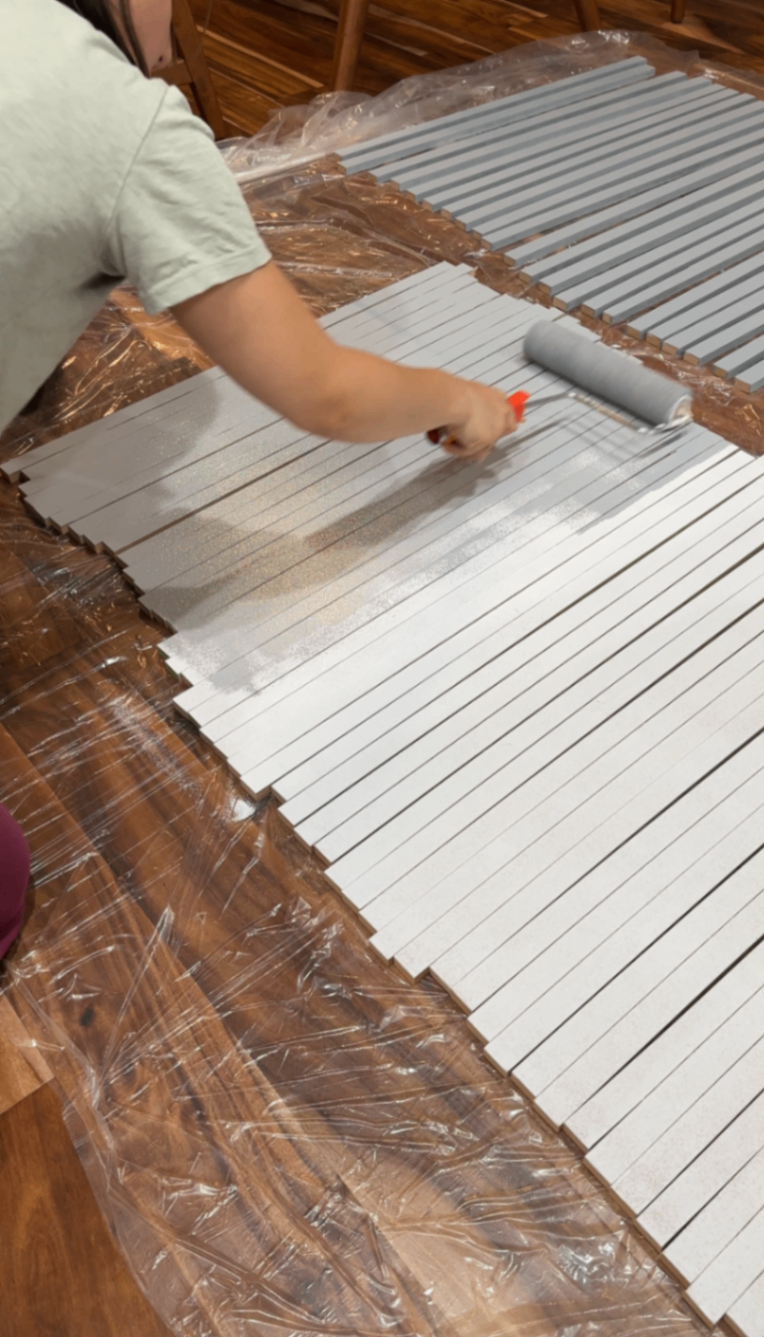
Once the slats were cut, I worked in batches to prime and paint three sides of each one in a blue-gray color. Painting before installation is a huge time-saver and gives you a much cleaner finish since you don’t have to squeeze a brush between slats later.
Step 2: Prepping the Wall
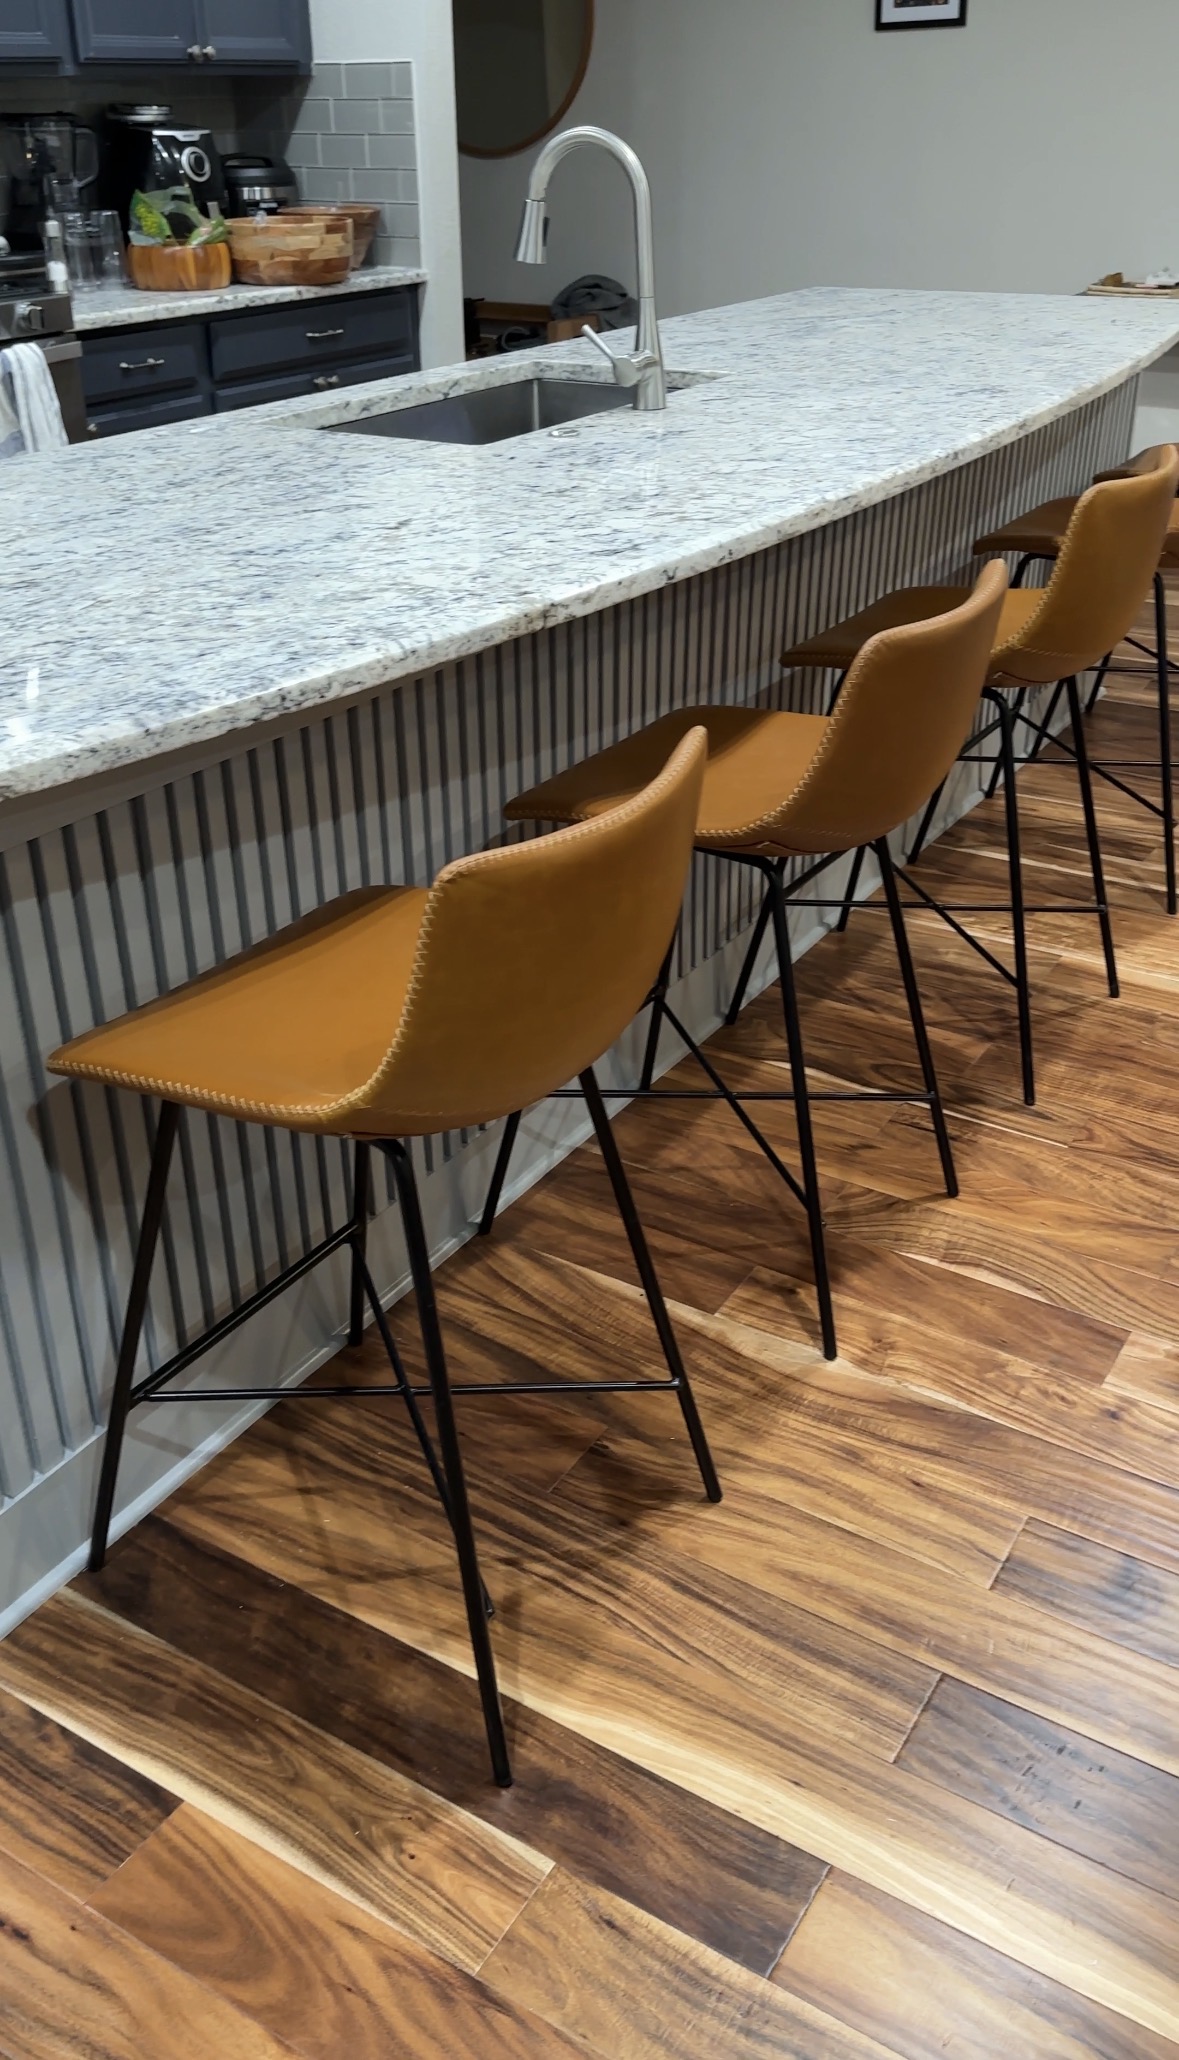
Before installation, I removed the trim at the top of the wall so the slats could run all the way up for a seamless, built-in look. And… let’s just say the drywall underneath wasn’t pretty.
Since the slats and trim fully cover the wall, I didn’t stress about making the drywall perfect first. (And yes — YouTube had opinions about this choice 😅.) But once the trim went back up, none of that damage was visible, so patching it would’ve just been wasted time, effort, product, and money. Sometimes the smartest DIY move is knowing what actually matters in the finished result.

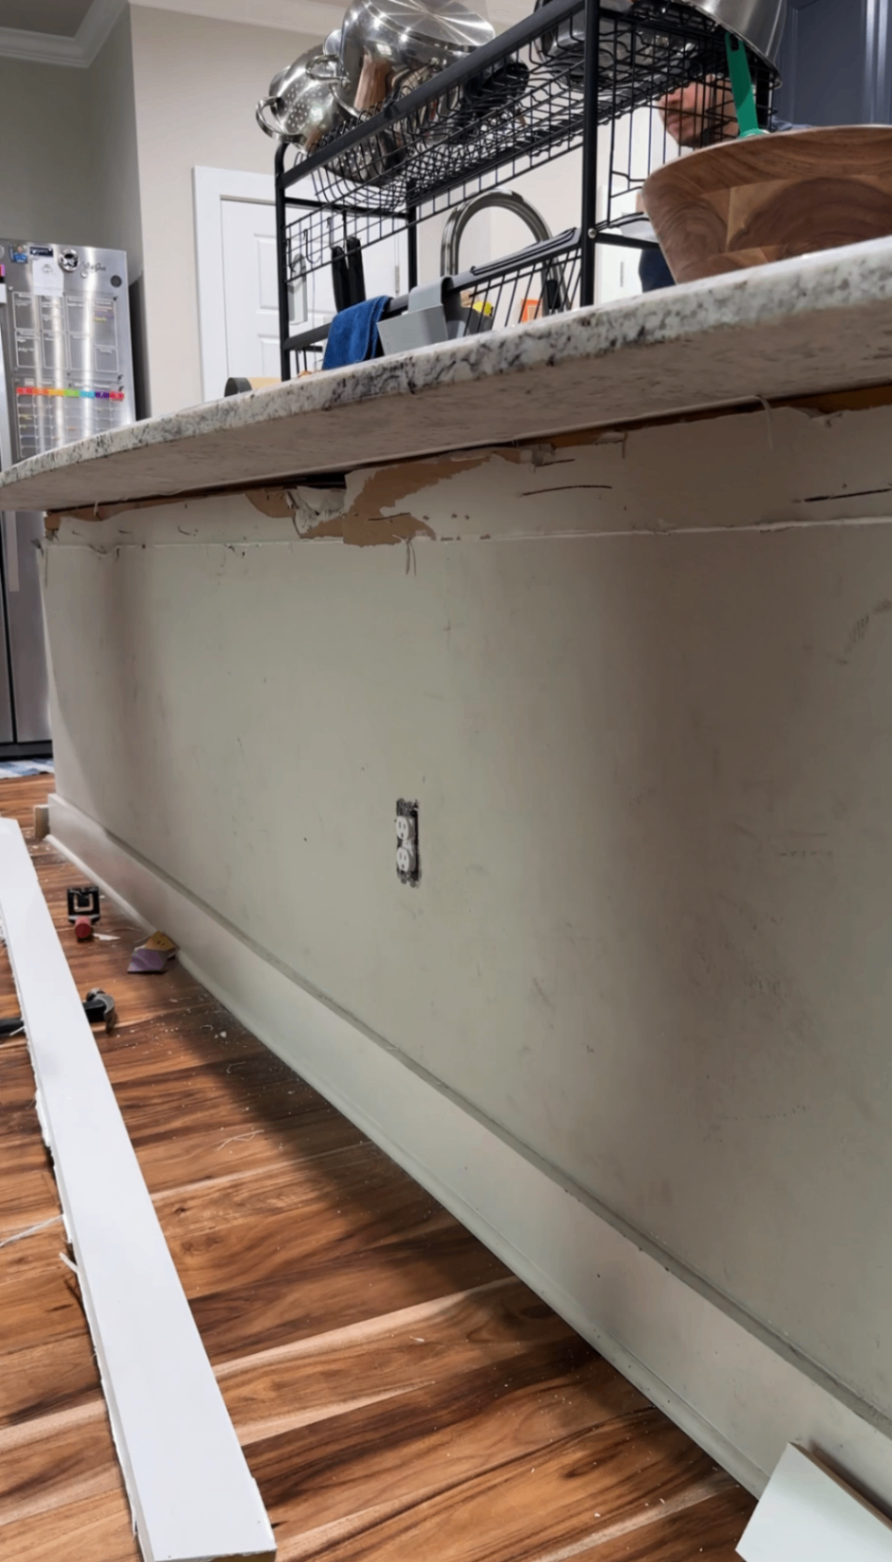
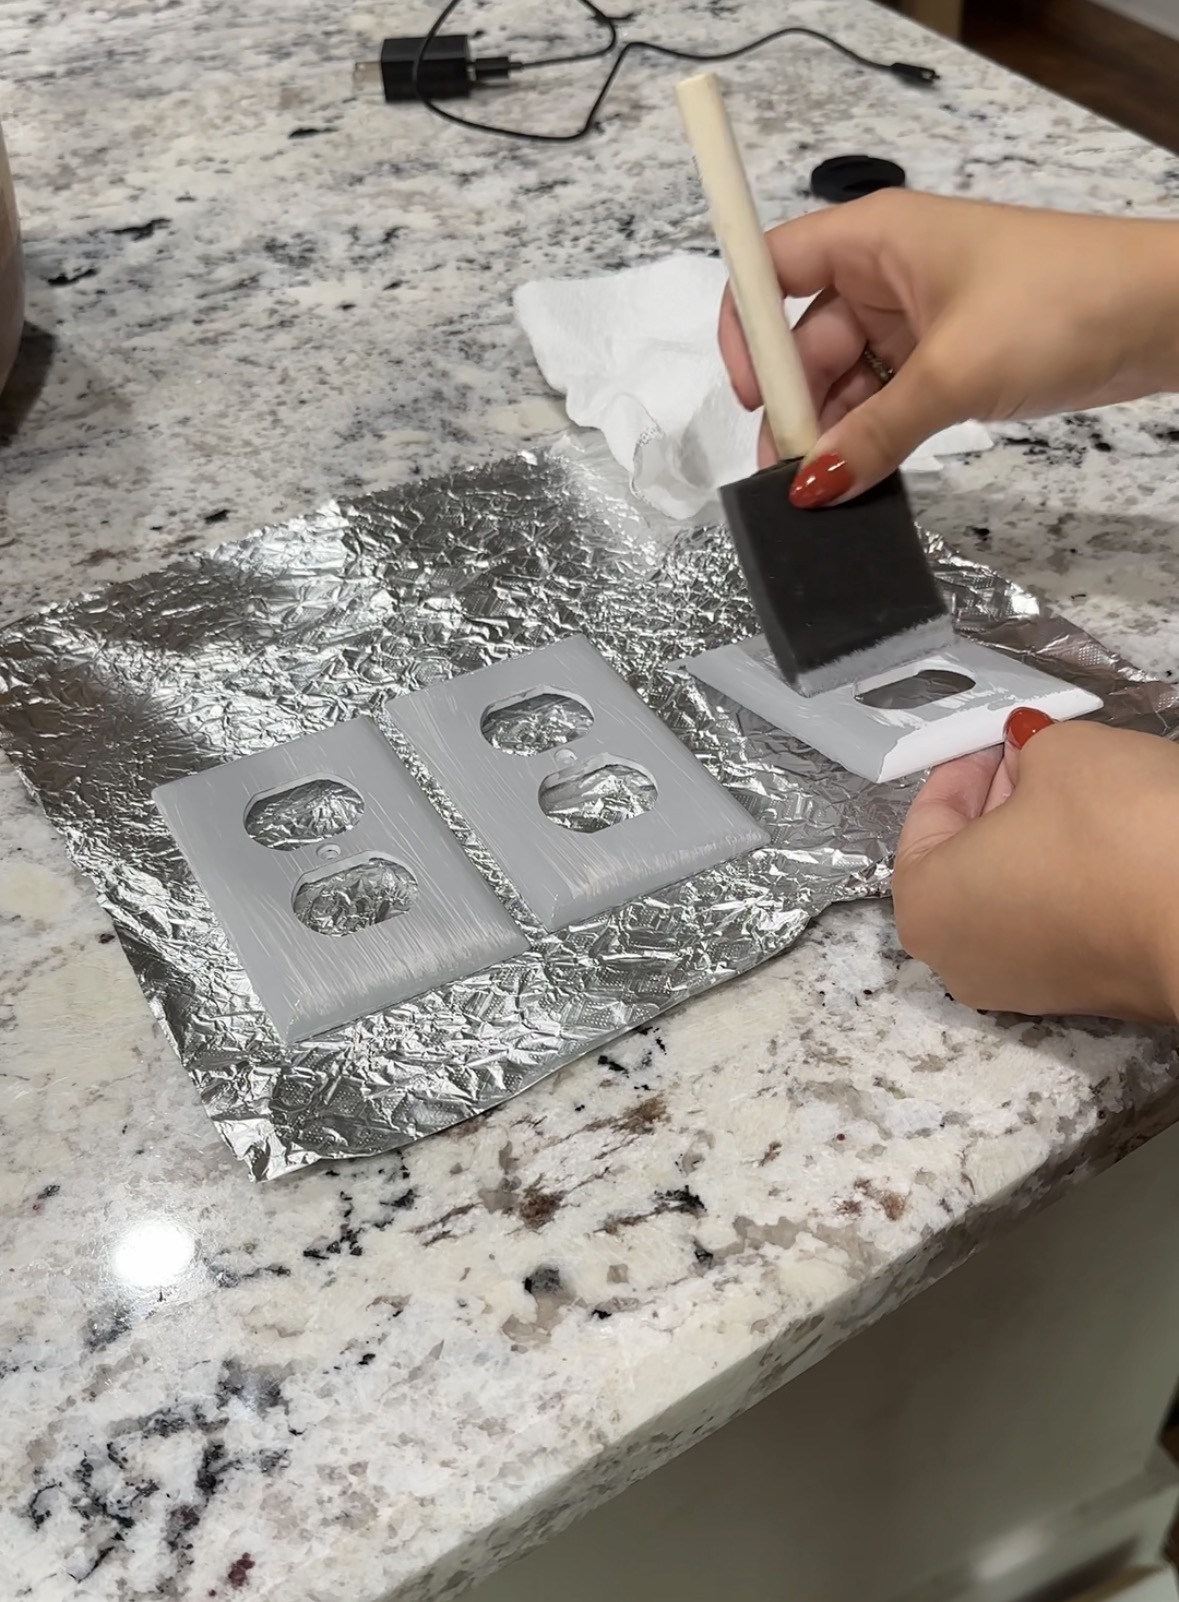
I also removed the outlet covers and painted them to match the wall color so they would blend in once everything was installed.
Step 3: Painting the Wall
Before attaching any slats, it’s important to paint the wall. This step makes the entire project easier and gives you a much cleaner final result.
Painting first allows you to use a roller and cover the wall quickly and evenly. Once the slats are installed, trying to paint behind them means working a brush into every narrow gap and angle - which is time -consuming, messy, and nearly impossible to do perfectly.
By painting the wall ahead of time, you ensure the background color is consistent and fully covered, so nothing shows through between the slats once they’re installed. It also minimizes touch-ups later and helps the finished slat wall look more intentional and professional.
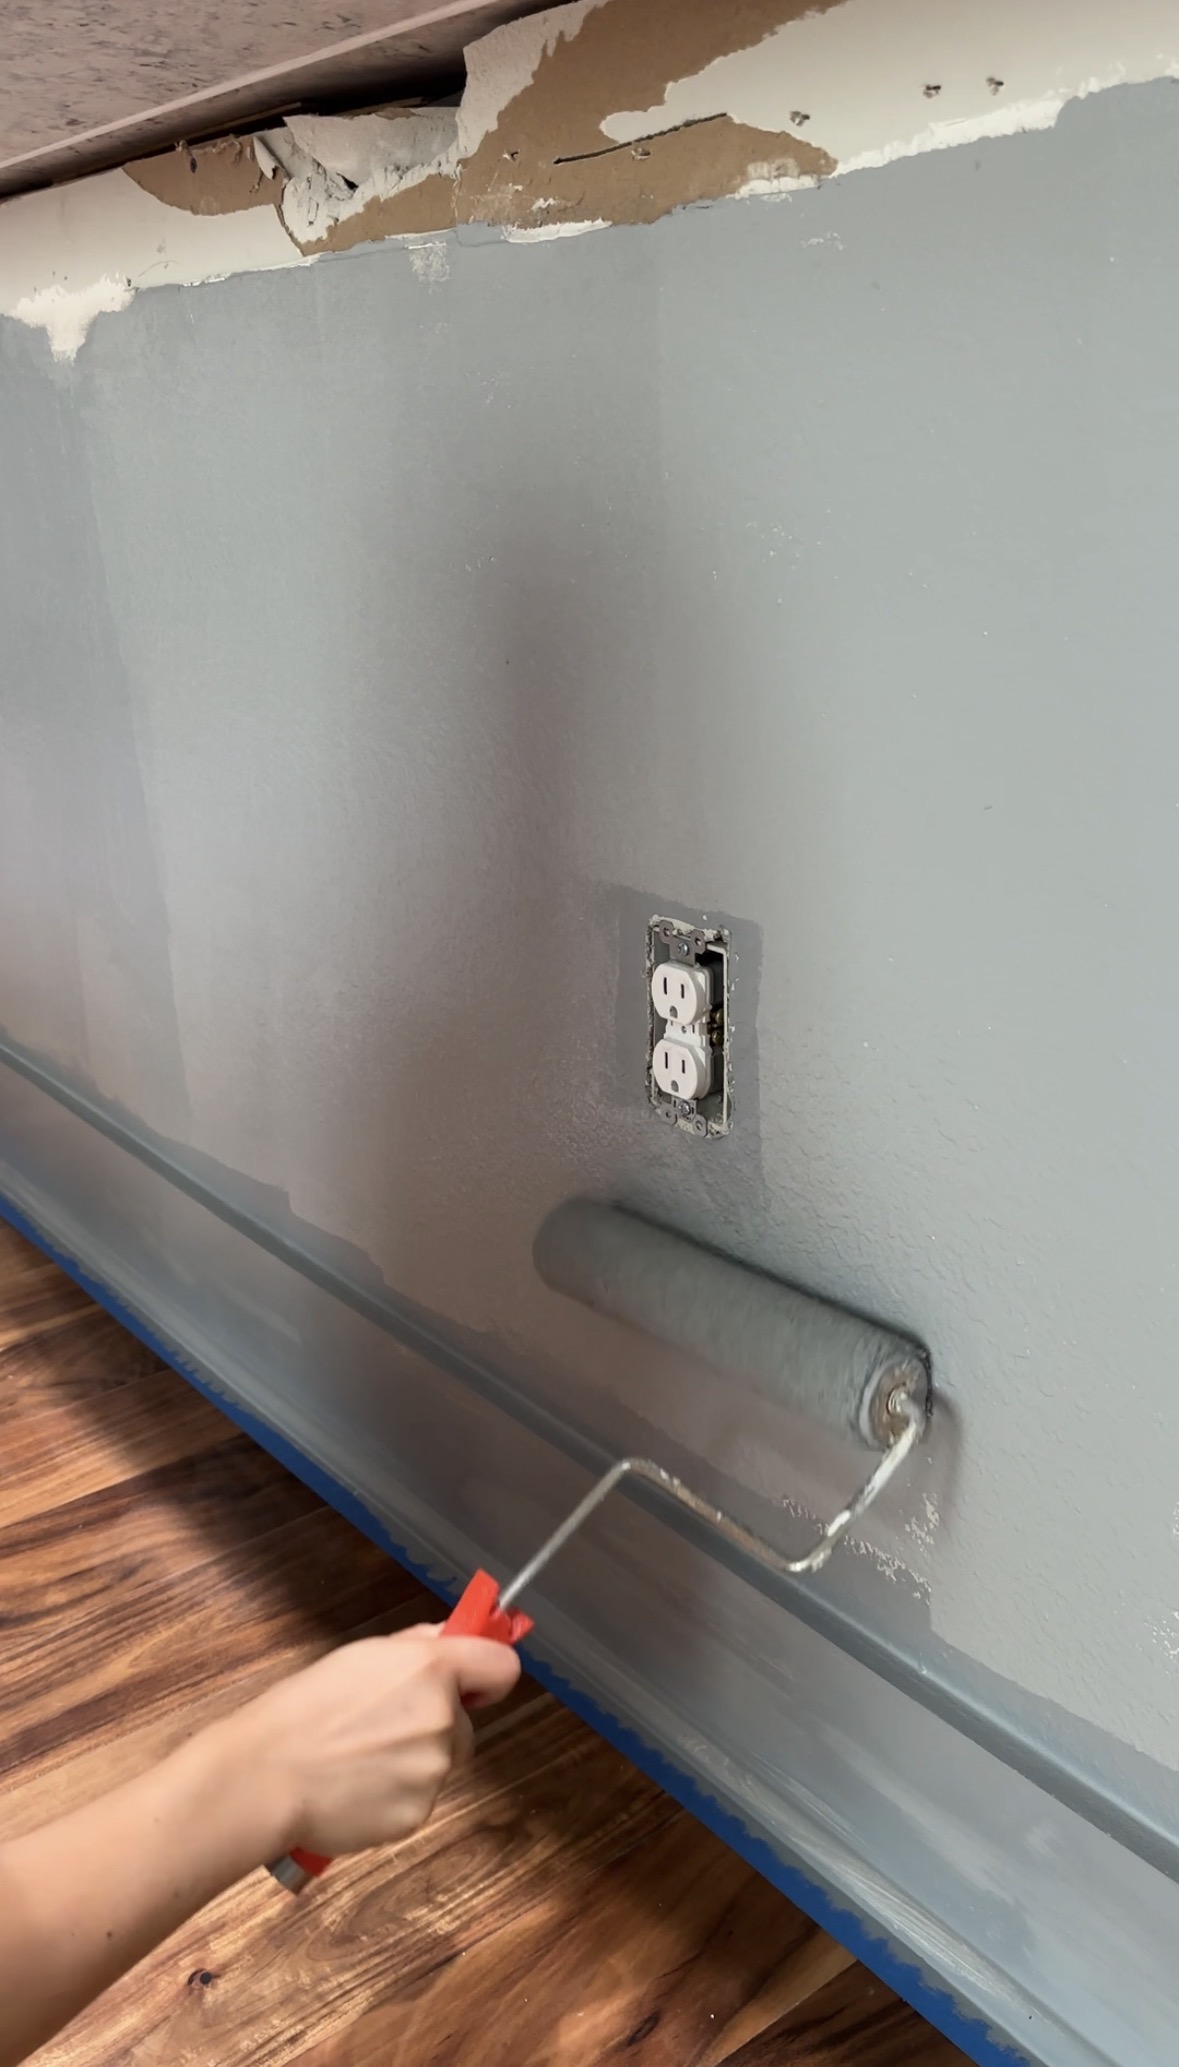
This simple step saves a lot of frustration down the line and sets you up for a smoother installation in the next phase.
Step 4: Installing the Slats
Now for the fun part. I secured each slat using three nails with my brad nailer, spacing them evenly using a spare slat turned sideways to create consistent ½” gaps.
Every few rows, I checked with a level to keep everything straight — small shifts add up quickly with a pattern like this.
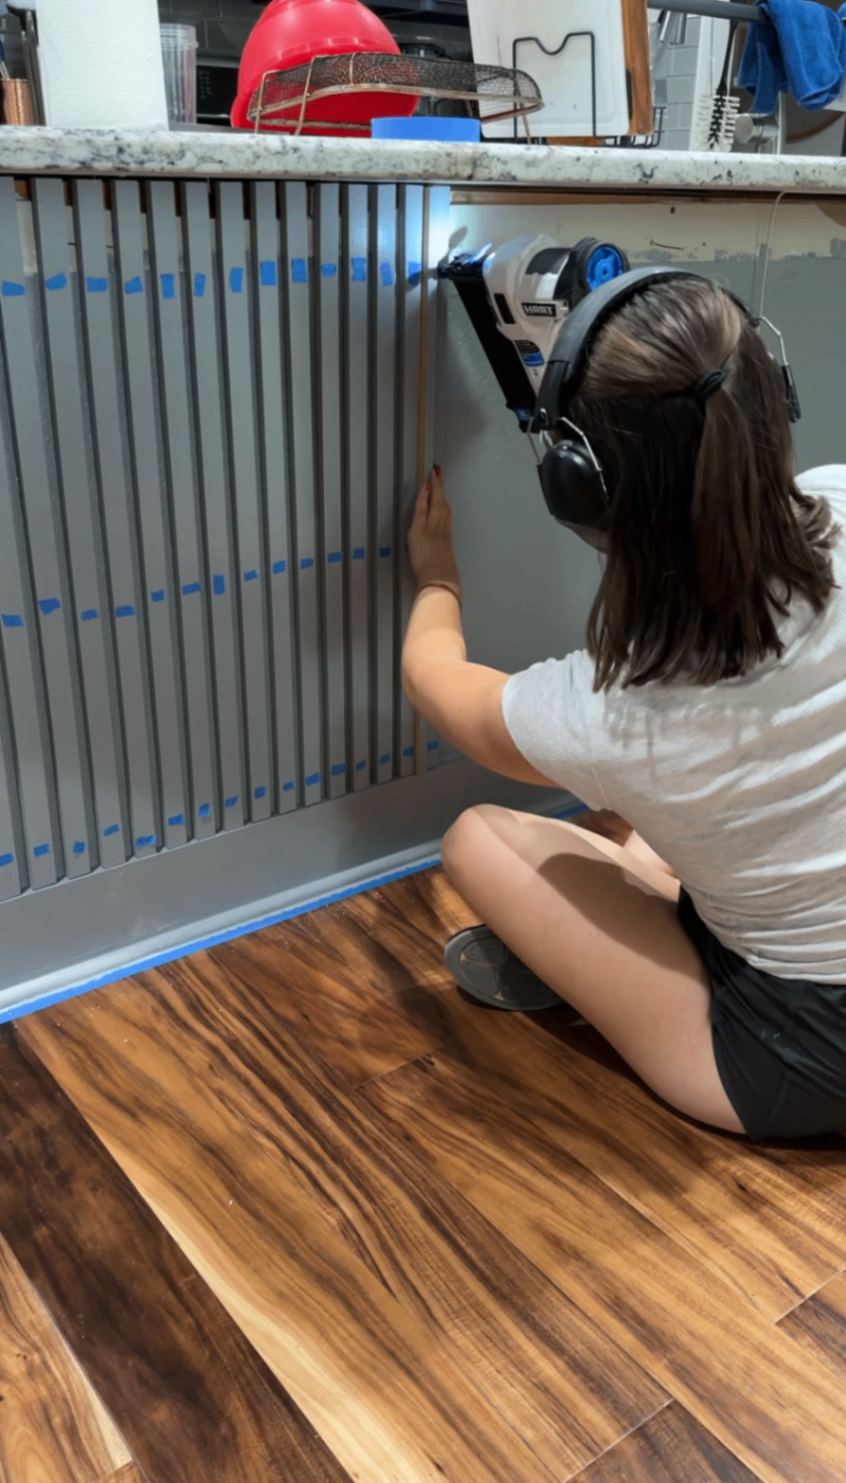
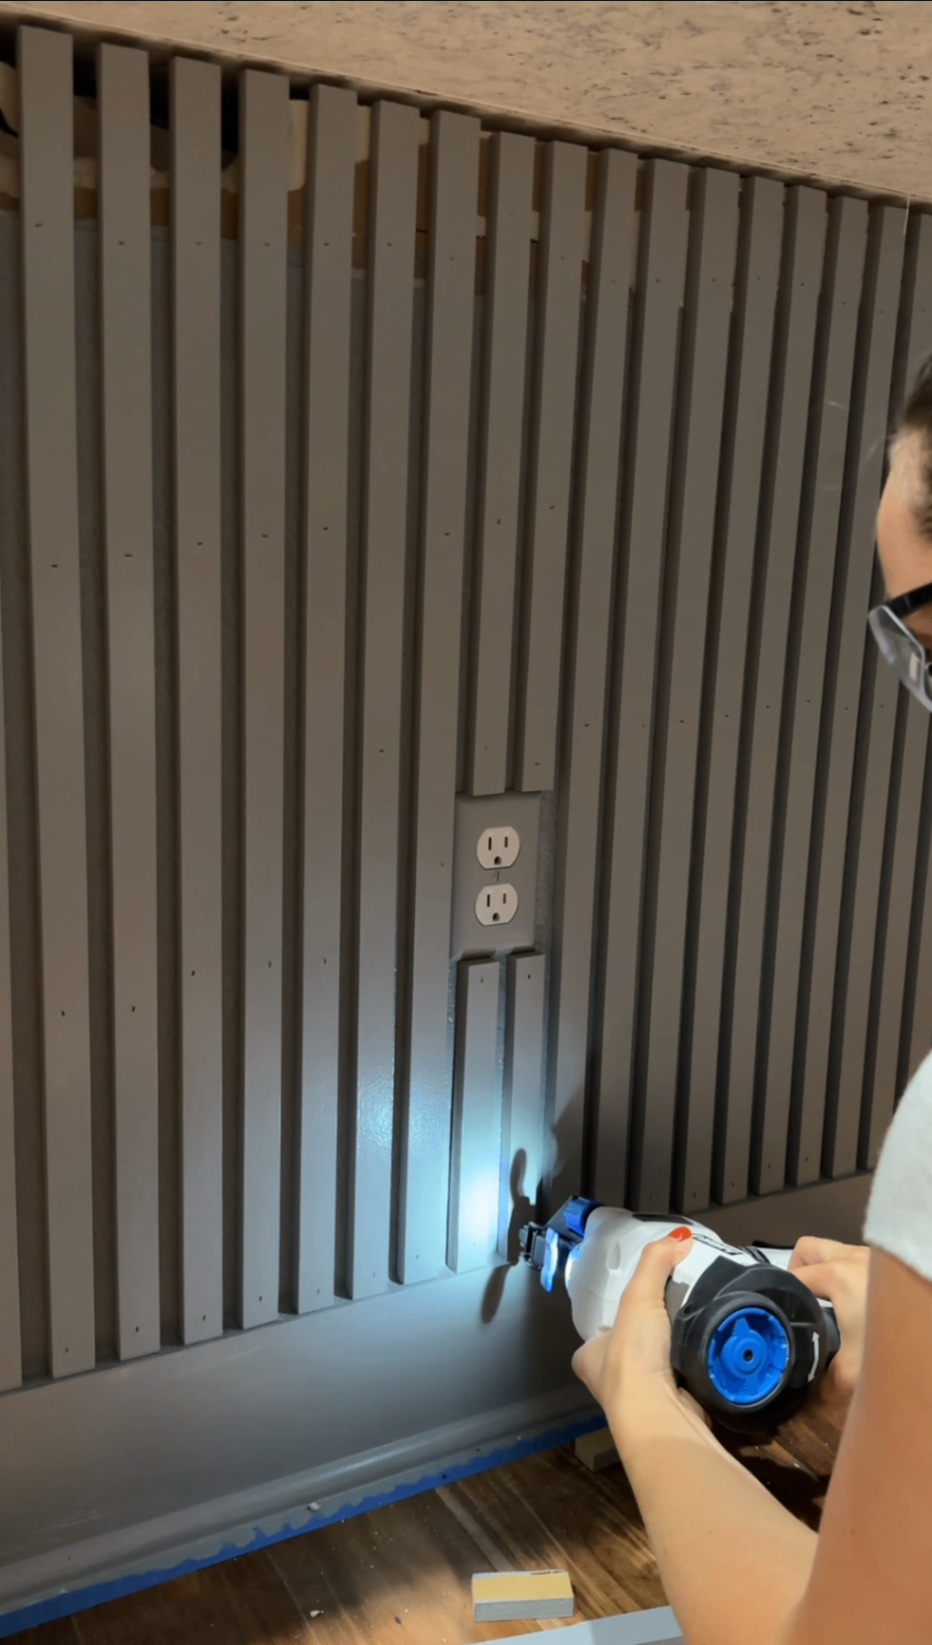
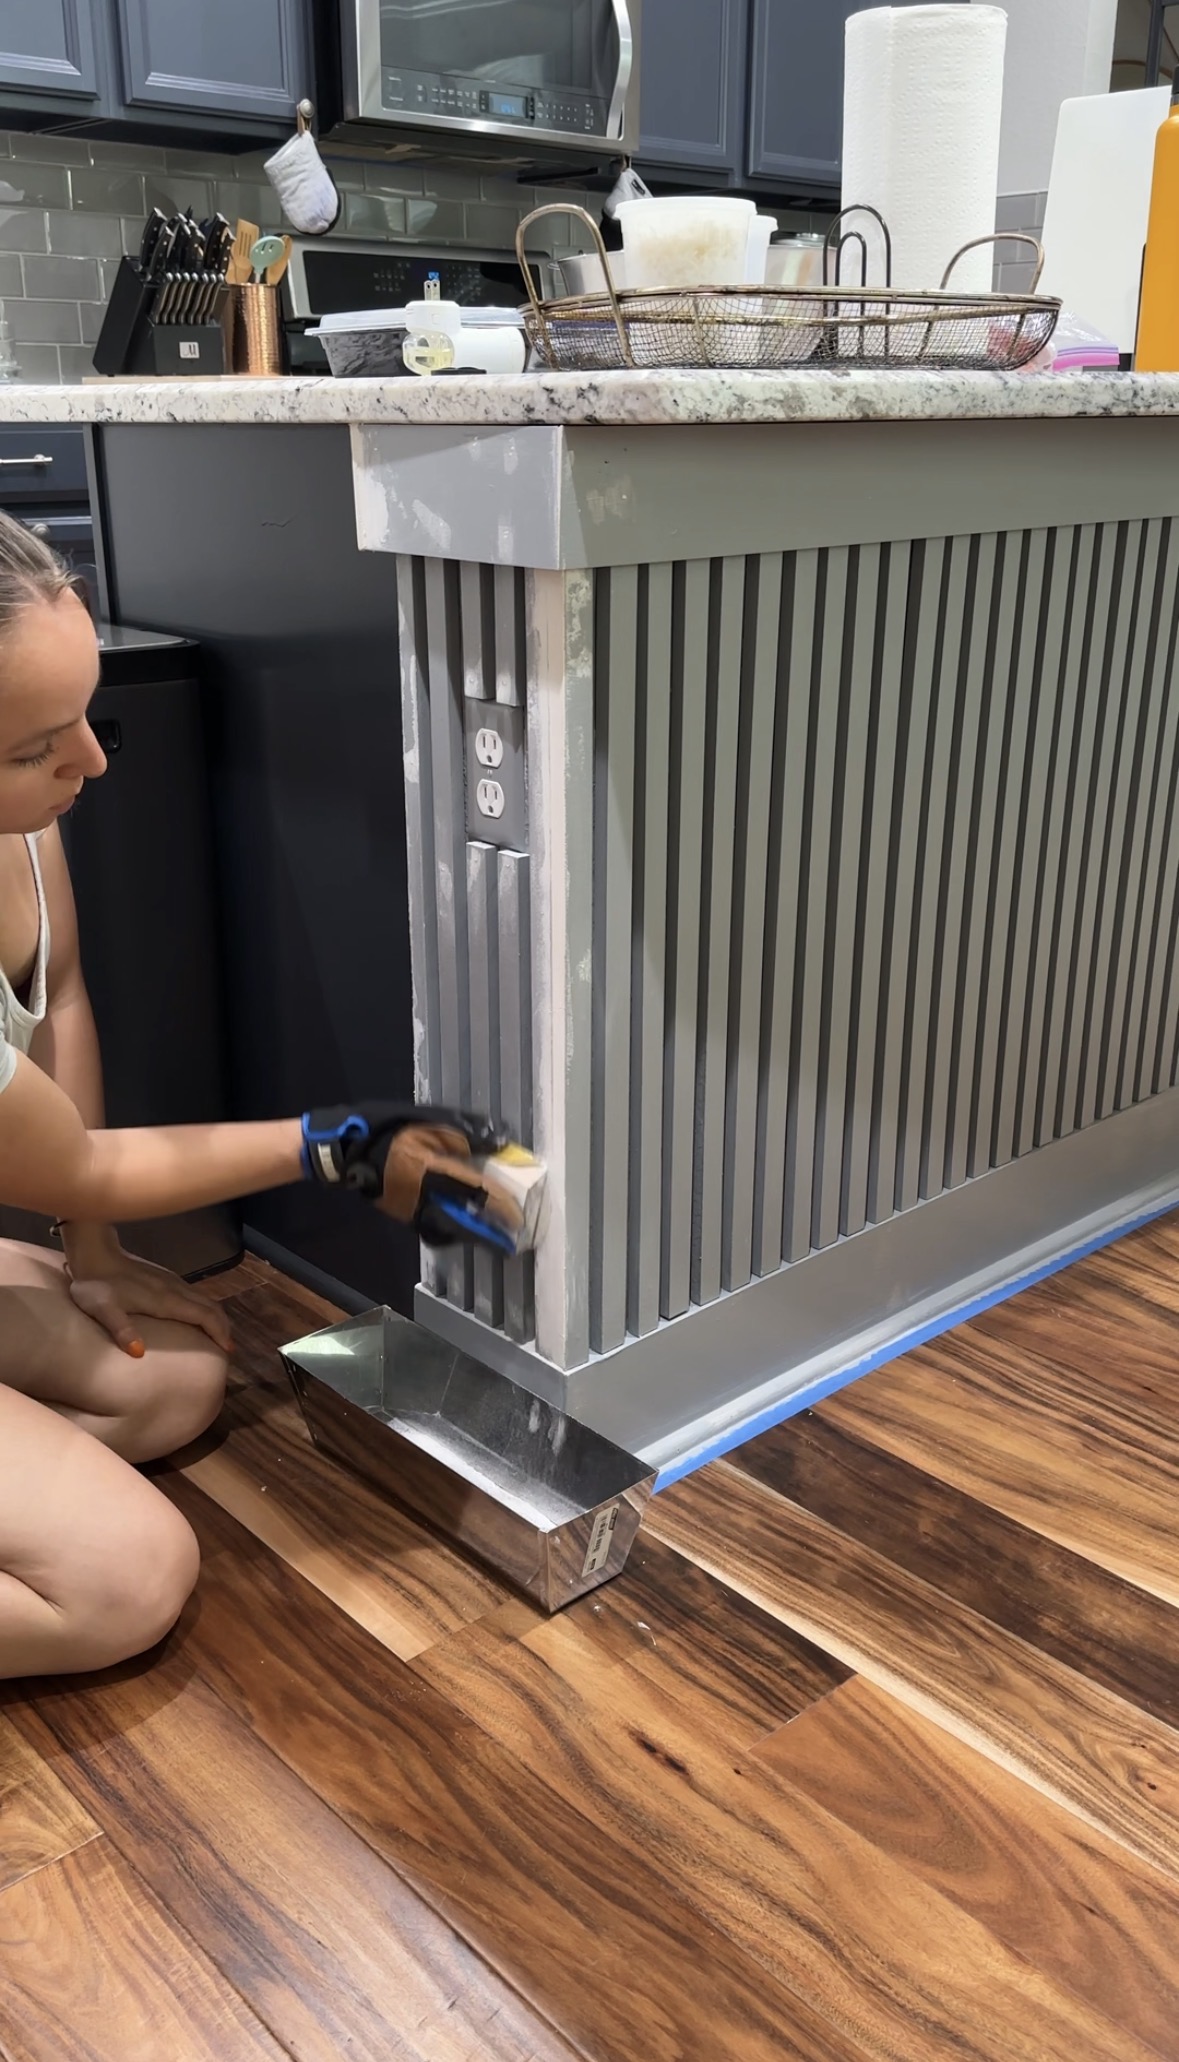
For outlets, I cut custom slat pieces so everything fit cleanly. On corners, I planned ahead to overlap the front slat over the side slat (as opposed to the side slat over the front slat) for a polished finish with no awkward seams. It's all in the details!
Step 5: Filling, Caulking & Touch-Ups
Once all the slats were installed, I went through and filled every nail hole and seam with spackle to prep the wall for final touchups and paint. Taking the time to do this step carefully makes a huge difference in how polished the finished slat wall looks.
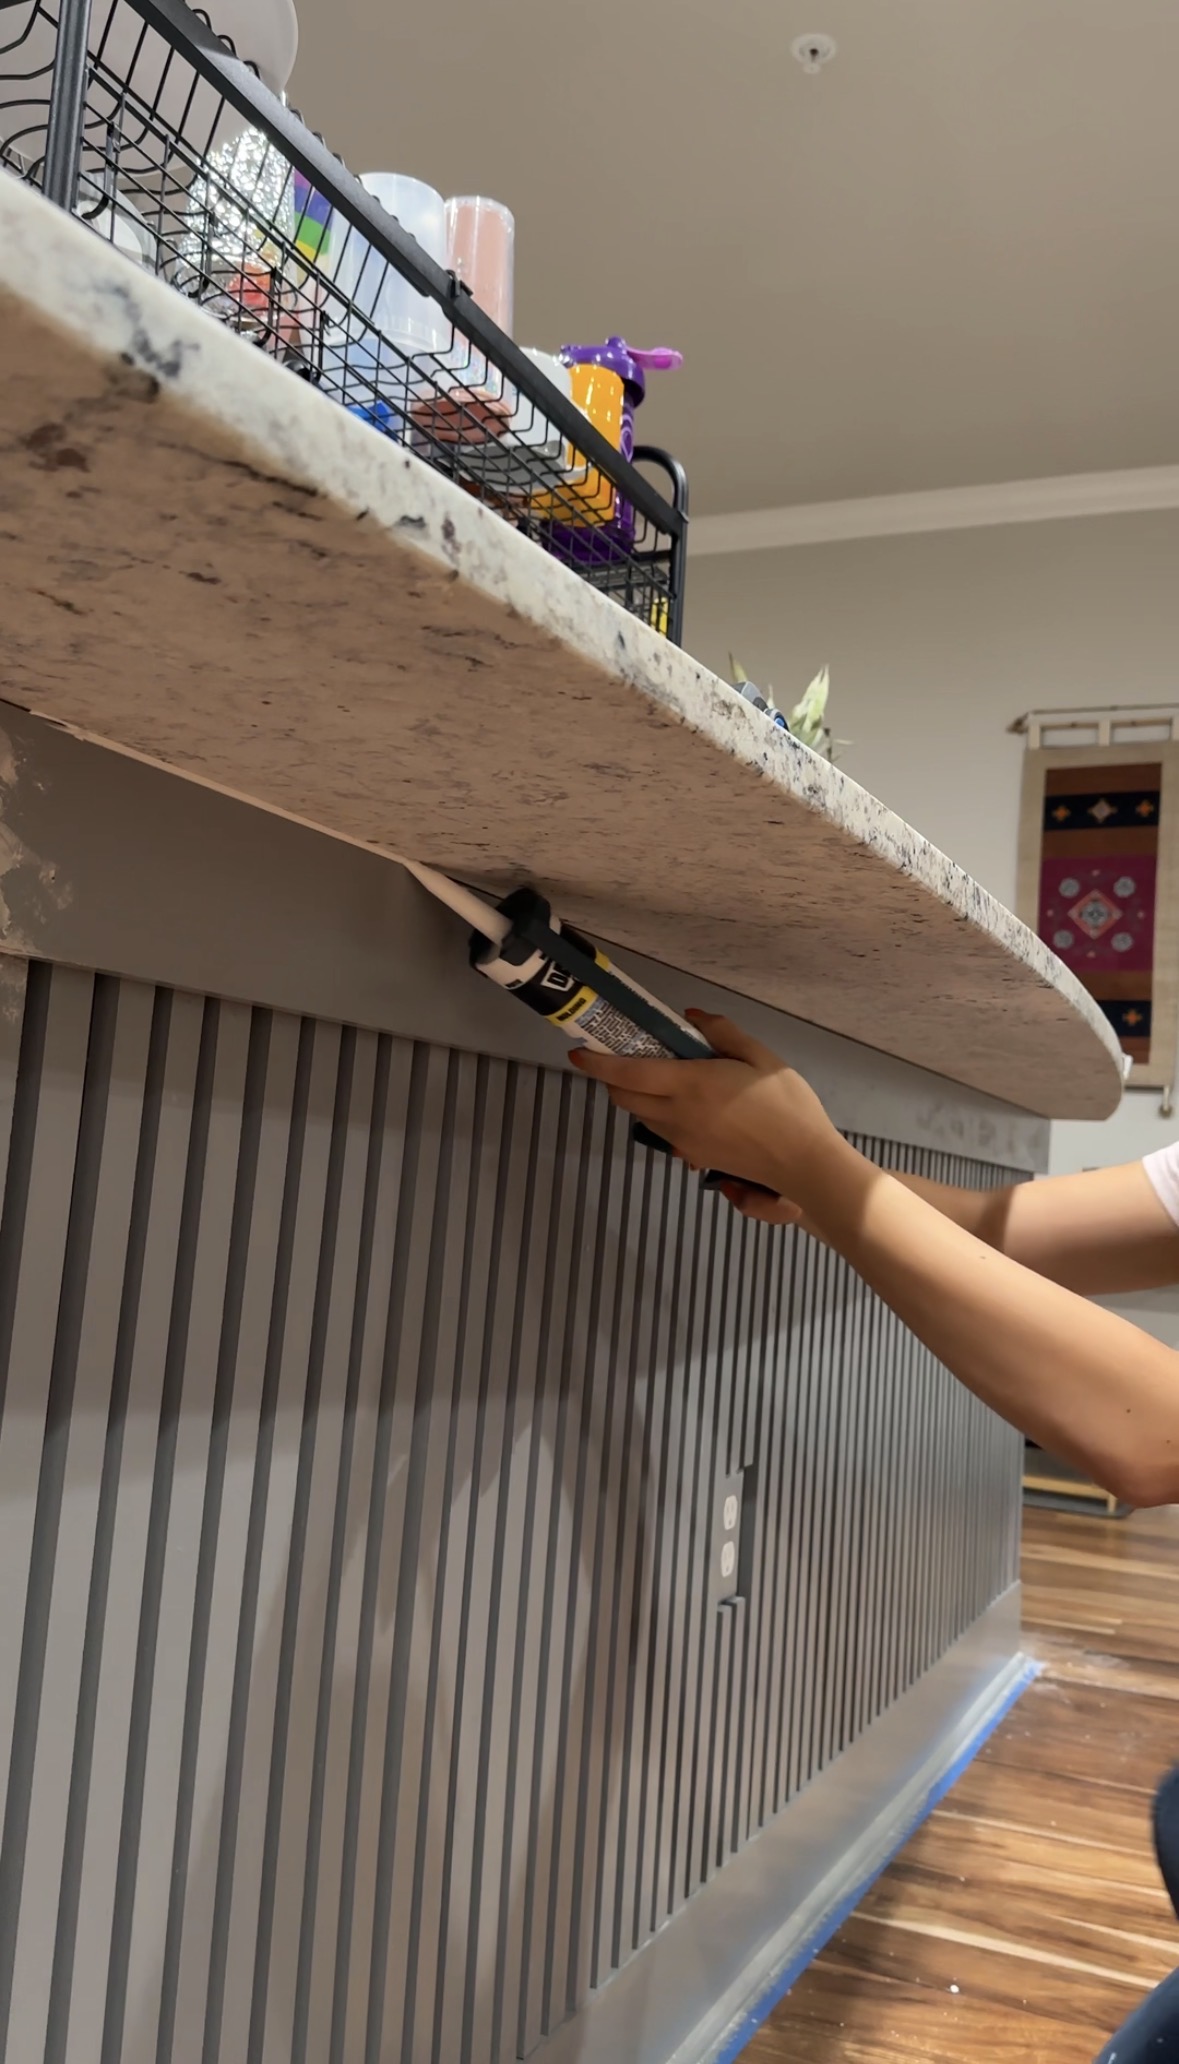

Confession time: I did hit a snag when reinstalling the upper trim. I nailed it on crooked and had to remove it - along with several slats - to fix it. Morale dipped briefly, but that’s DIY life. After reinstalling everything correctly, I caulked the front edges of each slat to make the wall feel truly custom.
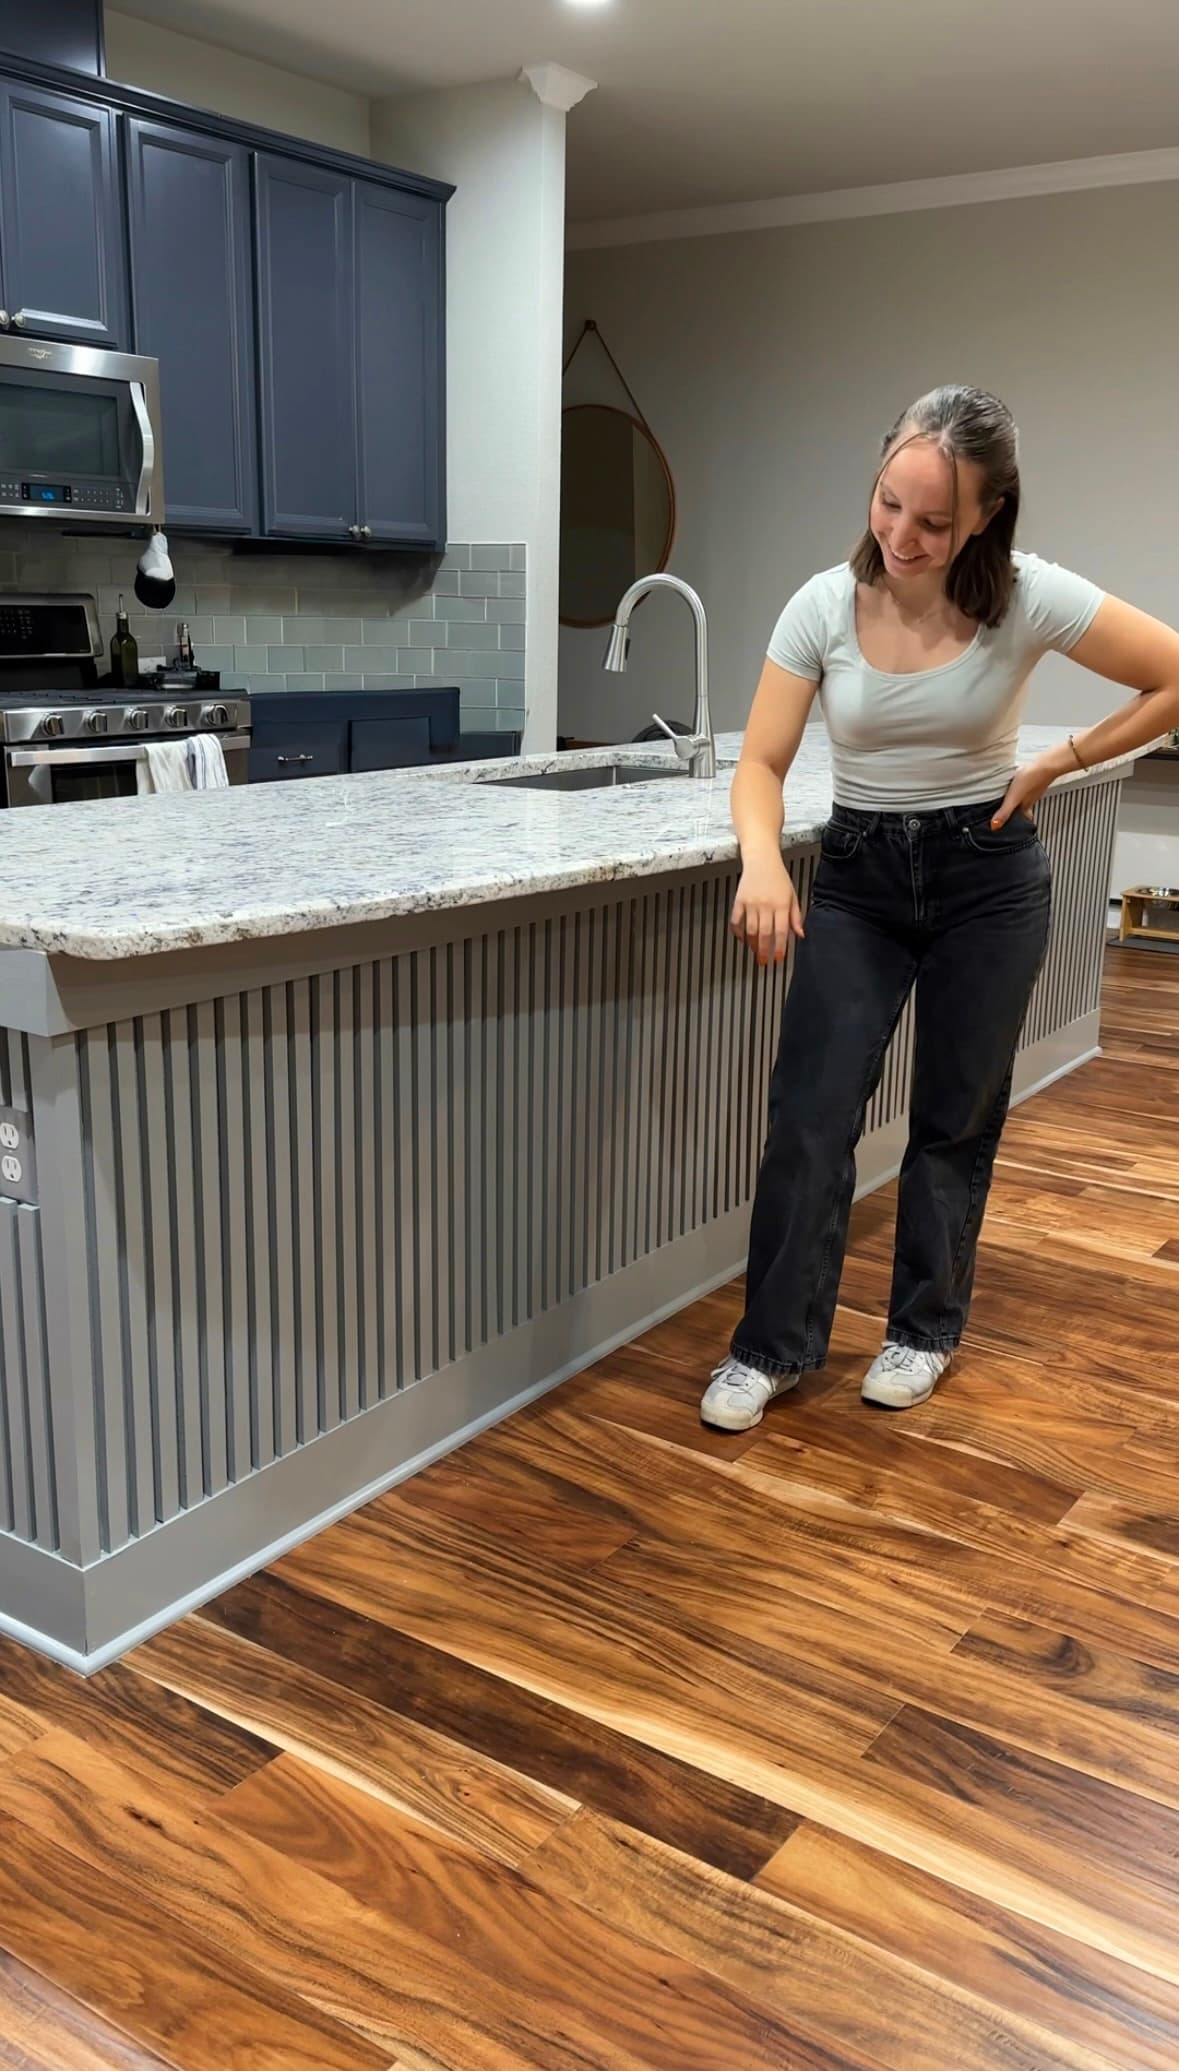
The Finished Look ✨
After peeling the tape and doing final touch-ups, the slat wall turned out sleek, modern, and completely custom - without the high price tag. Best of all, it was budget-friendly, and my friends absolutely love how much character it adds to their space.
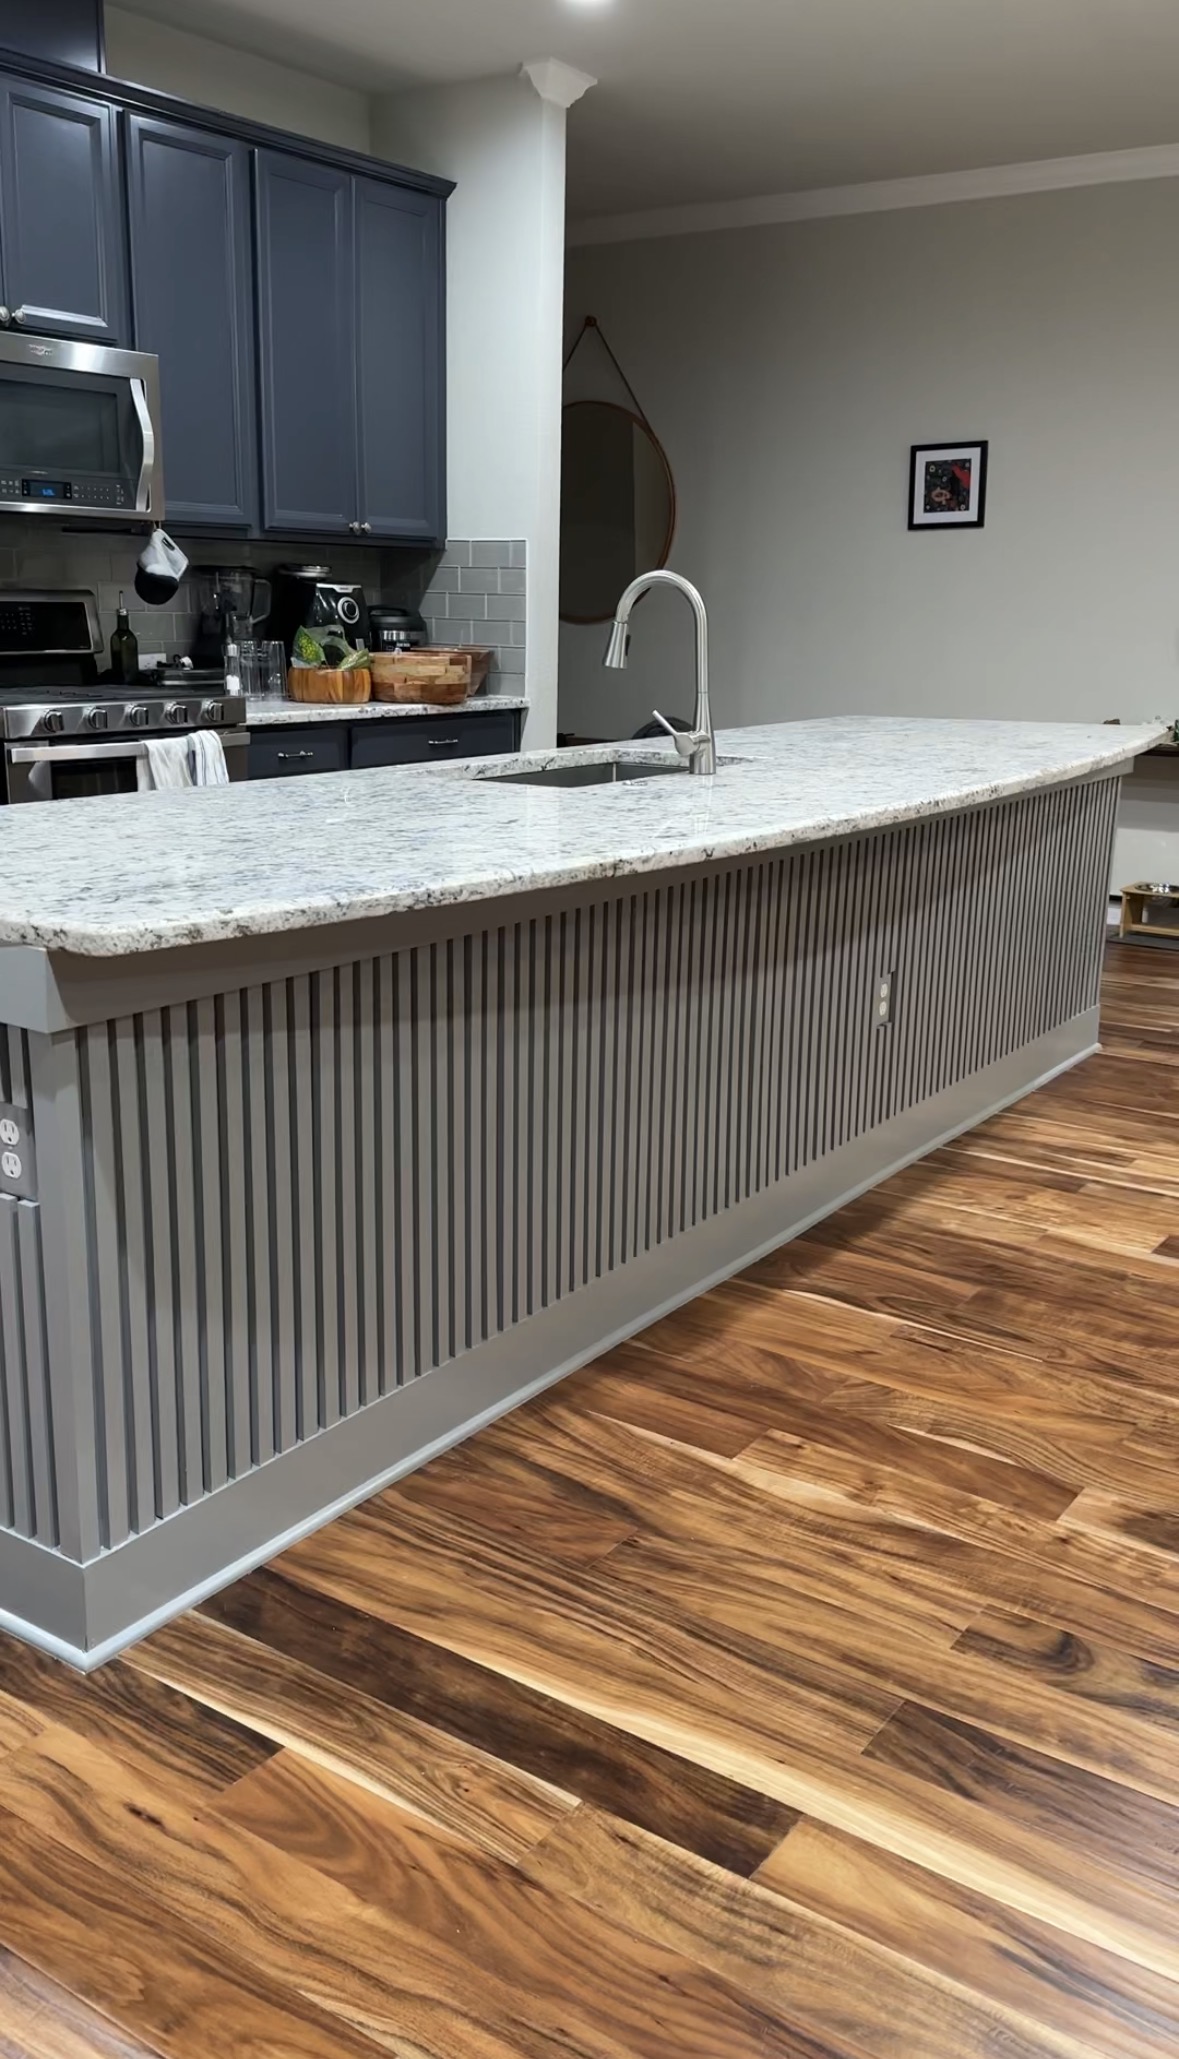
This design is incredibly versatile and works in living rooms, bedrooms, hallways, entryways, or anywhere you want a statement wall.
Looking for more DIY wall ideas? Check out my textured wall art tutorial, where I show you how to create a custom, high-end look on a budget.
📌 And if this is a project you might want to come back to later, make sure to save or pin for reference!