DIY Wire Diamond Trellis With Star Jasmine (Step-by-Step Guide)
Learn how we transformed a plain front wall into a gorgeous star jasmine feature using a DIY wire diamond trellis. This simple project adds instant curb appeal and only takes a weekend to install.
DIY Wire Diamond Trellis With Star Jasmine (Full Tutorial + Measurements)
If you’ve been wanting to add instant curb appeal to your home without spending thousands on landscaping, a DIY wire diamond trellis with star jasmine might be the perfect project. We just finished this makeover on the front of my sister’s house—right after painting her exterior (you can read that post here)—and the transformation is so good.
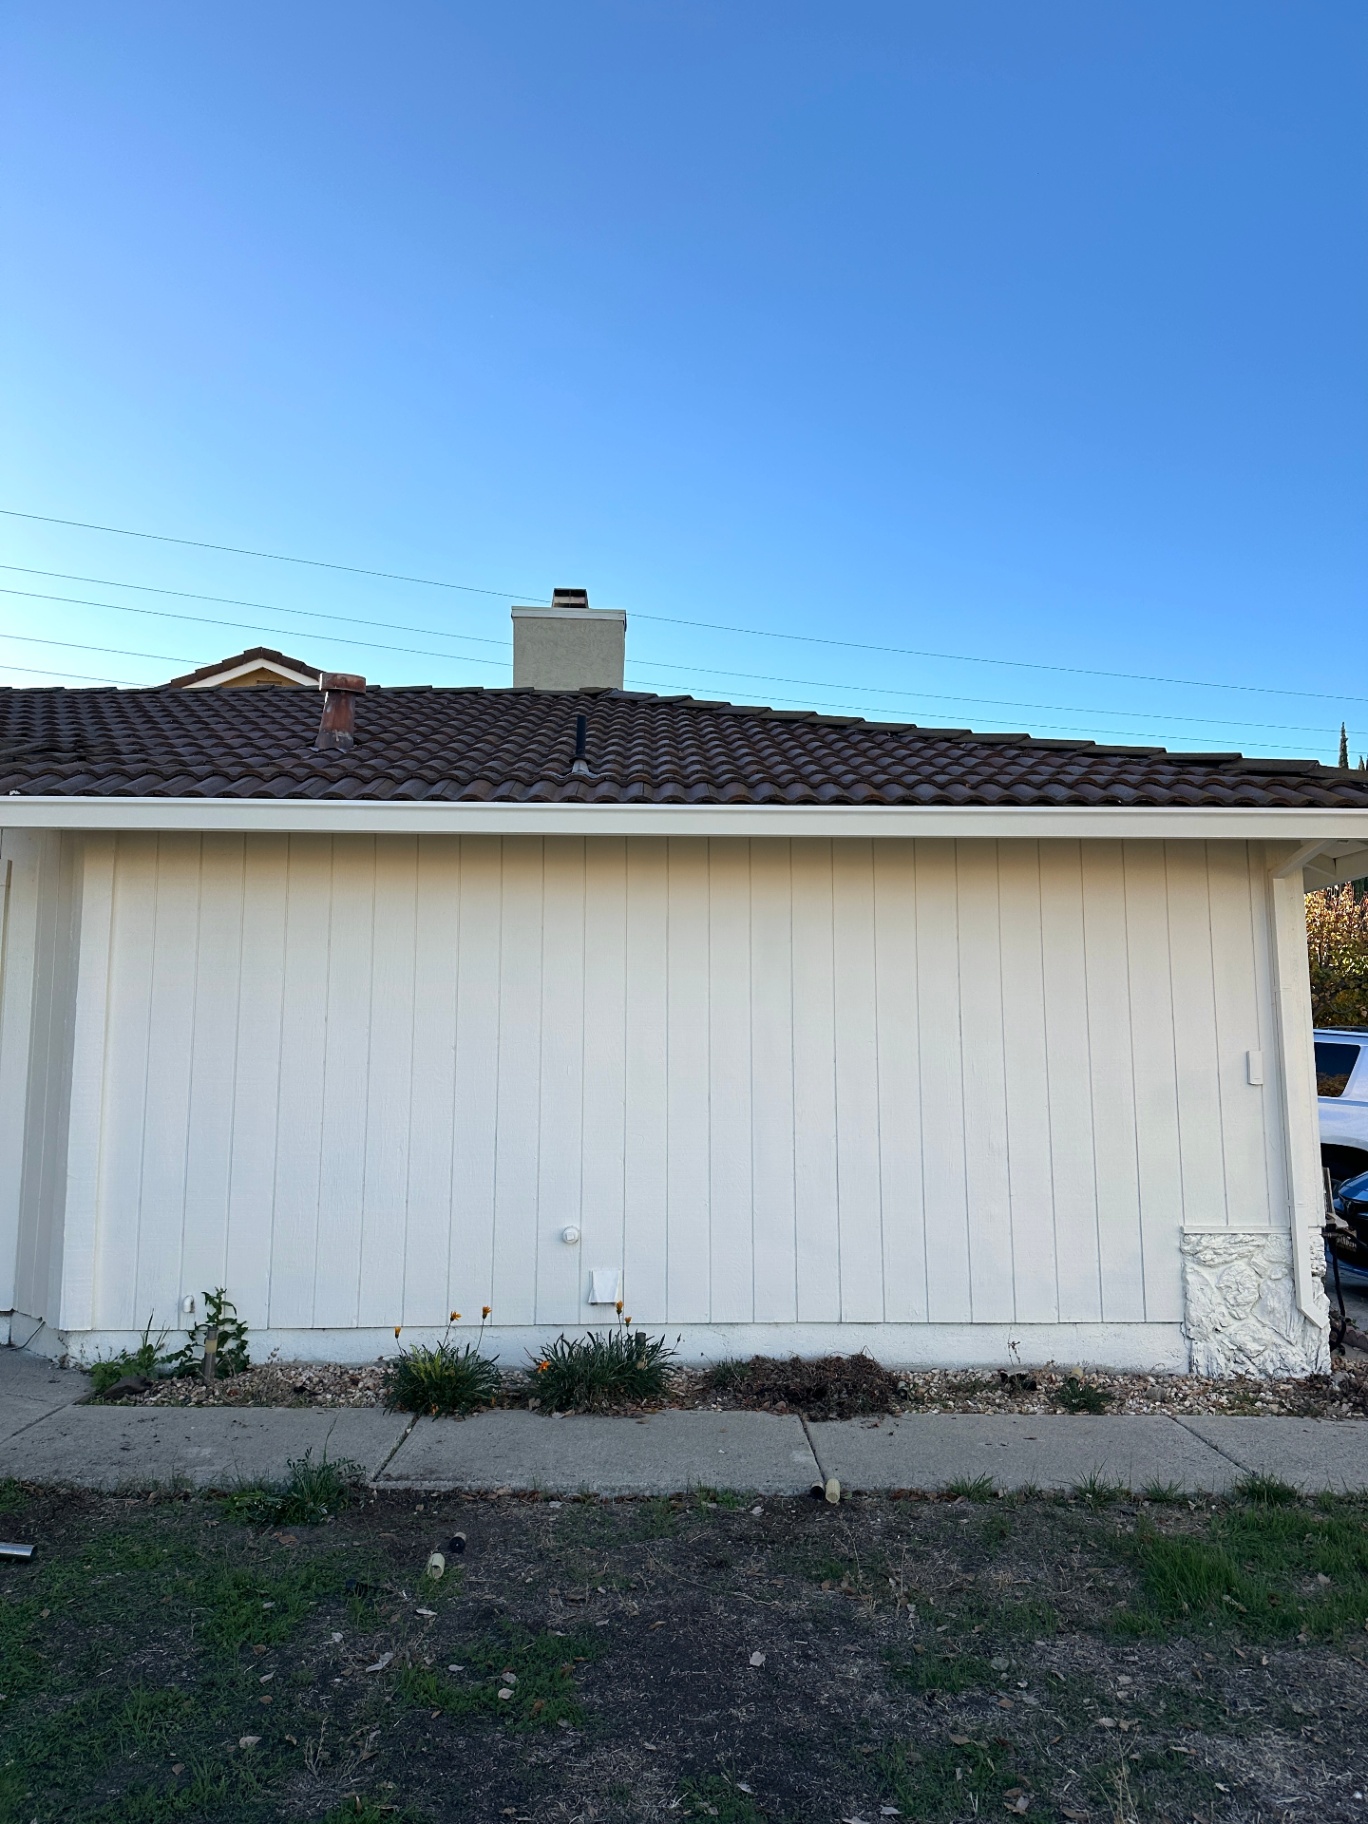
The front of her house originally had nothing but weed barrier, weeds, and… a random Folgers coffee container? Truly no idea. But now it has structure, greenery, and the start of a gorgeous jasmine wall that’s going to fill in beautifully over the next couple of years.
In this post, I’ll walk you through exactly how we planned, measured, and installed a diamond trellis using wire + eye screws, how we planted the star jasmine, and how you can recreate this look at home.
Why Star Jasmine Is Perfect for a Trellis Wall
Before we get into the installation process, let’s talk plants.
Star jasmine (Trachelospermum jasminoides) is:
Evergreen
Hardy
Fast-growing once established
Perfect for USDA zones 8–11
Heat- and drought-tolerant
Wonderfully fragrant
Amazing for flat vertical surfaces
If you want a lush green wall with minimal maintenance and a massive payoff, jasmine is one of the best climbing plants you can choose.
Step 1: Clear + Prep the Area
We started by clearing out the front section of the house that had:
Old weed barrier
Layers of rocks
A Folgers coffee container buried in the dirt (???)
And plenty of weeds
Getting down to a clean, level surface makes the layout work much easier.
Step 2: Plan Your Diamond Pattern (THIS PART MATTERS)
Before drilling anything into your siding, take a moment to look up diamond trellis inspo online or on Pinterest.
Ask yourself:
Do you prefer tight, more square-shaped diamonds?
Or taller, elongated diamonds?
Do you want a border around the entire pattern?
Should the diamonds fill the whole wall?
Do you want the pattern centered or full-width?
Once you know the look, start planning your dimensions.
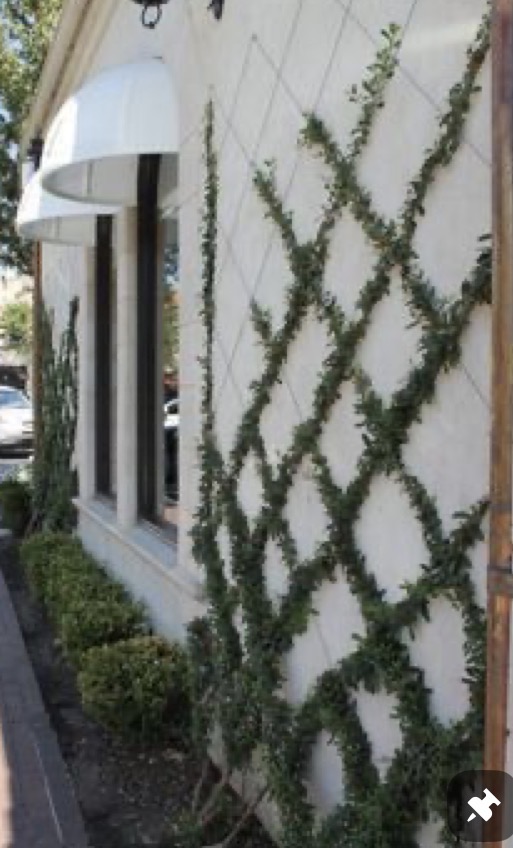
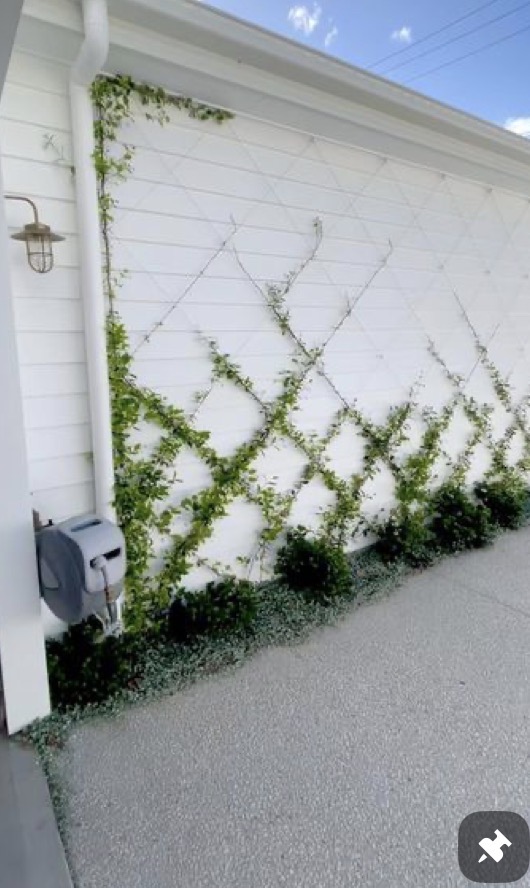
Our inspo:

How We Calculated Ours
We measured the overall width of the wall and then rounded up to a convenient number based on how many diamonds we wanted.
We chose:
6 diamonds across,
2 diamonds tall,
Which needed a span of 192 inches
Giving us 32 inches between each base point
This made the pattern visually balanced and easier to execute.
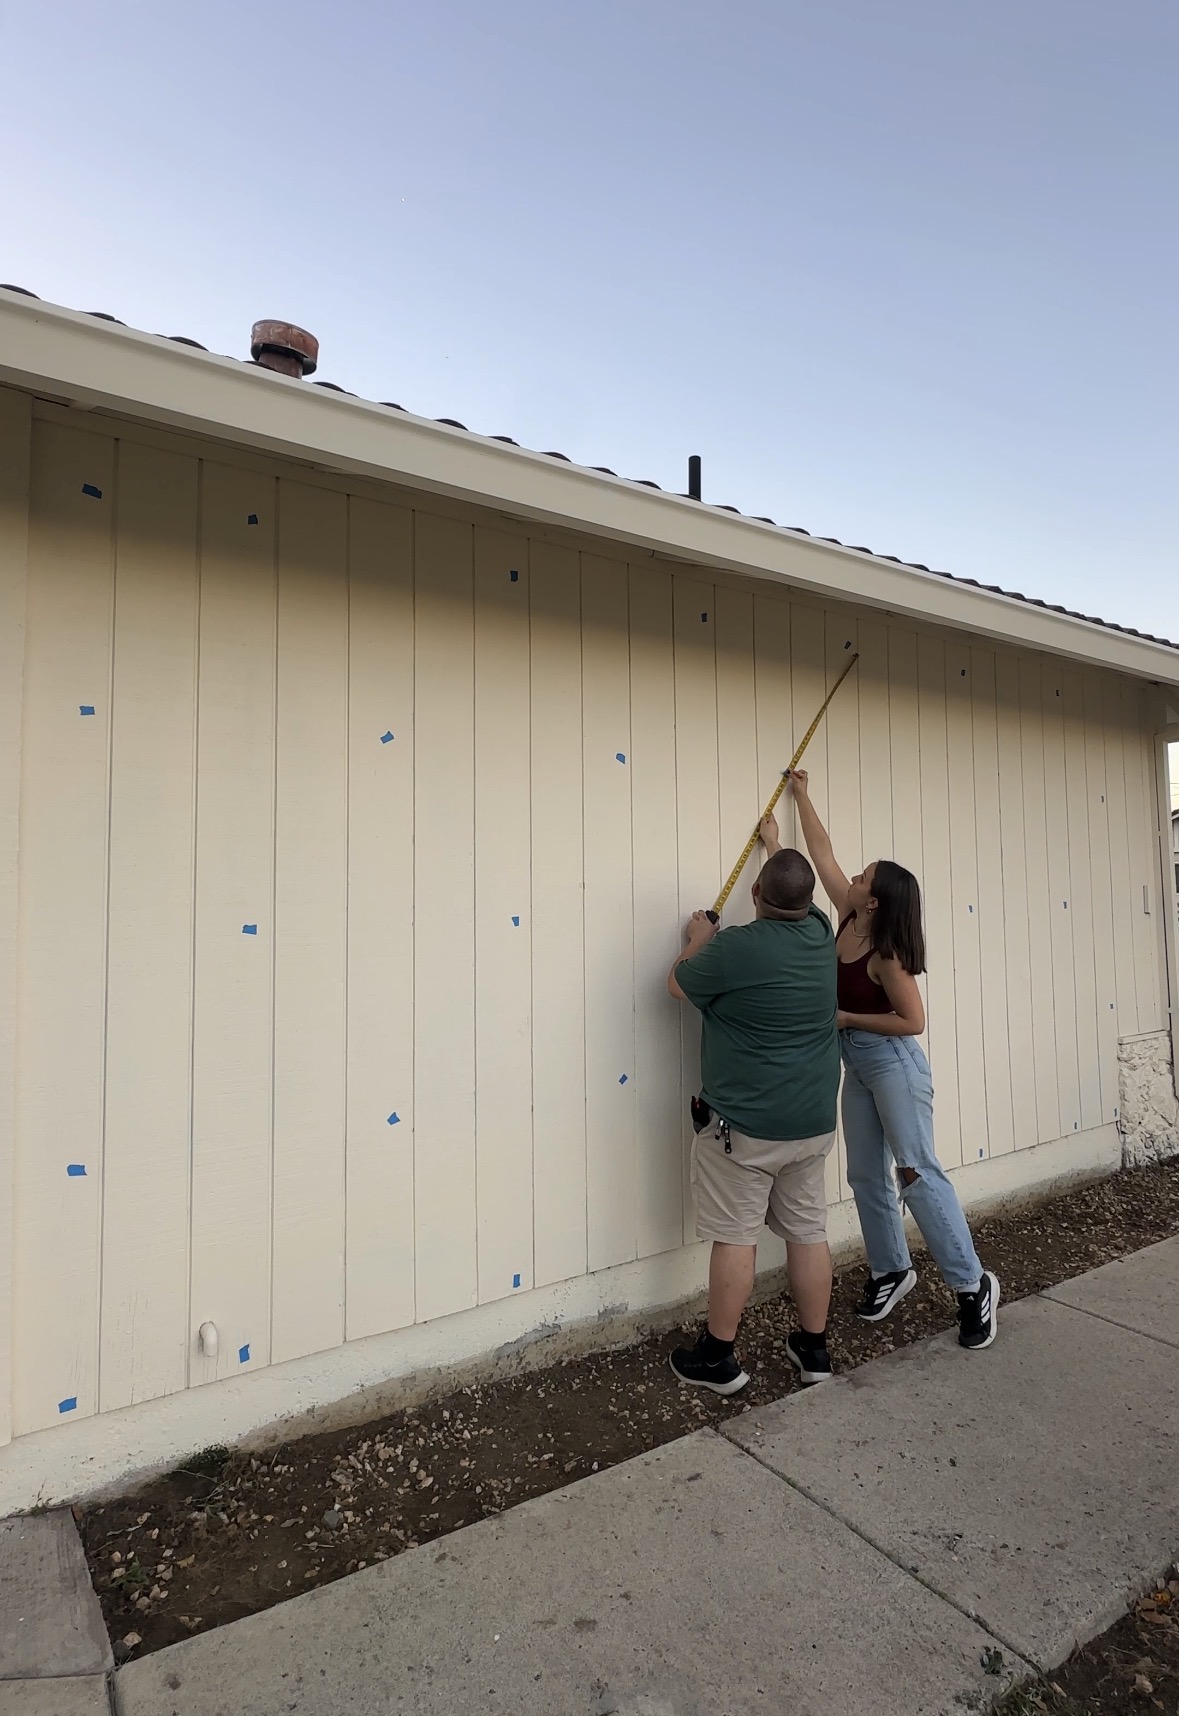
Step 3: Mark Everything With Painter’s Tape
This is the secret to a professional-looking trellis.
Use painter’s tape to mark:
Each intersection point
The top and bottom edges of the diamonds
The boundary of the pattern
This gives you a visual guide before you start drilling, and it makes installing the eye screws almost foolproof.
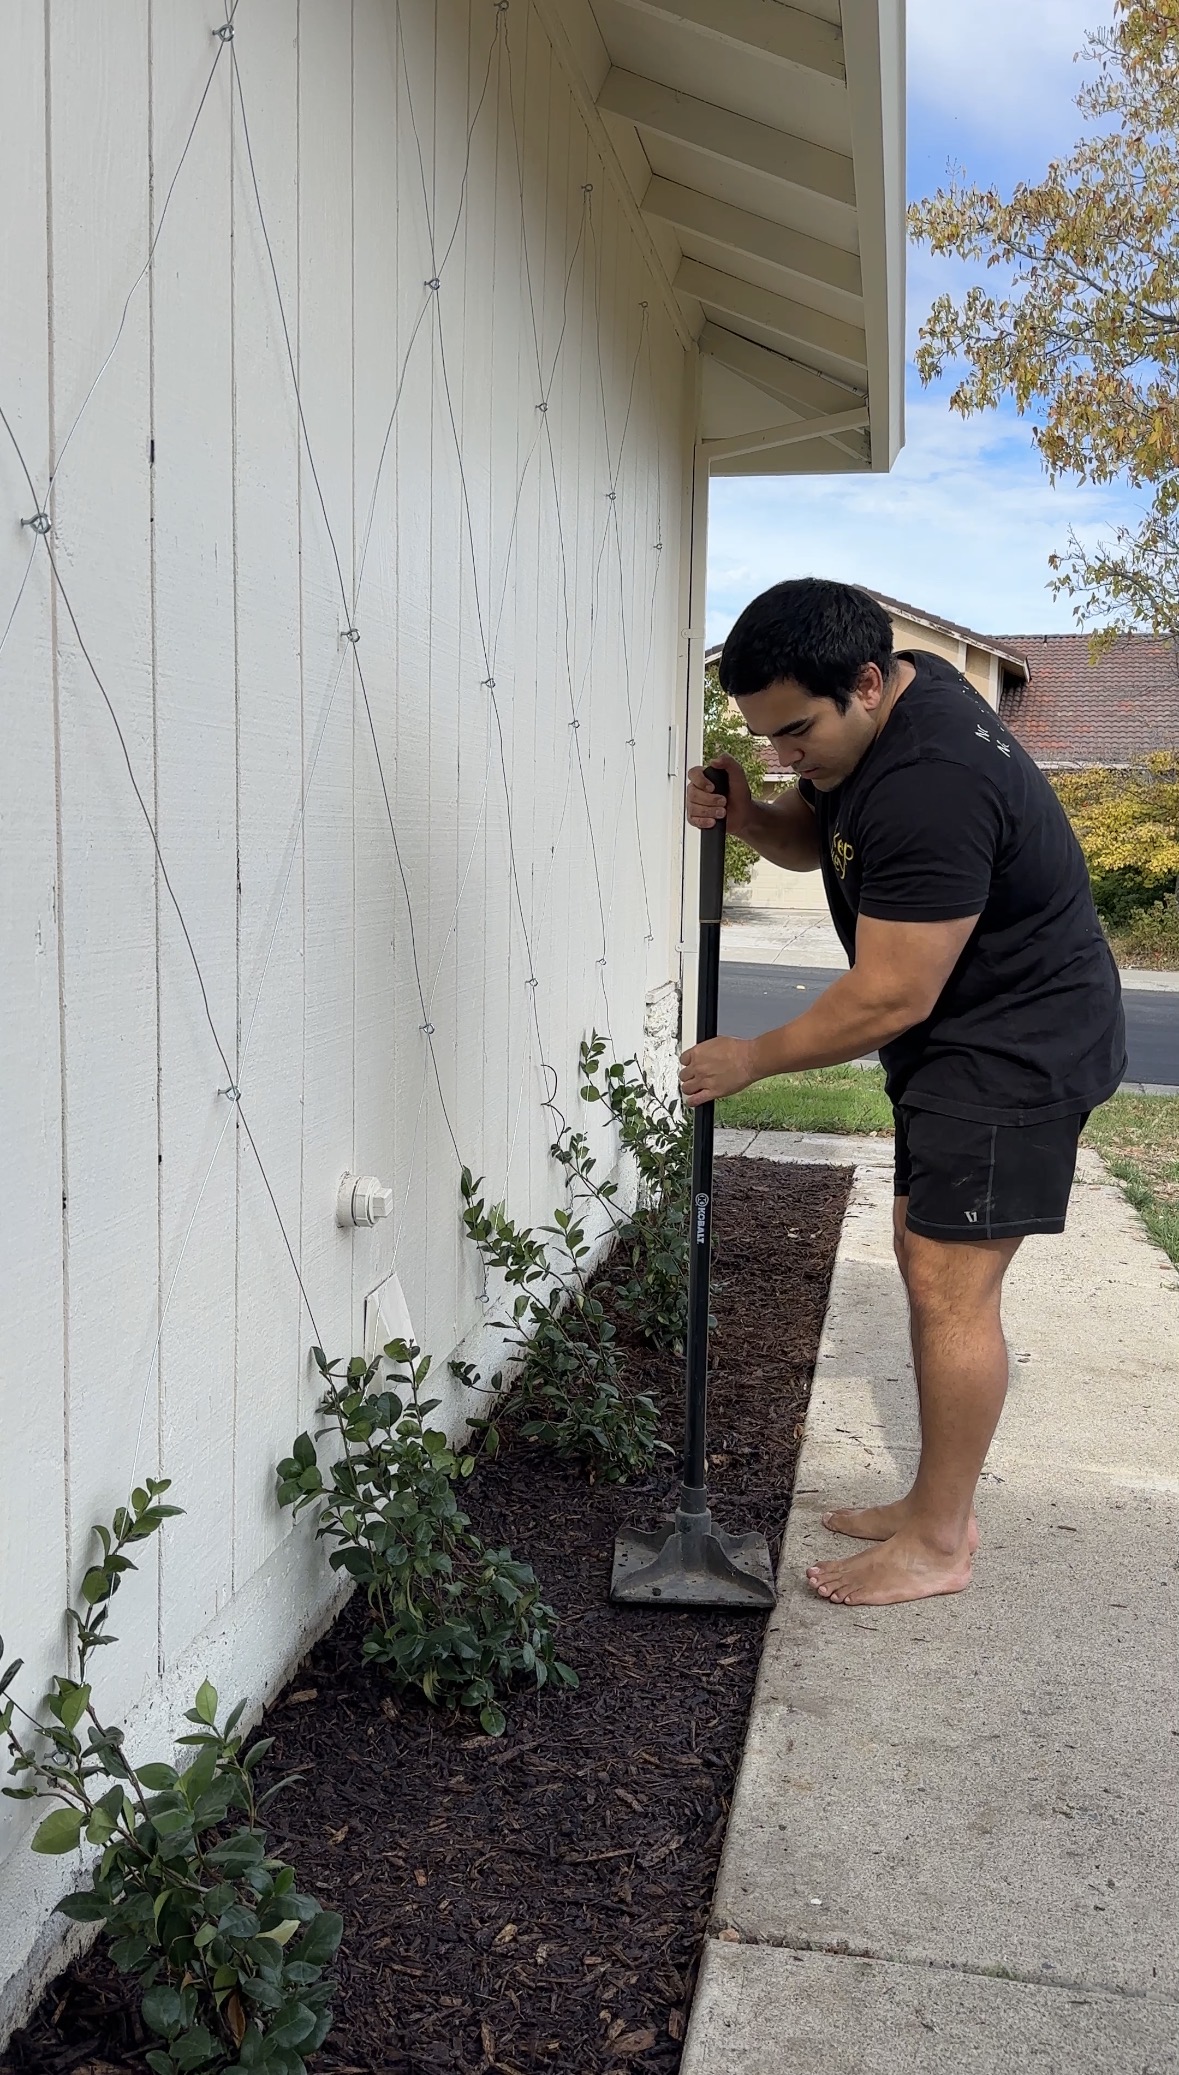
Step 4: Install Eye Hooks While Prepping for Planting
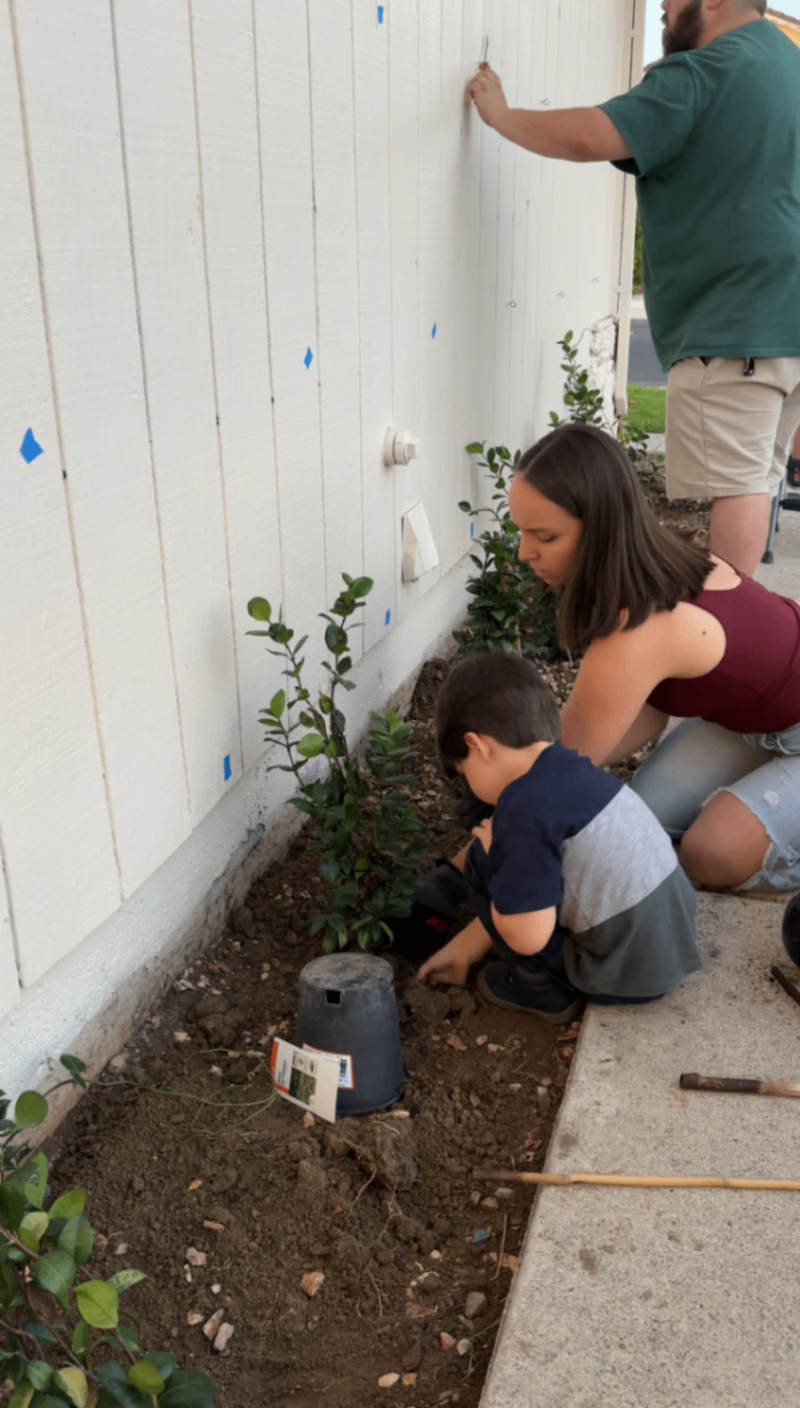
Once everything was taped and marked, we split up tasks to keep things moving.
My brother-in-law David started predrilling and installing the eye screws at each diamond intersection, while at the same time my boyfriend worked on digging the holes for the star jasmine plants along the base of the wall. Meanwhile, I started prepping and planting the jasmine as holes were ready.
Doing this simultaneously saved a ton of time and made the whole process feel much more efficient — especially helpful if you have a few extra hands.
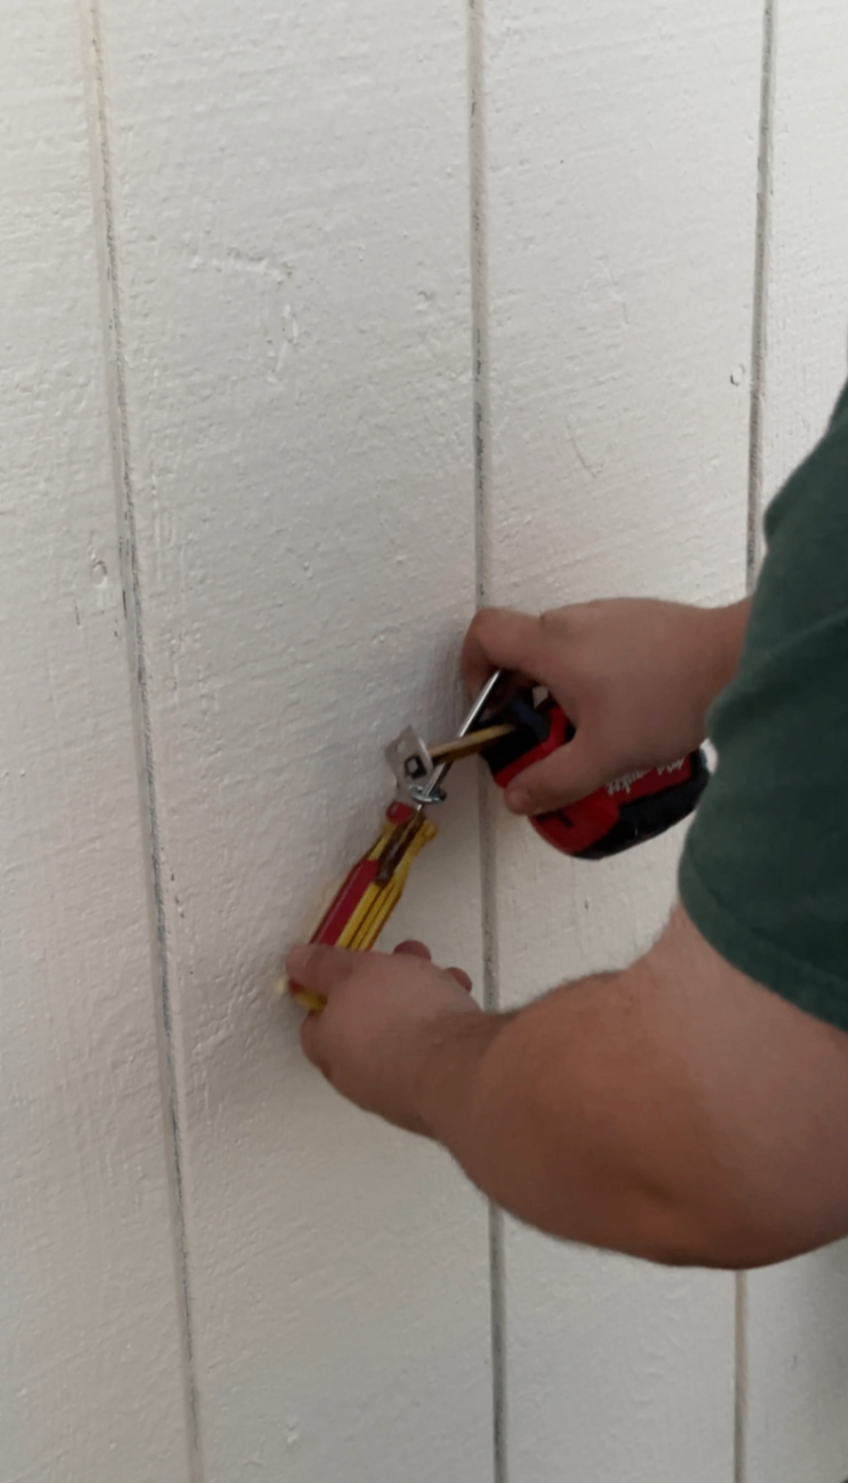
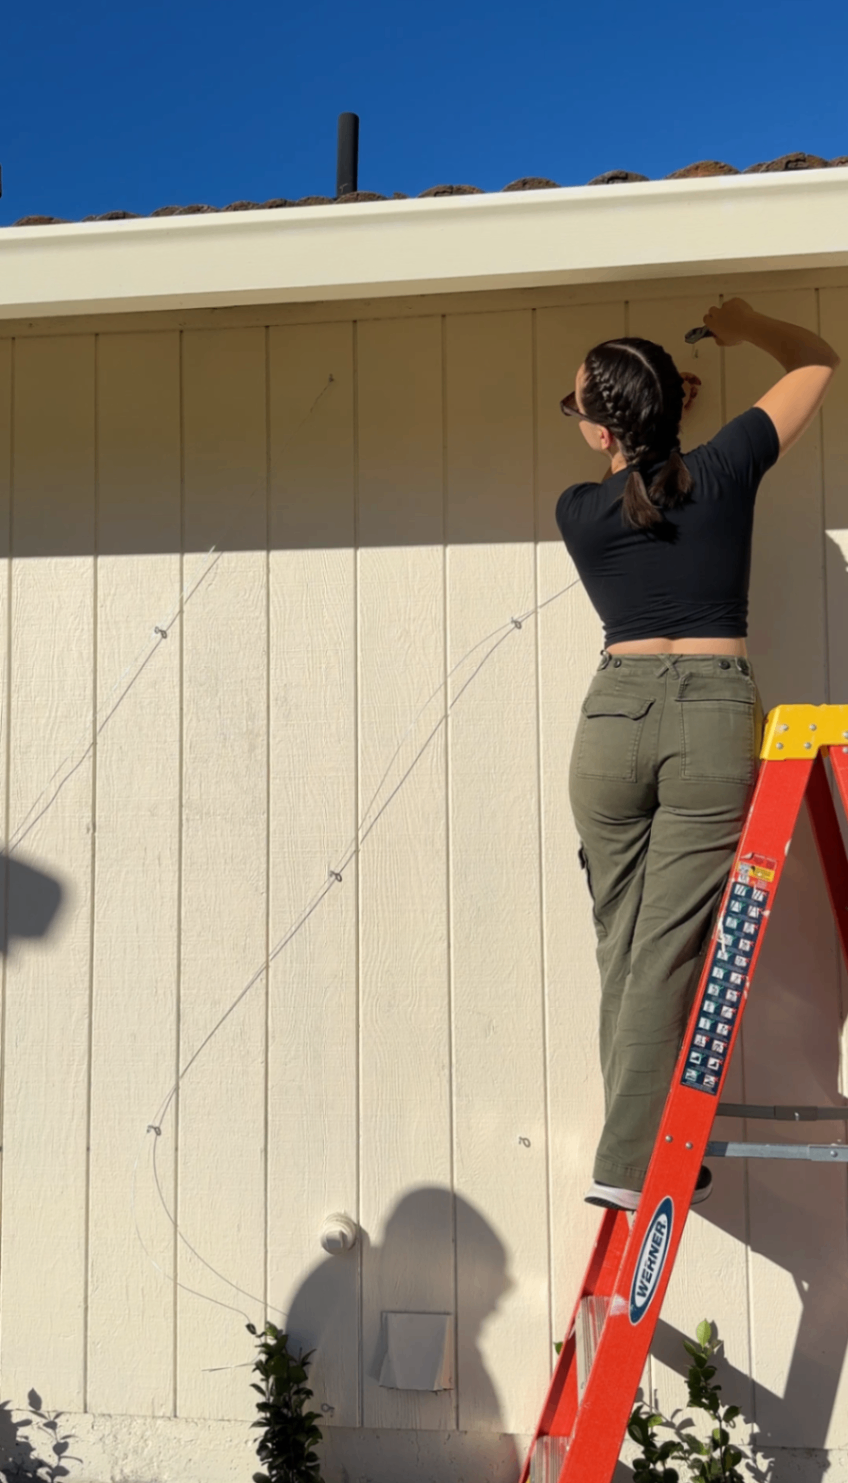
Eye Hook Installation Tips
To attach the wire, you’ll need eye screws at every diamond intersection.
A few things that made this easier:
Predrill each hole with a small drill bit
Twist eye screws in by hand at first
Once tight, insert a screwdriver through the eye and use it as leverage
Keep all eye hooks aligned in the same direction for a cleaner look
This part goes much faster with someone dedicated to it.
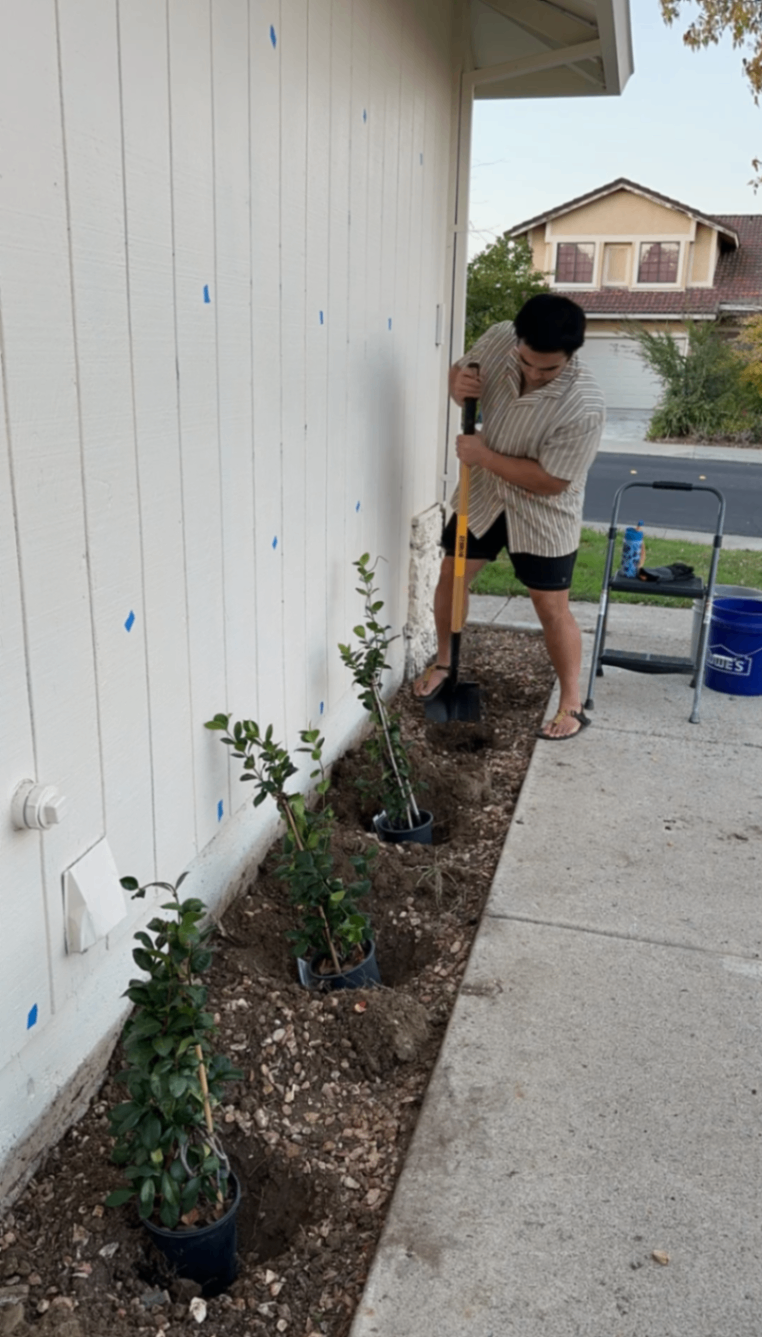
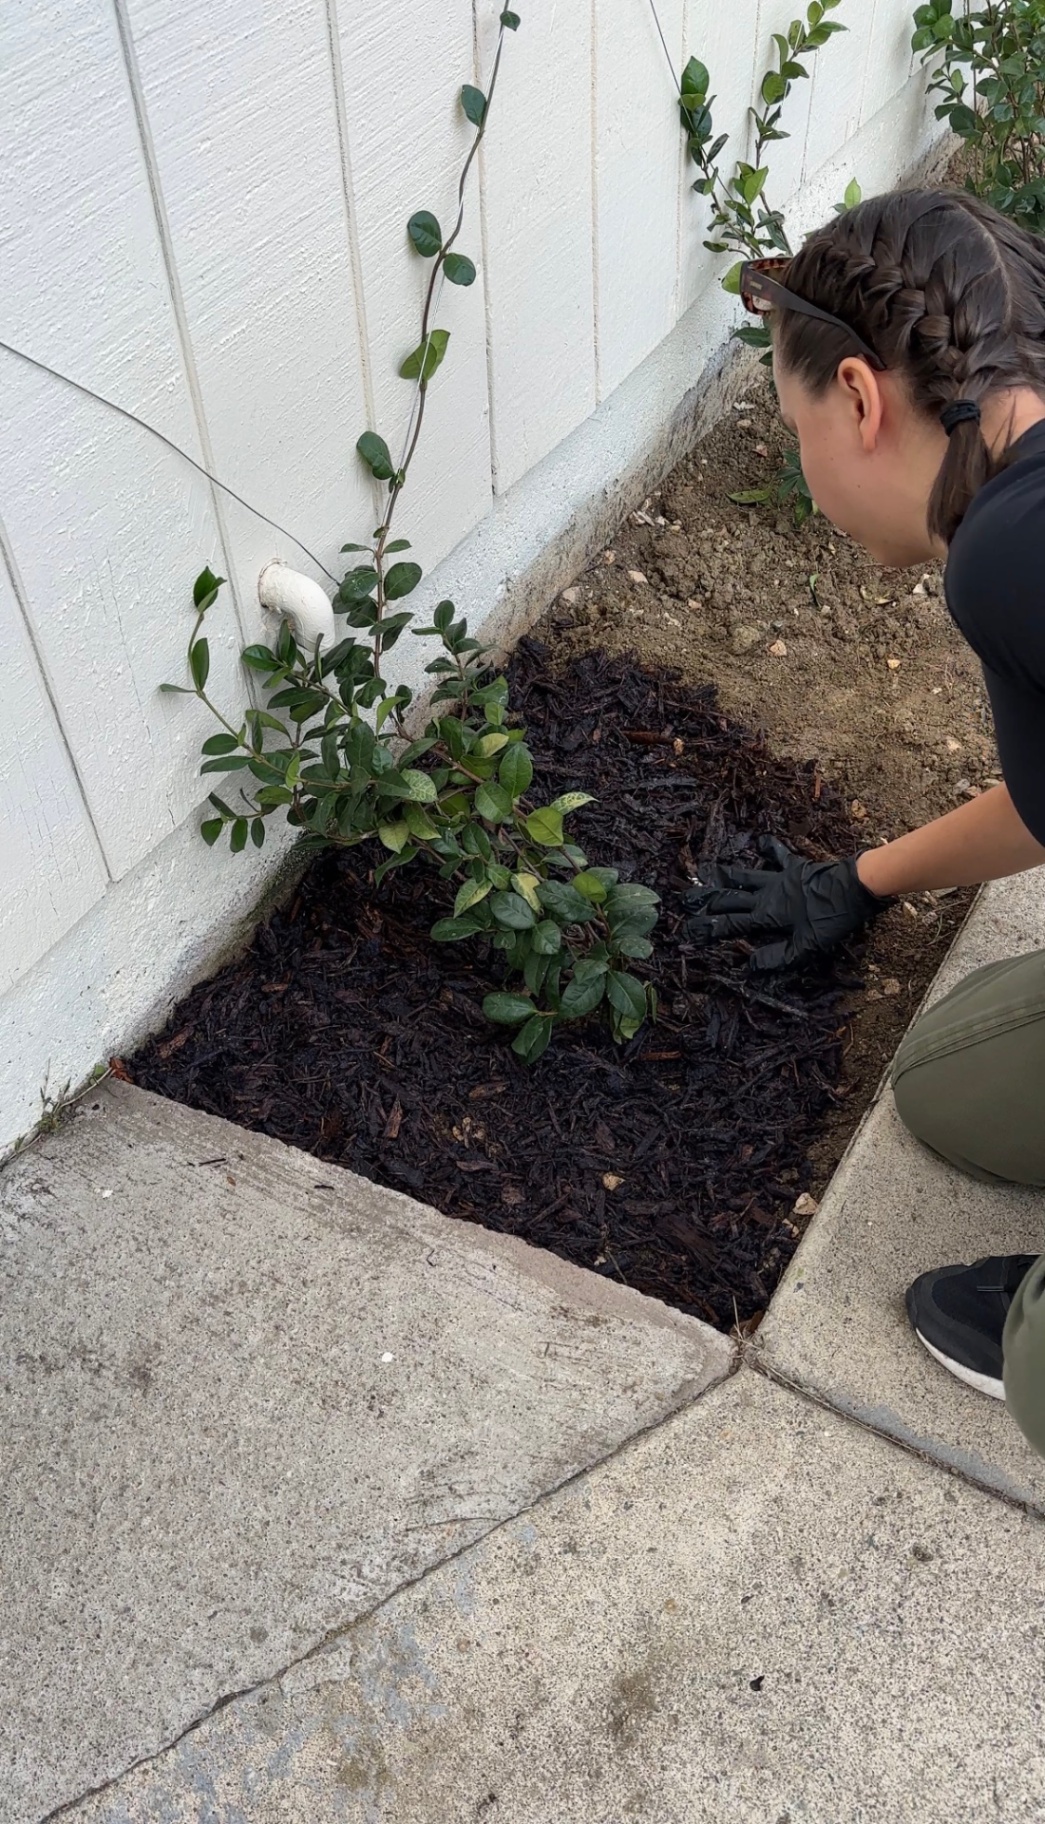
Step 5: Dig Holes & Plant the Star Jasmine
While the eye screws were being installed, we worked along the base of the wall prepping for the plants.
What we did:
Measured 12" from the wall for proper clearance
Dug planting holes spaced to align with the diamonds
Planted each star jasmine as holes were finished
Ideally, you’ll plant one jasmine per diamond, but if you’re covering a large wall, planting every other diamond works too - it’ll just take longer to fill in.
The plants were small at first, but star jasmine grows quickly once established, especially with regular watering and sun.
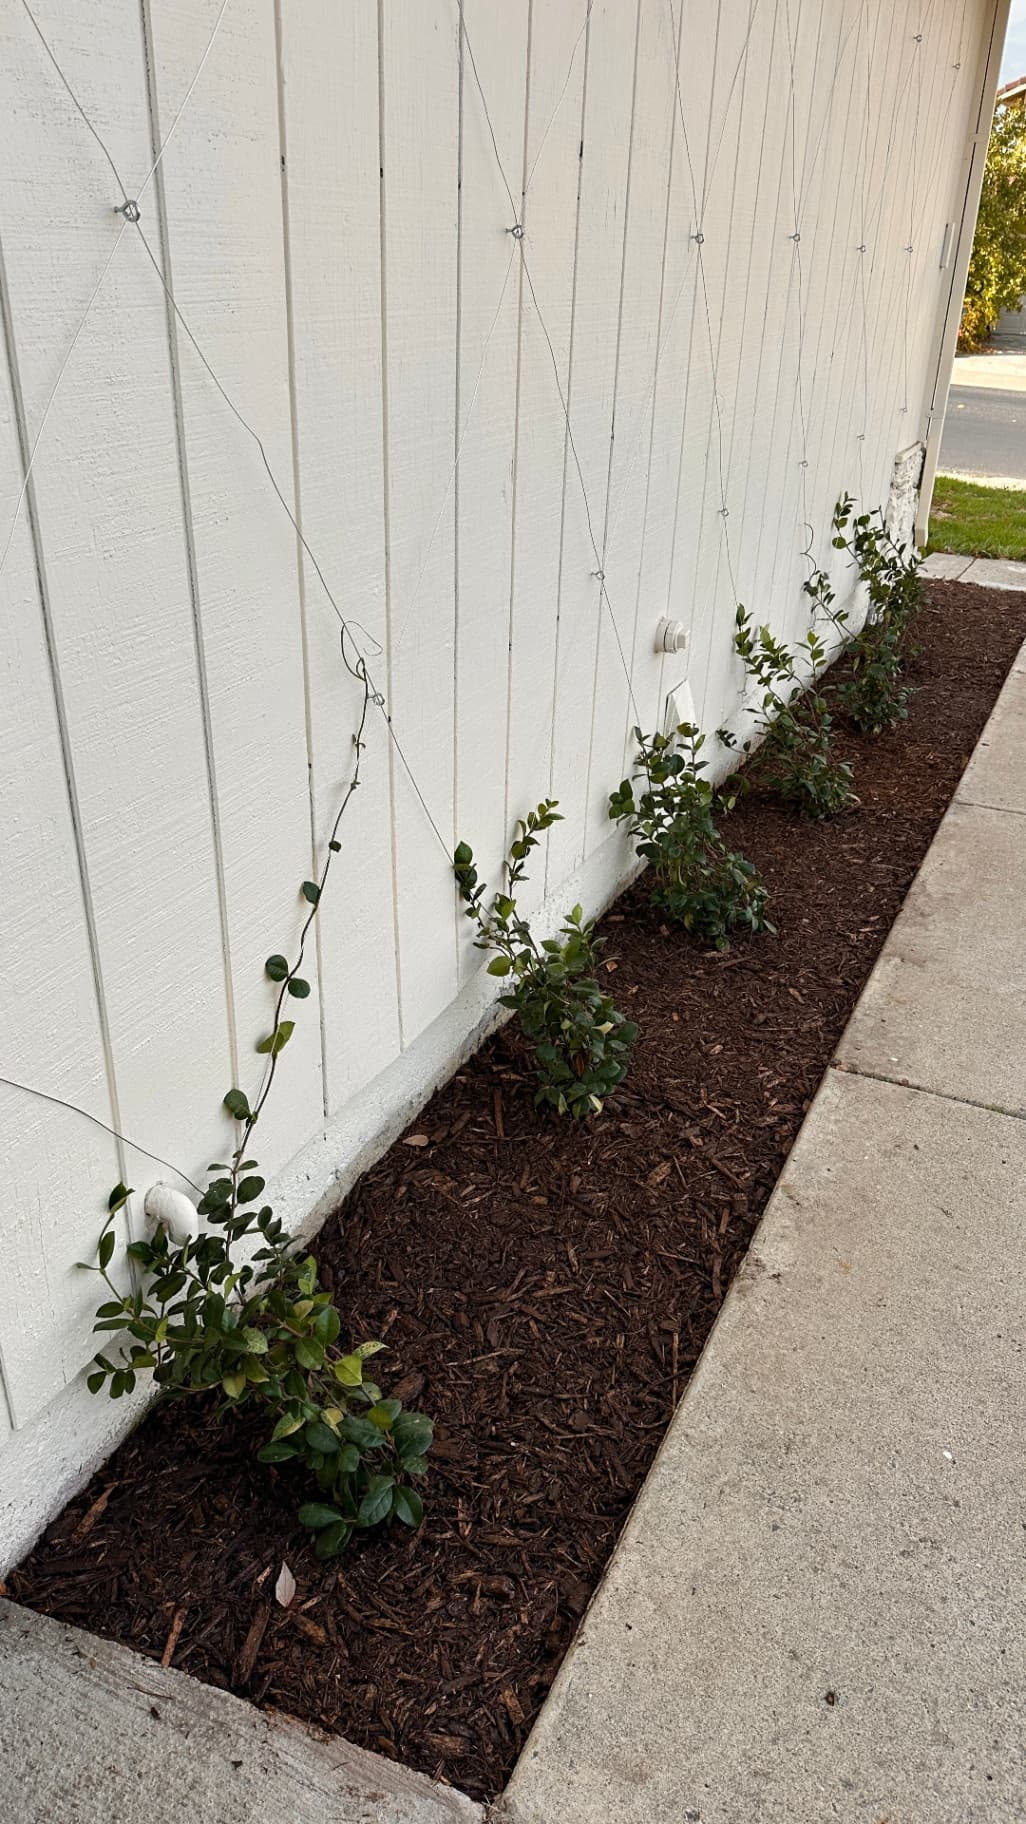
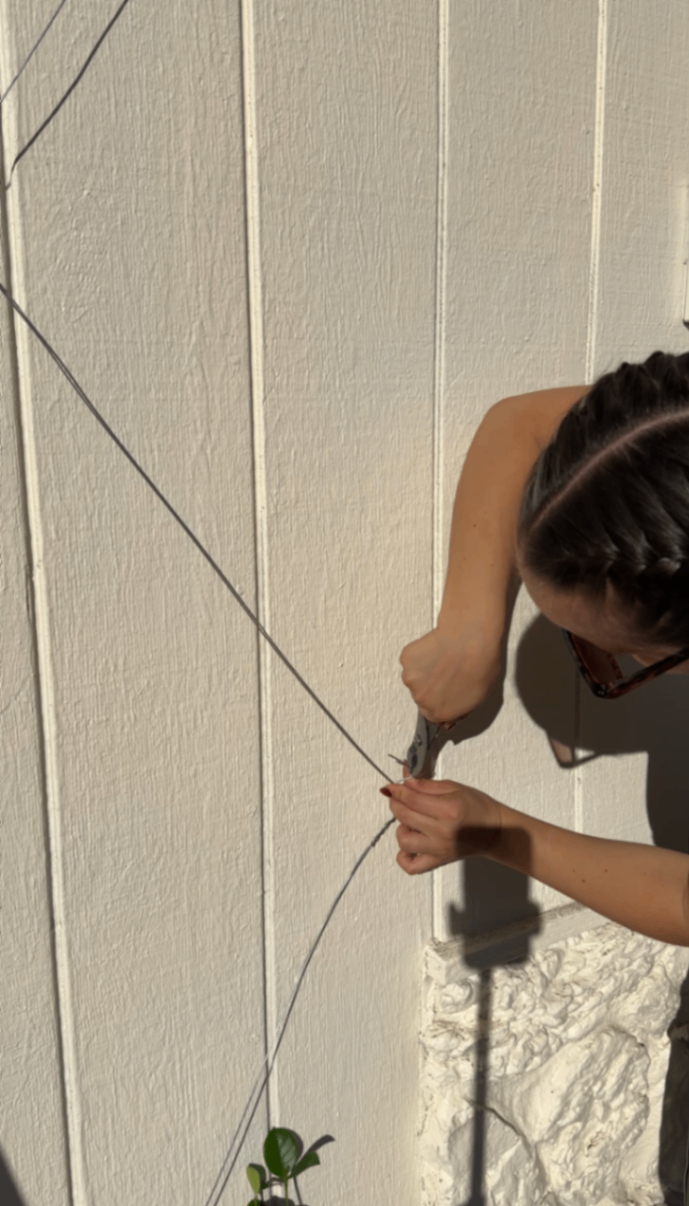
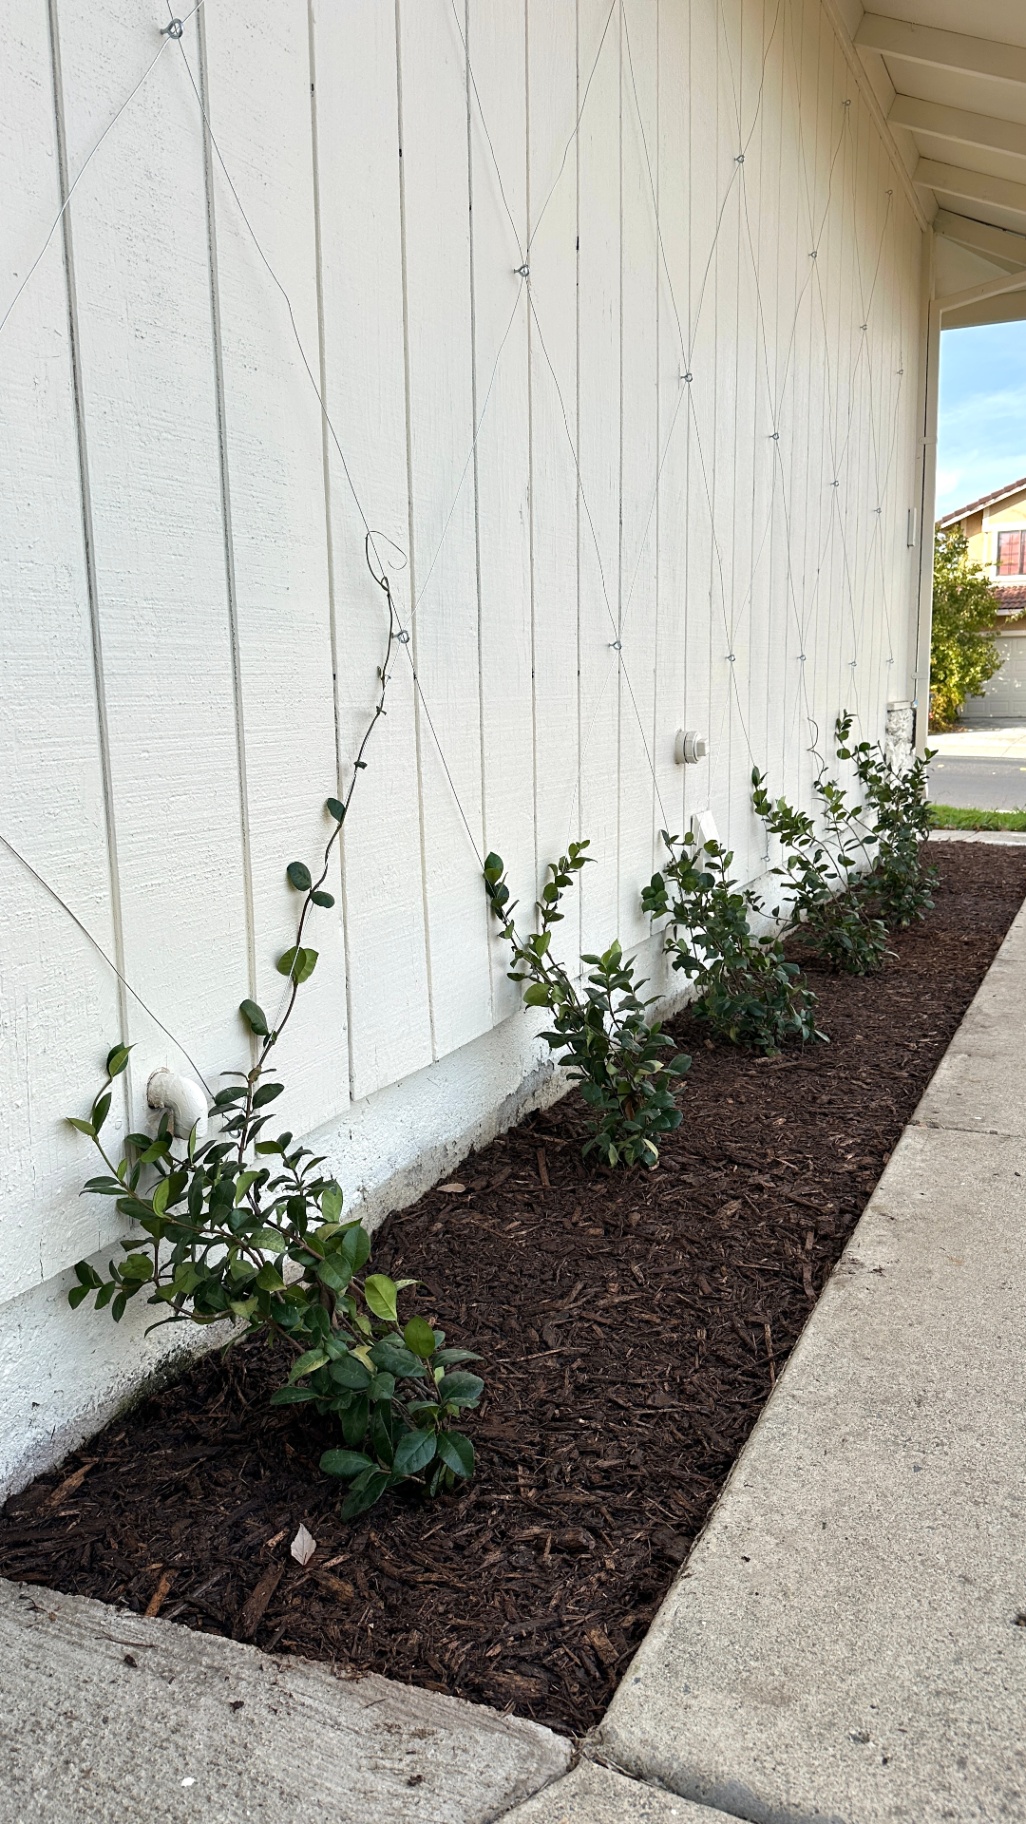
Step 6: Run the Wire
Once all the eye screws were installed and the jasmine was planted, we moved on to running the wire.
This wire is thick and rigid, so the goal isn’t perfection — it’s tension and consistency.
You’ll want to:
Run the wire diagonally in one direction first
Then run a second set diagonally in the opposite direction to create the diamond pattern
Wrap wire tails around themselves at the ends (trust me you'll want a good pliers set for this)
Clip excess with heavy-duty wire cutters
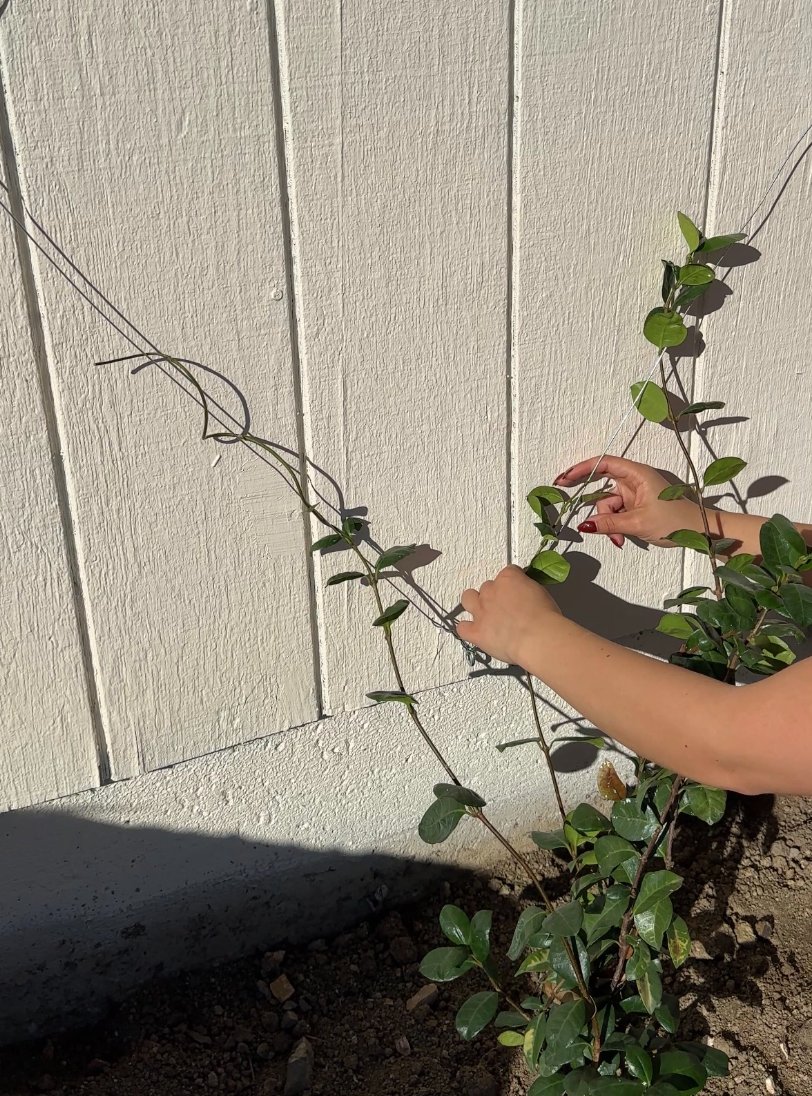
With the plants already in place, it was easy to immediately guide vines onto the finished trellis.
Optional: Keep the Mulch in Place
After laying the plants, we mixed Easihold directly into the mulch one batch at a time in a bucket before spreading it. It acts like a clear glue that binds the mulch together once it dries, helping everything stay exactly where you put it.
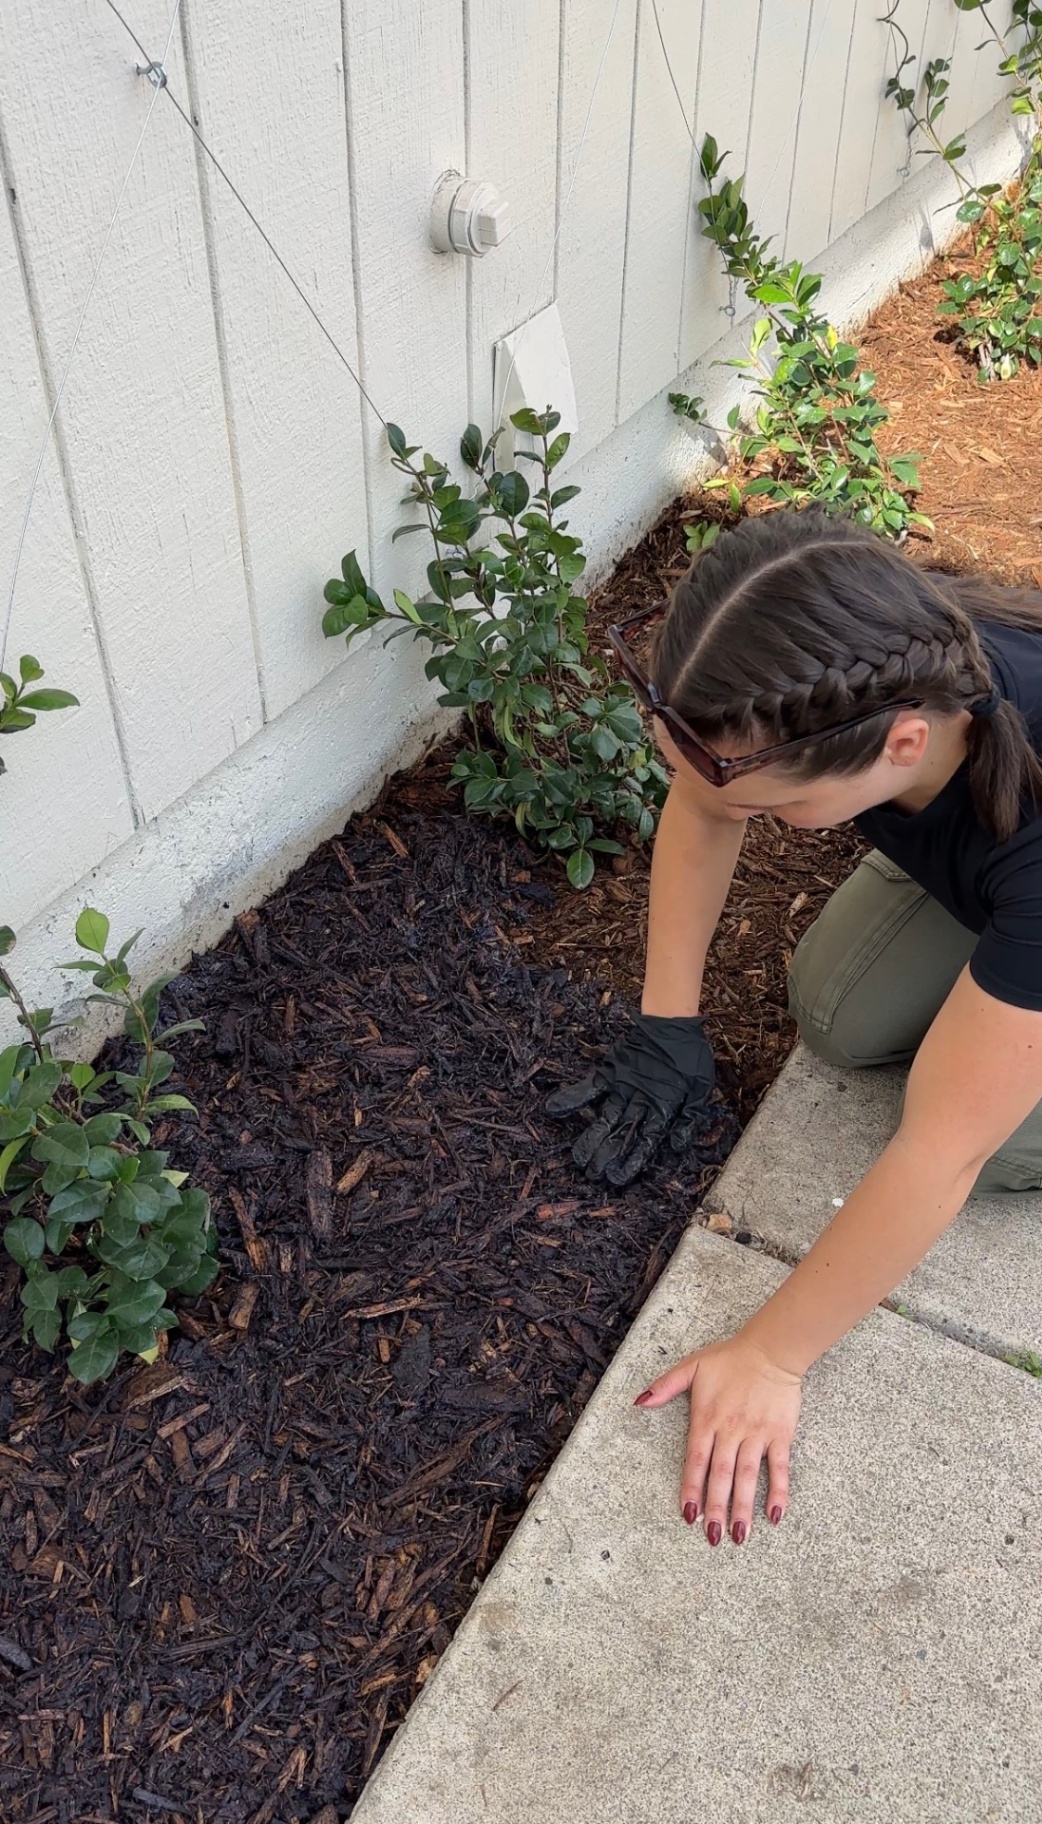
It’s been about two months, and the mulch has held up great - we can even use a leaf blower directly over it to clear leaves without disturbing anything! It’s a simple add-on that keeps front-of-house landscaping looking clean and low-maintenance.
Jasmine Care Tips for Fast Growth
To help your star jasmine fill in beautifully:
✔ Water consistently the first year
Keep soil lightly moist but never soggy.
✔ Fertilize once or twice during spring
A balanced fertilizer (like 10-10-10) works great.
✔ Guide new growth
Gently wrap or tie young vines to the wire.
✔ Prune lightly
Remove scraggly or out-of-place vines to encourage branching and density.
✔ Mulch
Mulch helps retain soil moisture and keeps the roots cool.
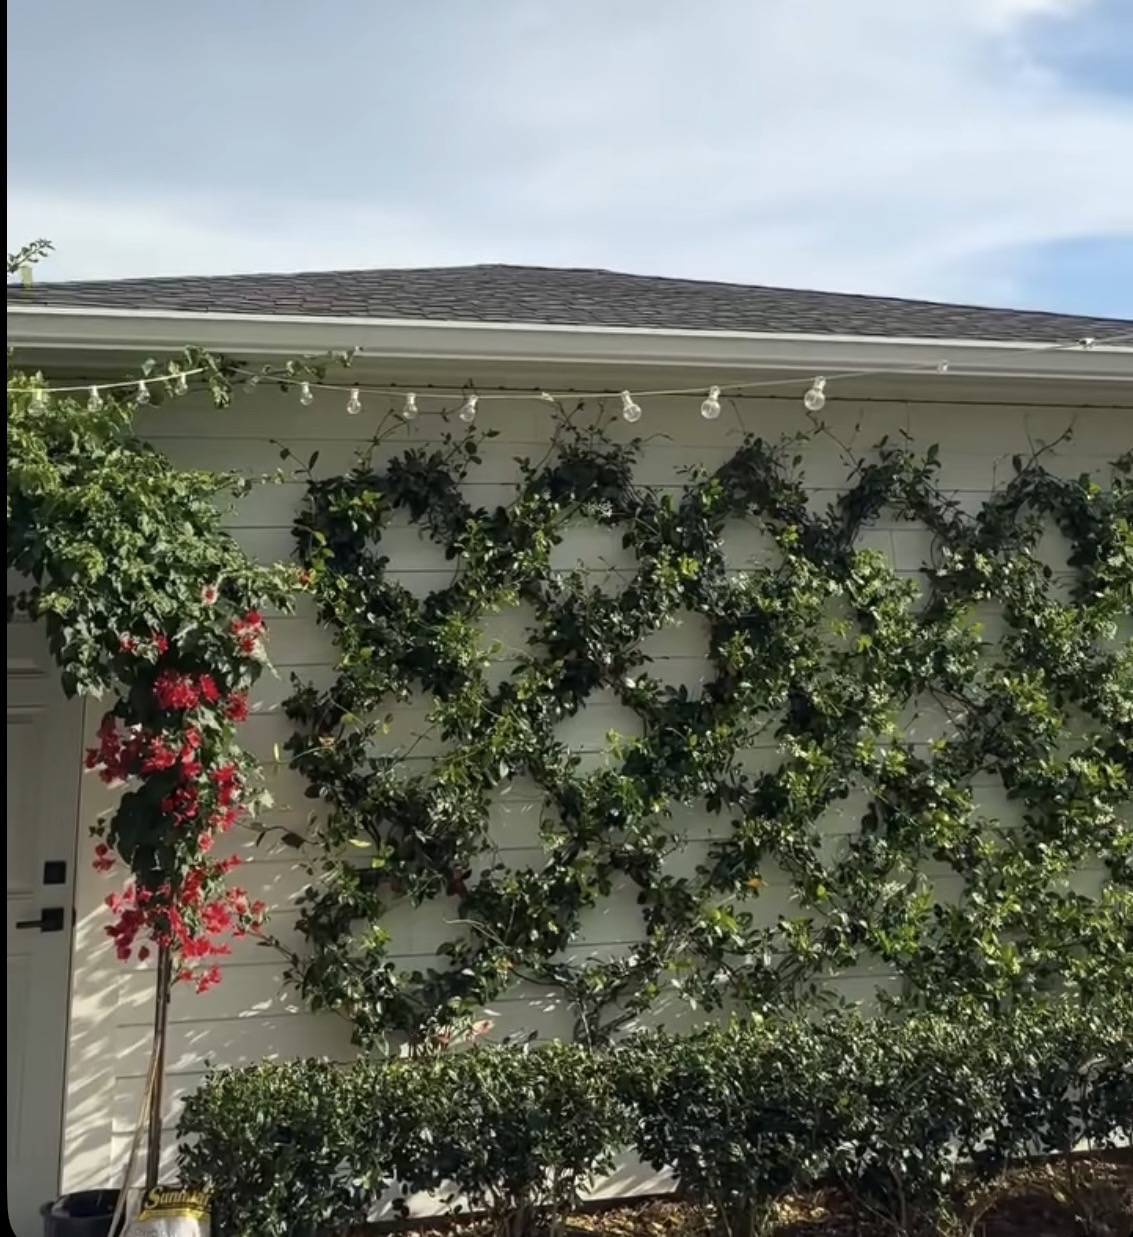
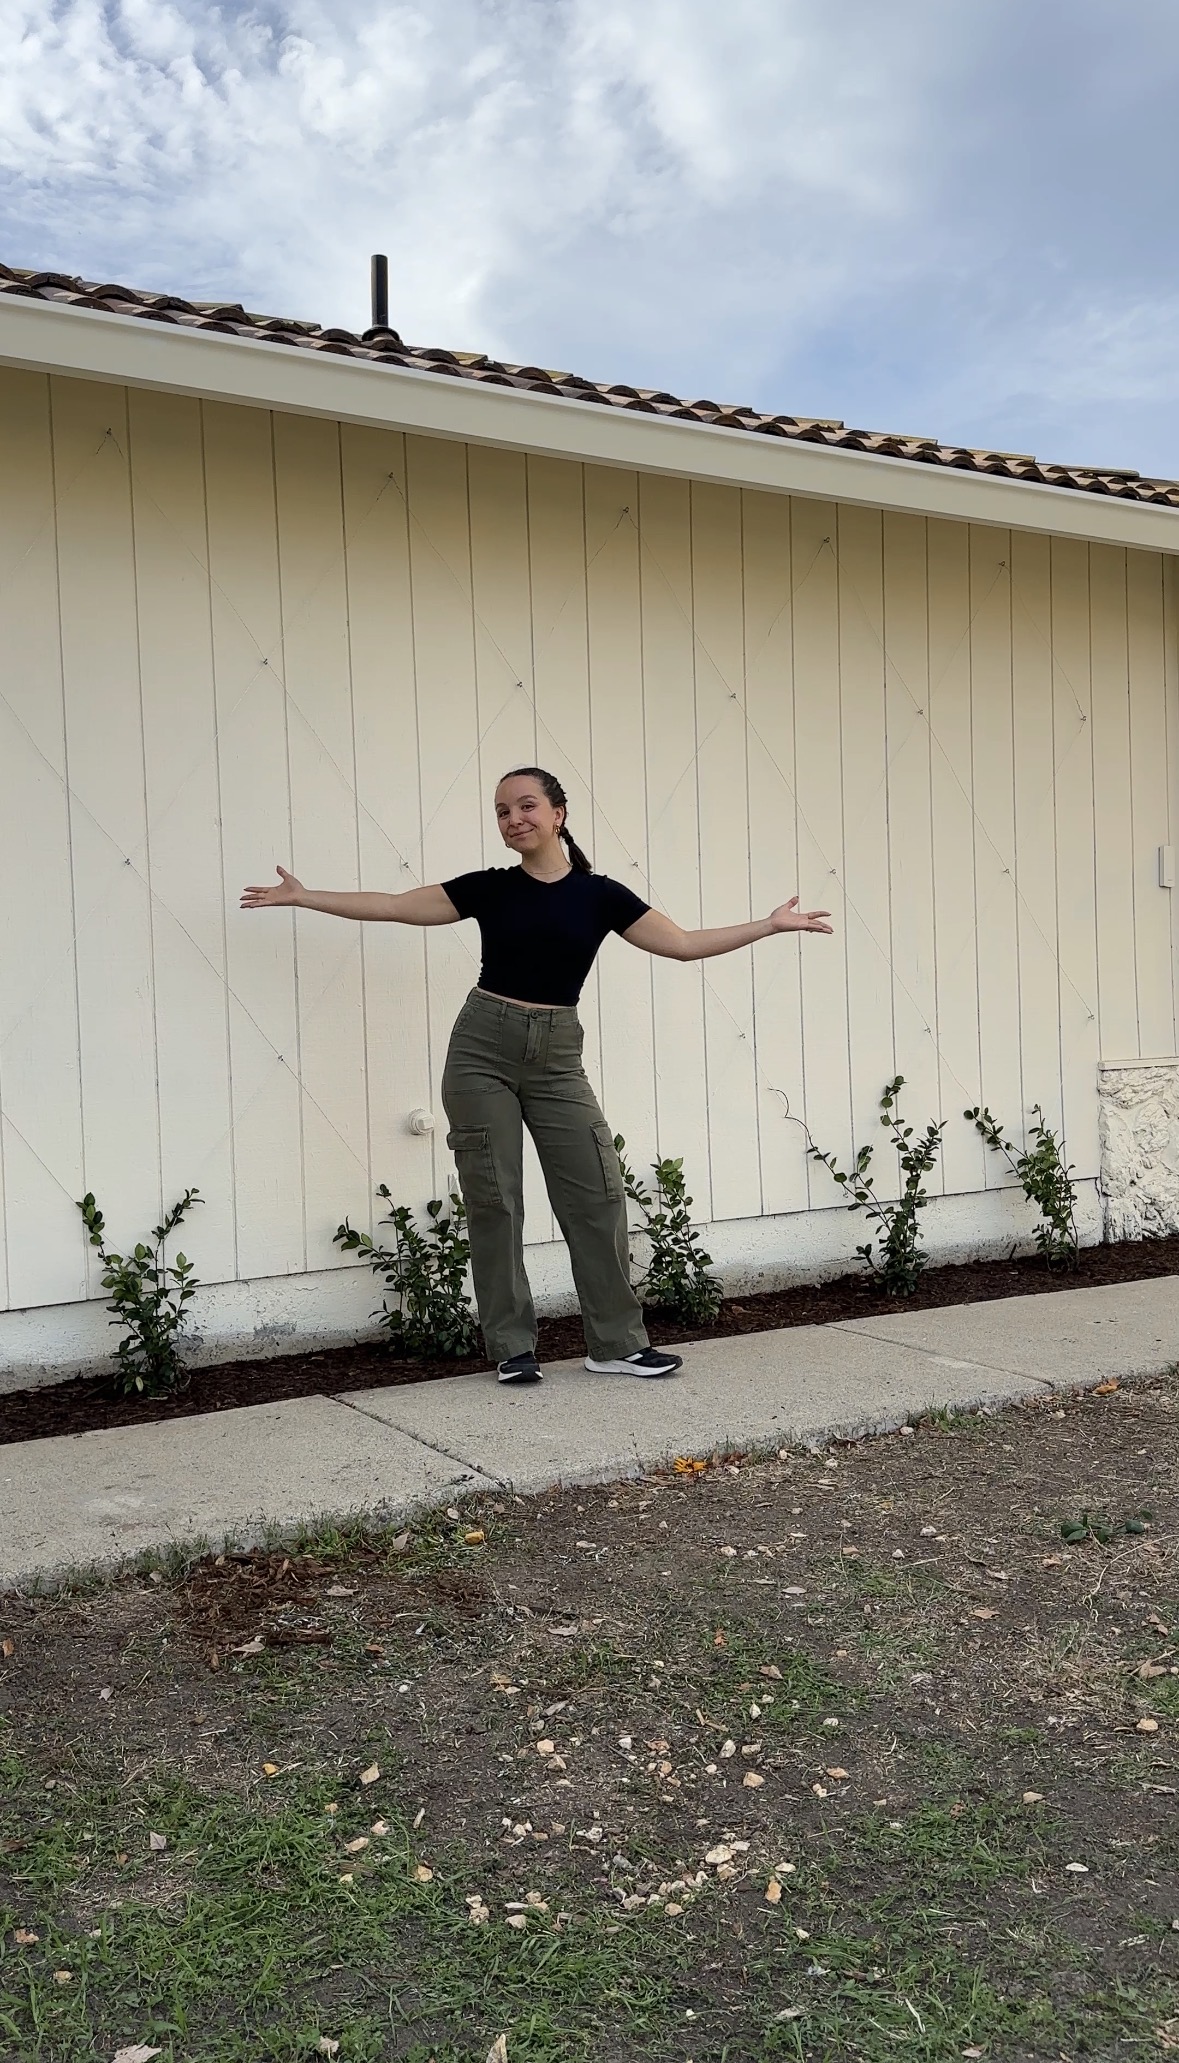
Final Look + What’s Next
Even though the jasmine is still small and the trellis is just getting started, this project already adds so much structure and intention to the front of the house. And honestly, we’re nowhere near “done” with this space — we still have plans to clean up the lawn, update some of the fencing, and add more thoughtful landscaping as we go.
But that’s the reality of home projects: it’s all a process. You don’t need to transform everything at once for it to make a noticeable difference. This diamond trellis and fresh jasmine are the first step toward a bigger vision, and they’re going to make an even bigger impact as they grow in over time.
If you’ve been thinking about adding curb appeal or creating a living wall, this is such a doable weekend project.
Let me know if you would try this—and if you want more tutorials like this, make sure to follow along!