DIY Mid-Century Modern Walnut Tallboy Dresser Flip (Full Tutorial)
I restored this $300 mid-century modern tallboy dresser from faded, bleached walnut to deep, rich satin-finished walnut. This post walks through my full process — stripping, repairing, staining, toning, and sealing — plus all the supplies I used. The before and after difference is unreal.

$300 Mid-Century Modern Dresser Restoration: Light vs. Dark Walnut
You tell me if you think this one was worth it — I spent $300 and drove two hours to pick up this mid-century modern tallboy dresser. The silhouette instantly caught my eye: the tapered legs, brass-tipped feet, and solid sculptural base — so classic MCM.
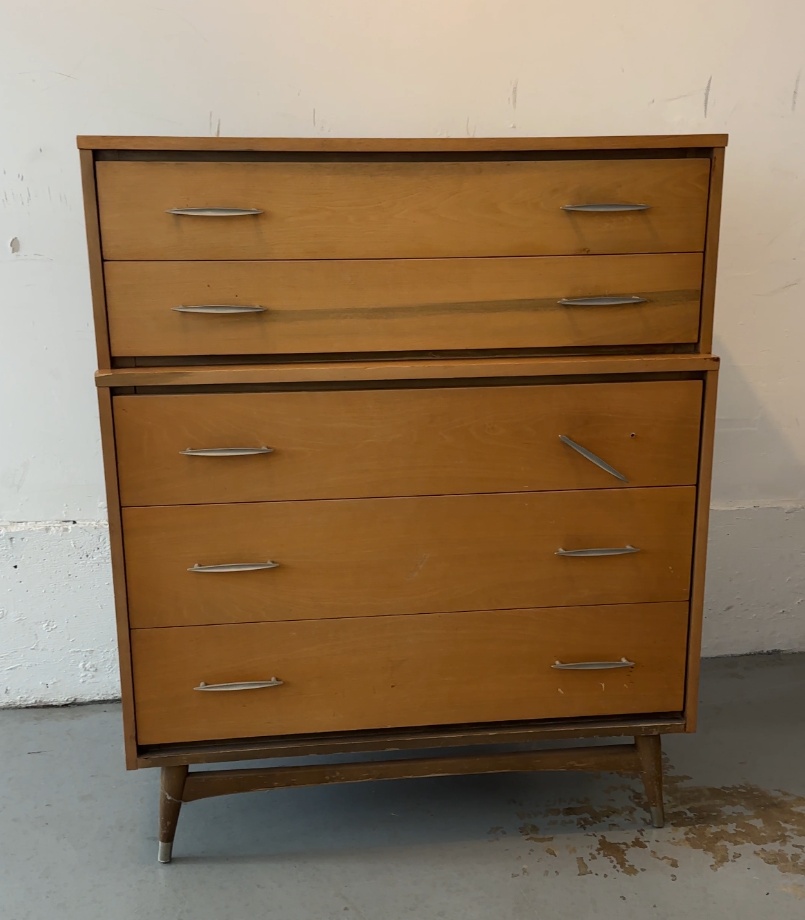
After a little research, I found out it was made by Joern’s Brothers Furniture, a mid-century manufacturer known for their clean lines and high-quality walnut craftsmanship. You might think this piece is maple, but it’s actually walnut that had been bleached. I knew right away I wanted to restore those deep, rich walnut tones and bring the warmth back into the wood.
Supplies Used
Carbide scraper (for stripping finish)
Orbital sander + sandpaper (120–400 grit)
Epoxy putty (for repairing dings or gouges)
Gel stain in a rich walnut tone
Toner spray (for blending color variations)
Wipe-on polyurethane — my go-to top coat
Furniture wax (for drawers and drawer glides)
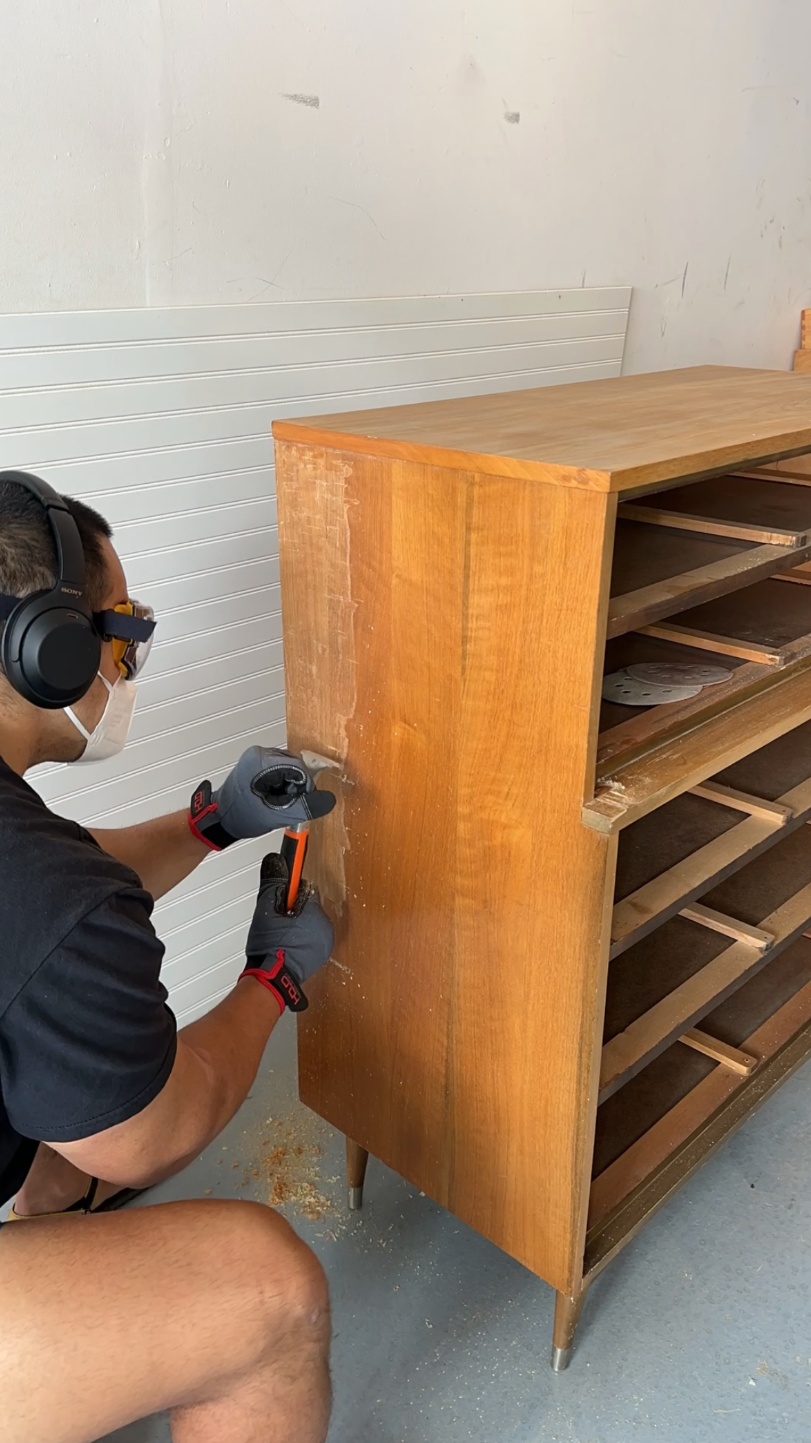
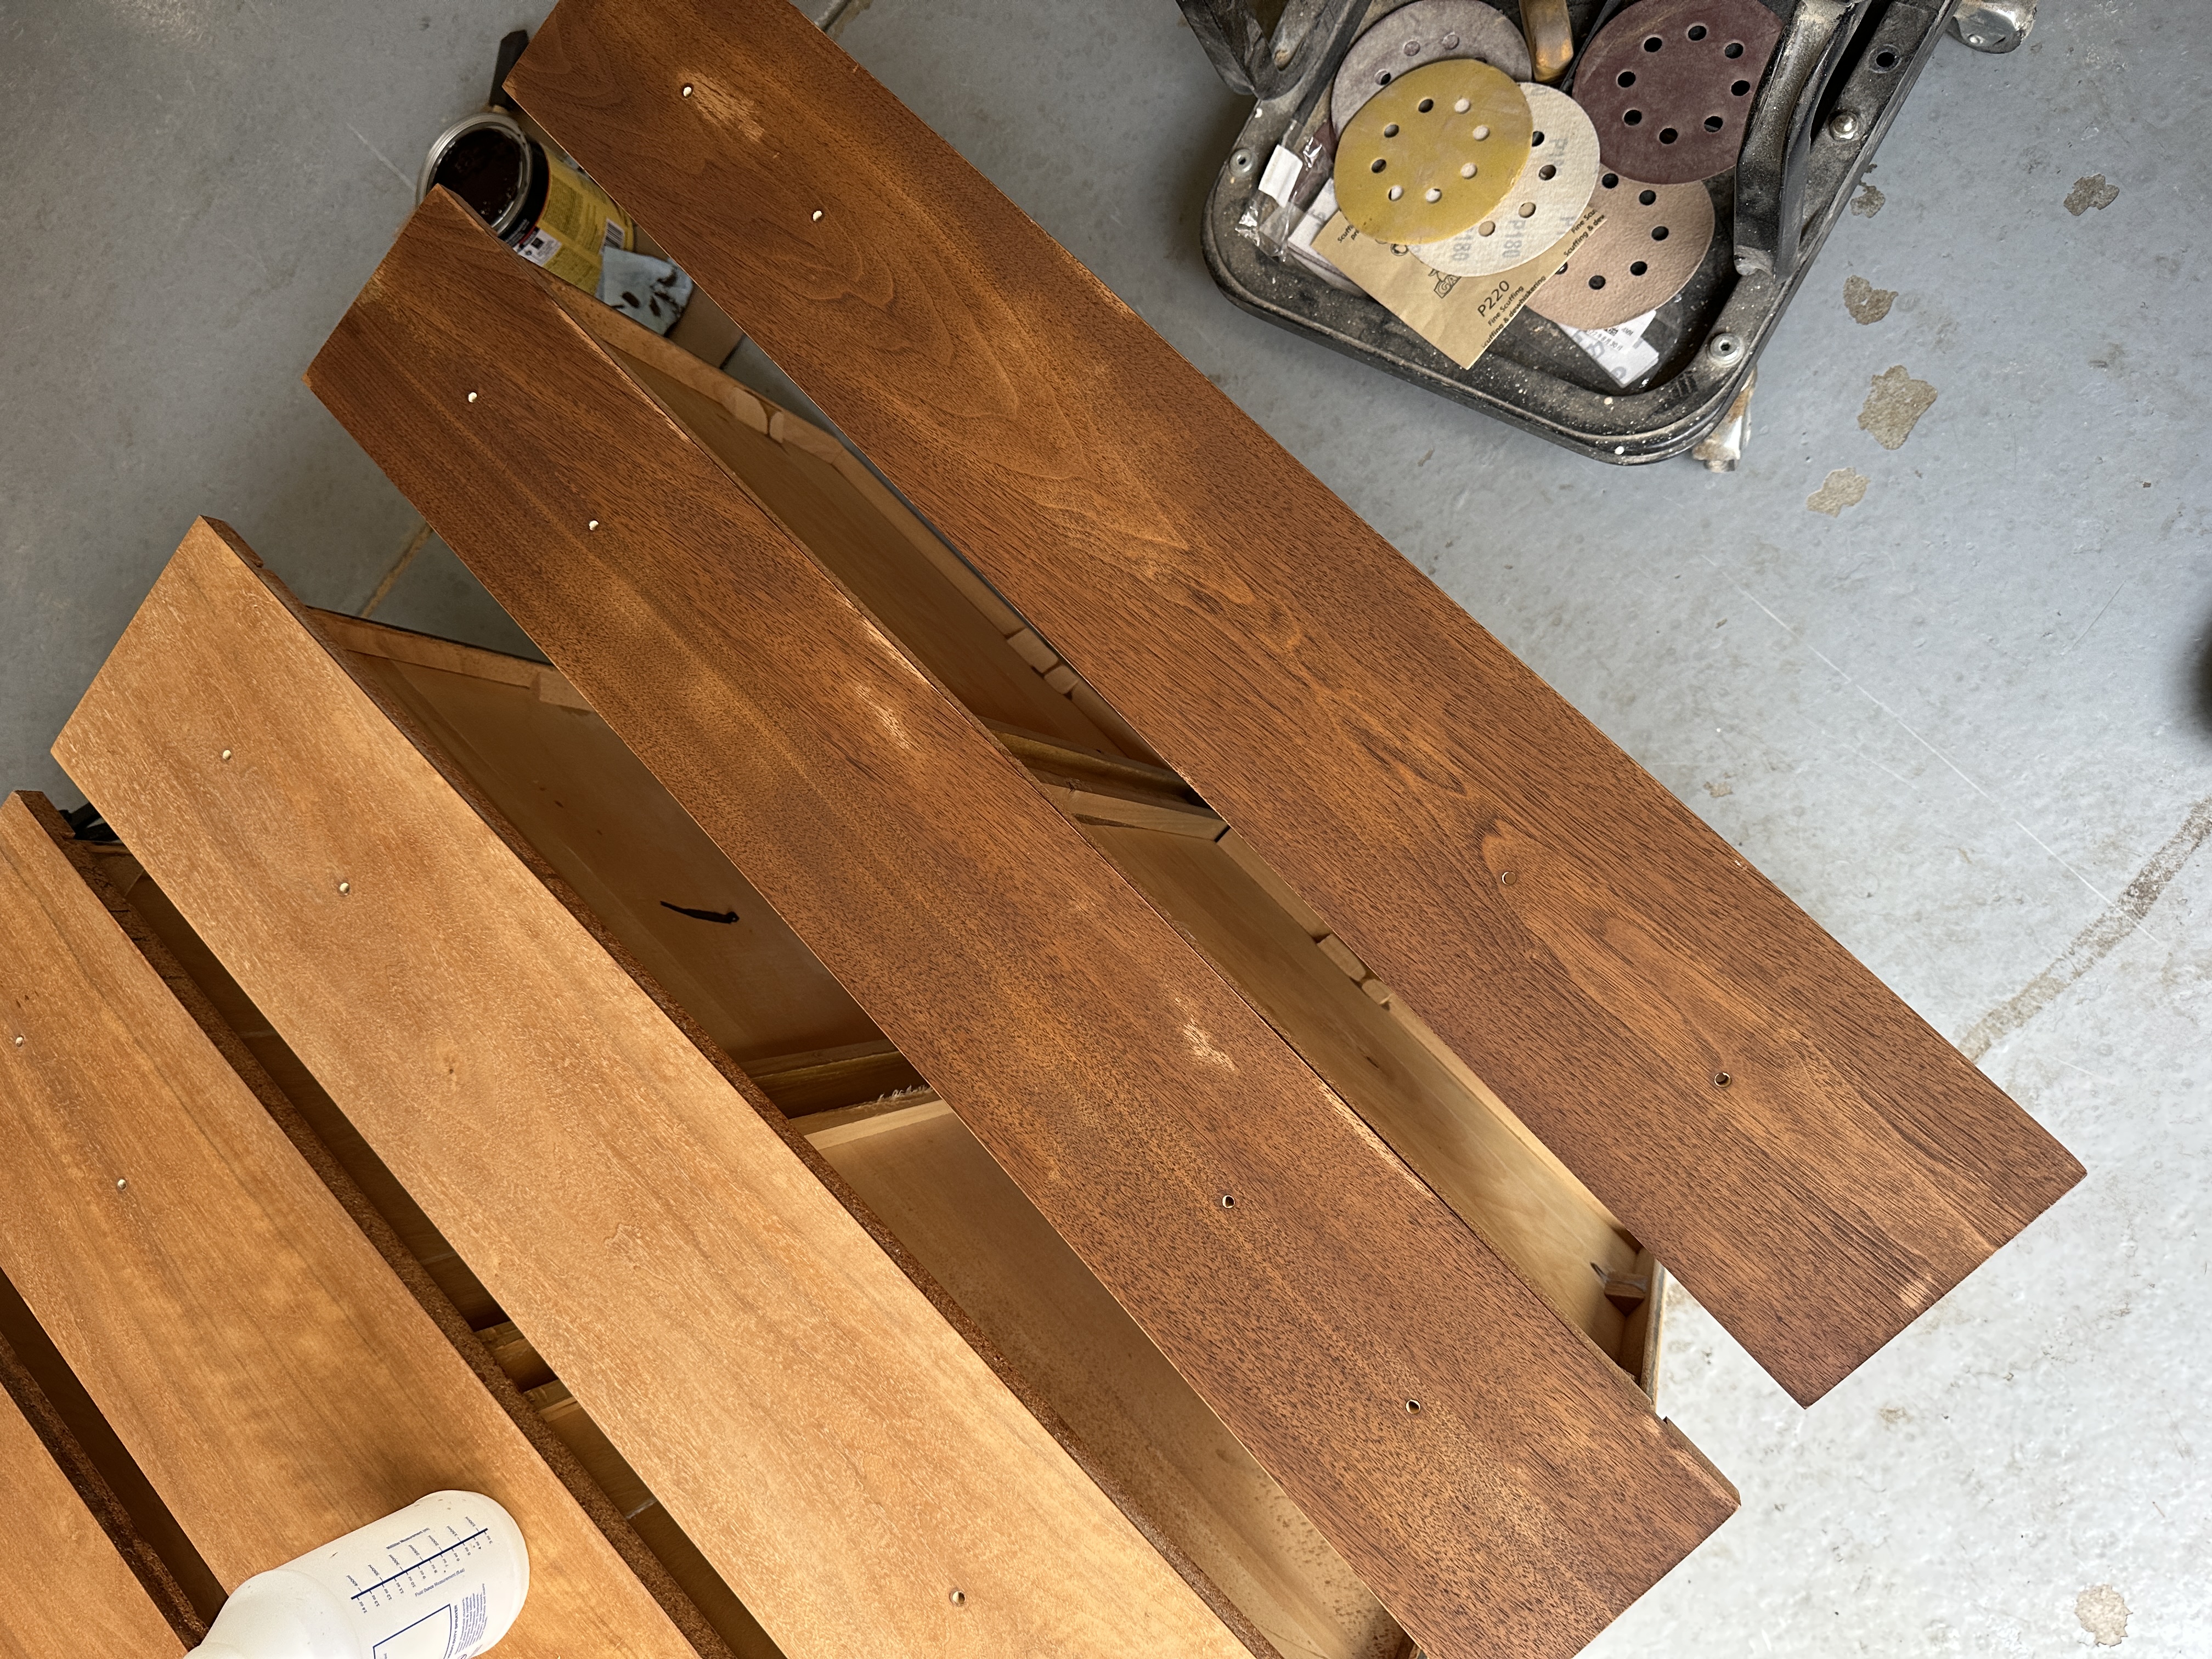
Step 1: Hardware Off, Sandpaper On
While my boyfriend Pre handled cleaning duties, I started by removing the hardware and giving the whole piece a light sanding. It didn’t take long to realize sanding alone was going to take forever, so we brought in the carbide scraper to speed things up. Pre scraped down the sides while I focused on the corners and detailed edges — easily one of the best time-savers for restoring bleached or stripped furniture.
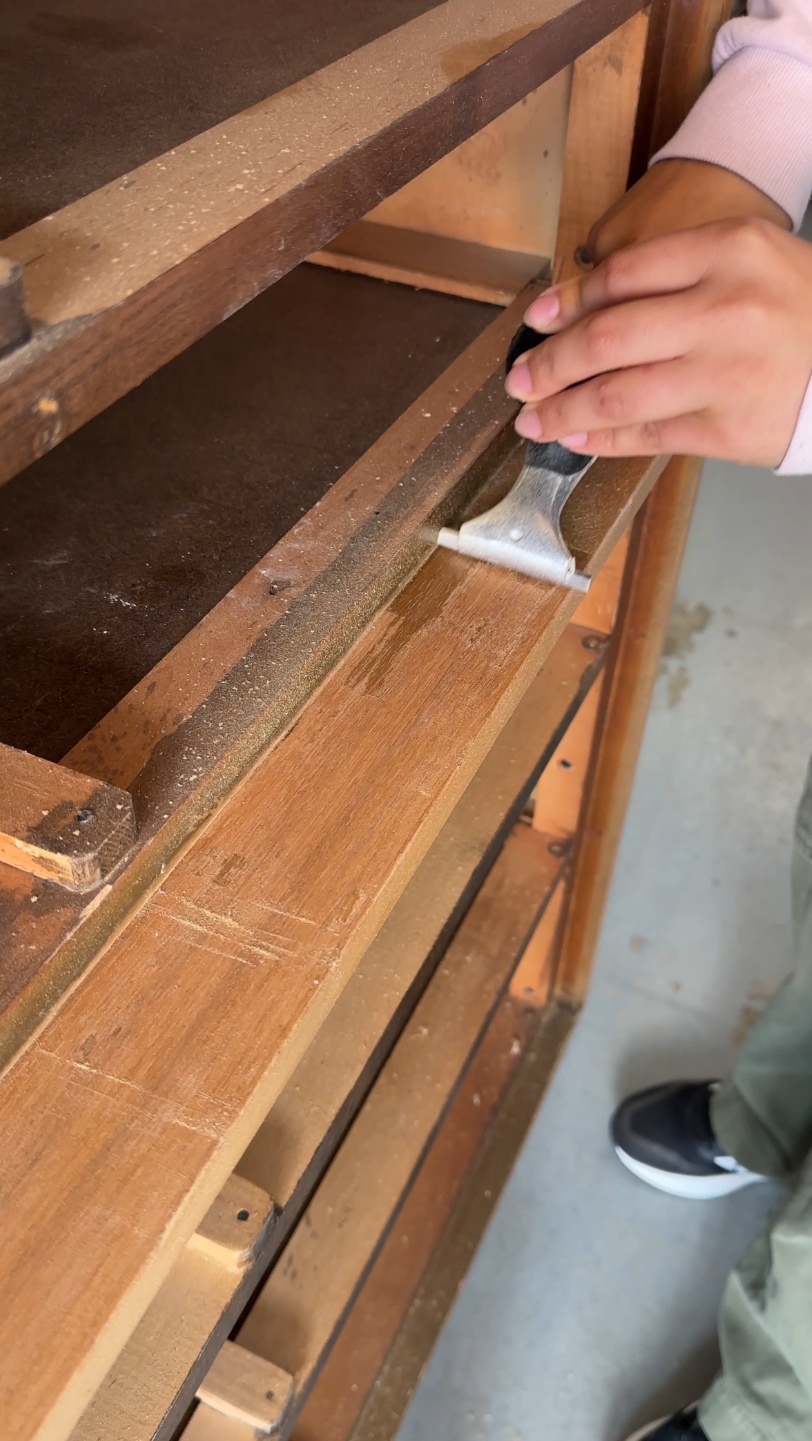
Before moving on to staining, I used a bit of epoxy putty to fill in a few small dings and imperfections. Once it cured, I sanded everything smooth so the repairs could be blended in after the first round of top coat.
Step 2: Staining & (Re-)Staining
Once the surface was fully prepped, I moved on to the base first — it’s solid oak, so I used a gel stain to deepen the color.
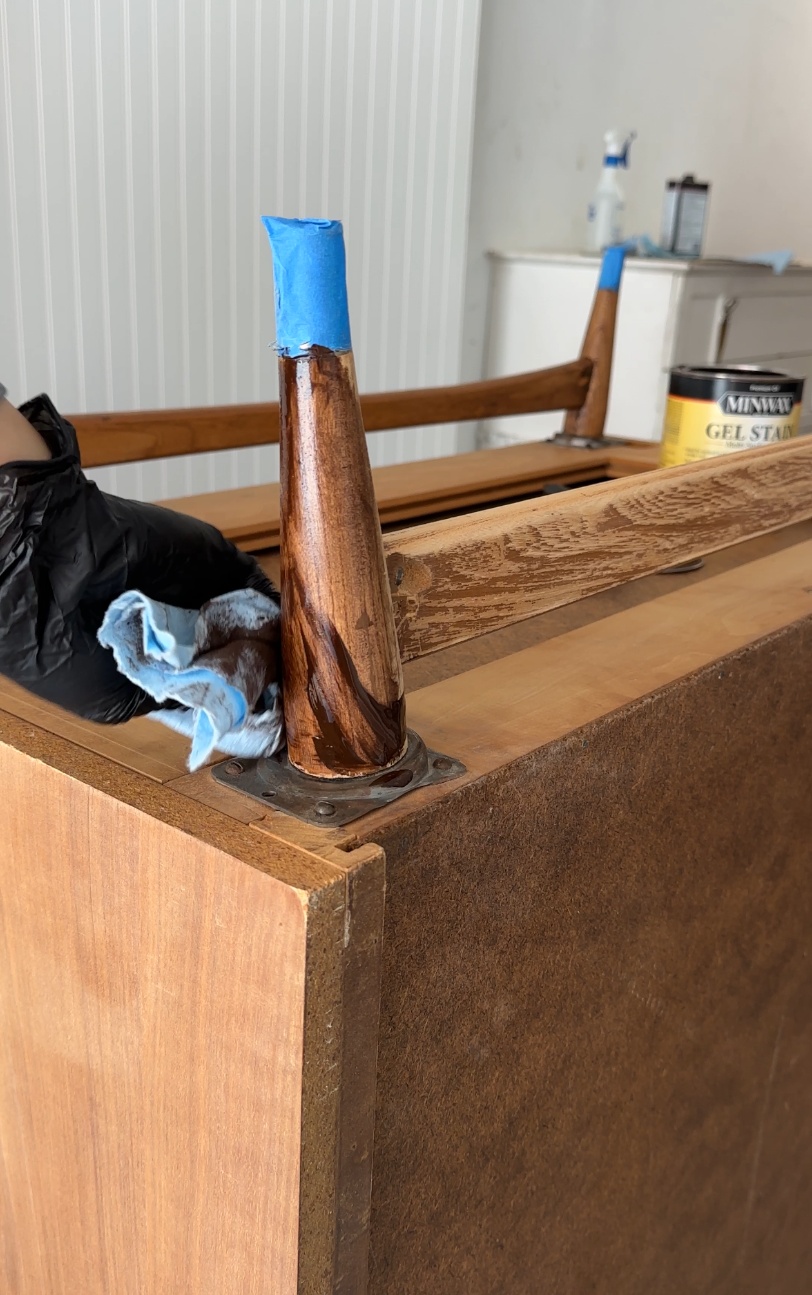
The drawers, though… didn’t cooperate. The first round of gel stain looked uneven and patchy, so I sanded them back down, wiped with acetone, applied a pre-stain conditioner, and then re-stained. This worked like a charm!
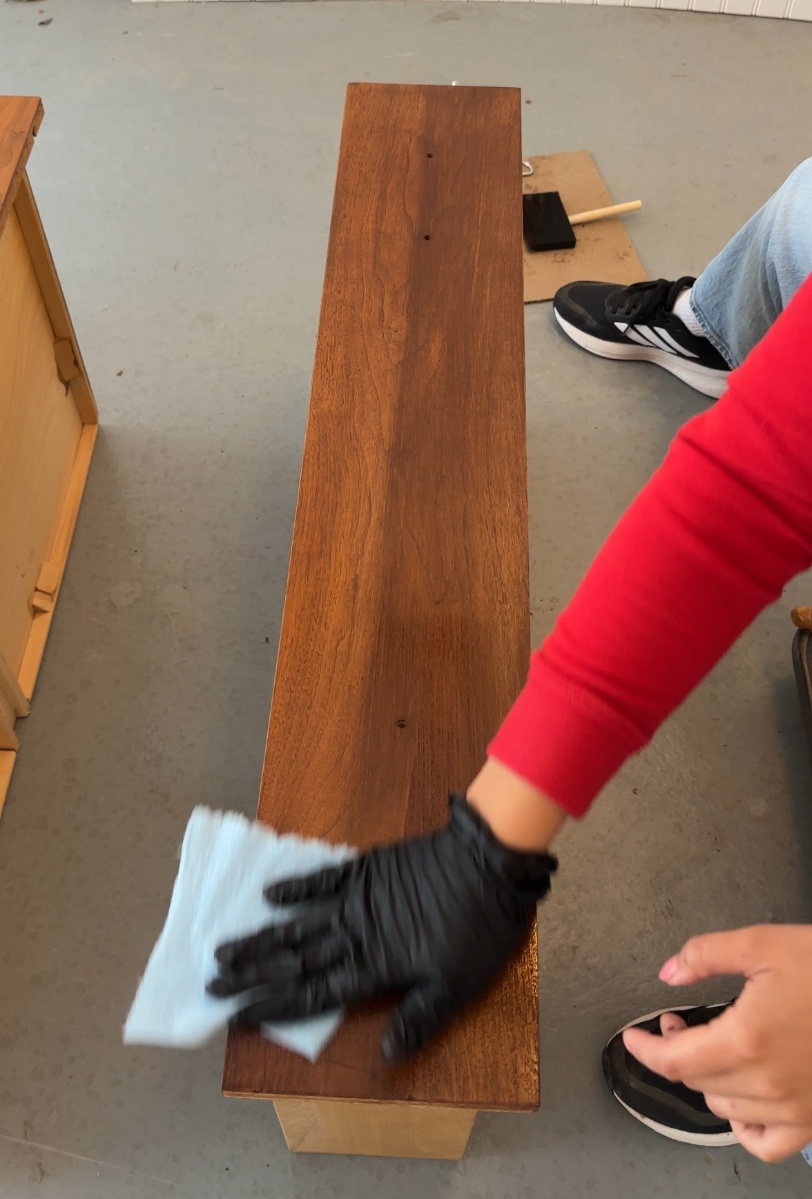
PSA: Normally I wouldn’t stain walnut at all, but the bleaching treatment had left some drawers lighter than others with strong green streaks. The stain helped even everything out and brought the whole piece back to life.
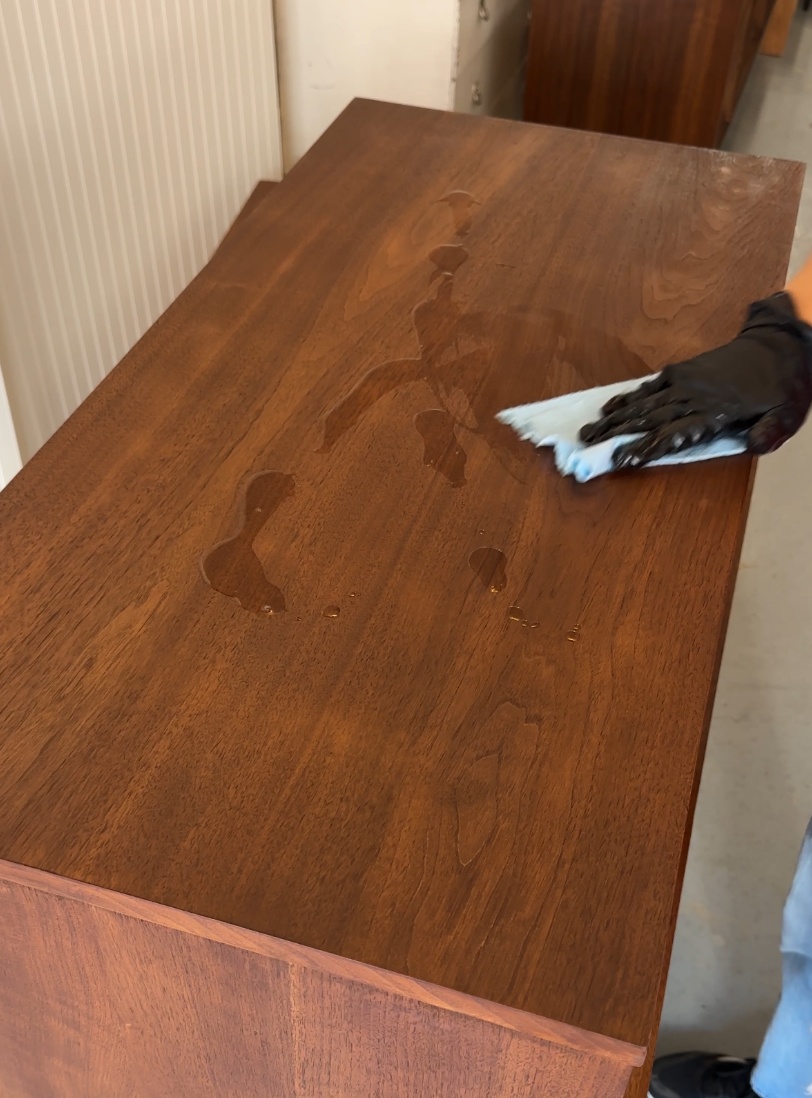
Step 3: Toner & Top Coat
Pro tip: If you’re working with multiple wood types or want to blend out uneven tones, a toner is your best friend. It subtly evens out color differences without masking the natural grain and gives you that seamless, cohesive look across the whole piece.
Once I was happy with the tone, I sealed everything with my favorite top coat — a wipe-on polyurethane. It’s seriously the most user-friendly finish out there: just wipe it on with a clean cloth, let it dry, and you’re left with the perfect satin sheen every time. I did three coats total for durability and a buttery smooth finish (I sand with 400 grit between coats).
Step 4: Finishing Touches
Pre cleaned out the drawers while I gave them a quick coat of wax (along with the drawer glides) - this stuff is my favorite. We reinstalled the original hardware, stood it upright, and that’s when it really hit me — this piece turned out SO good.
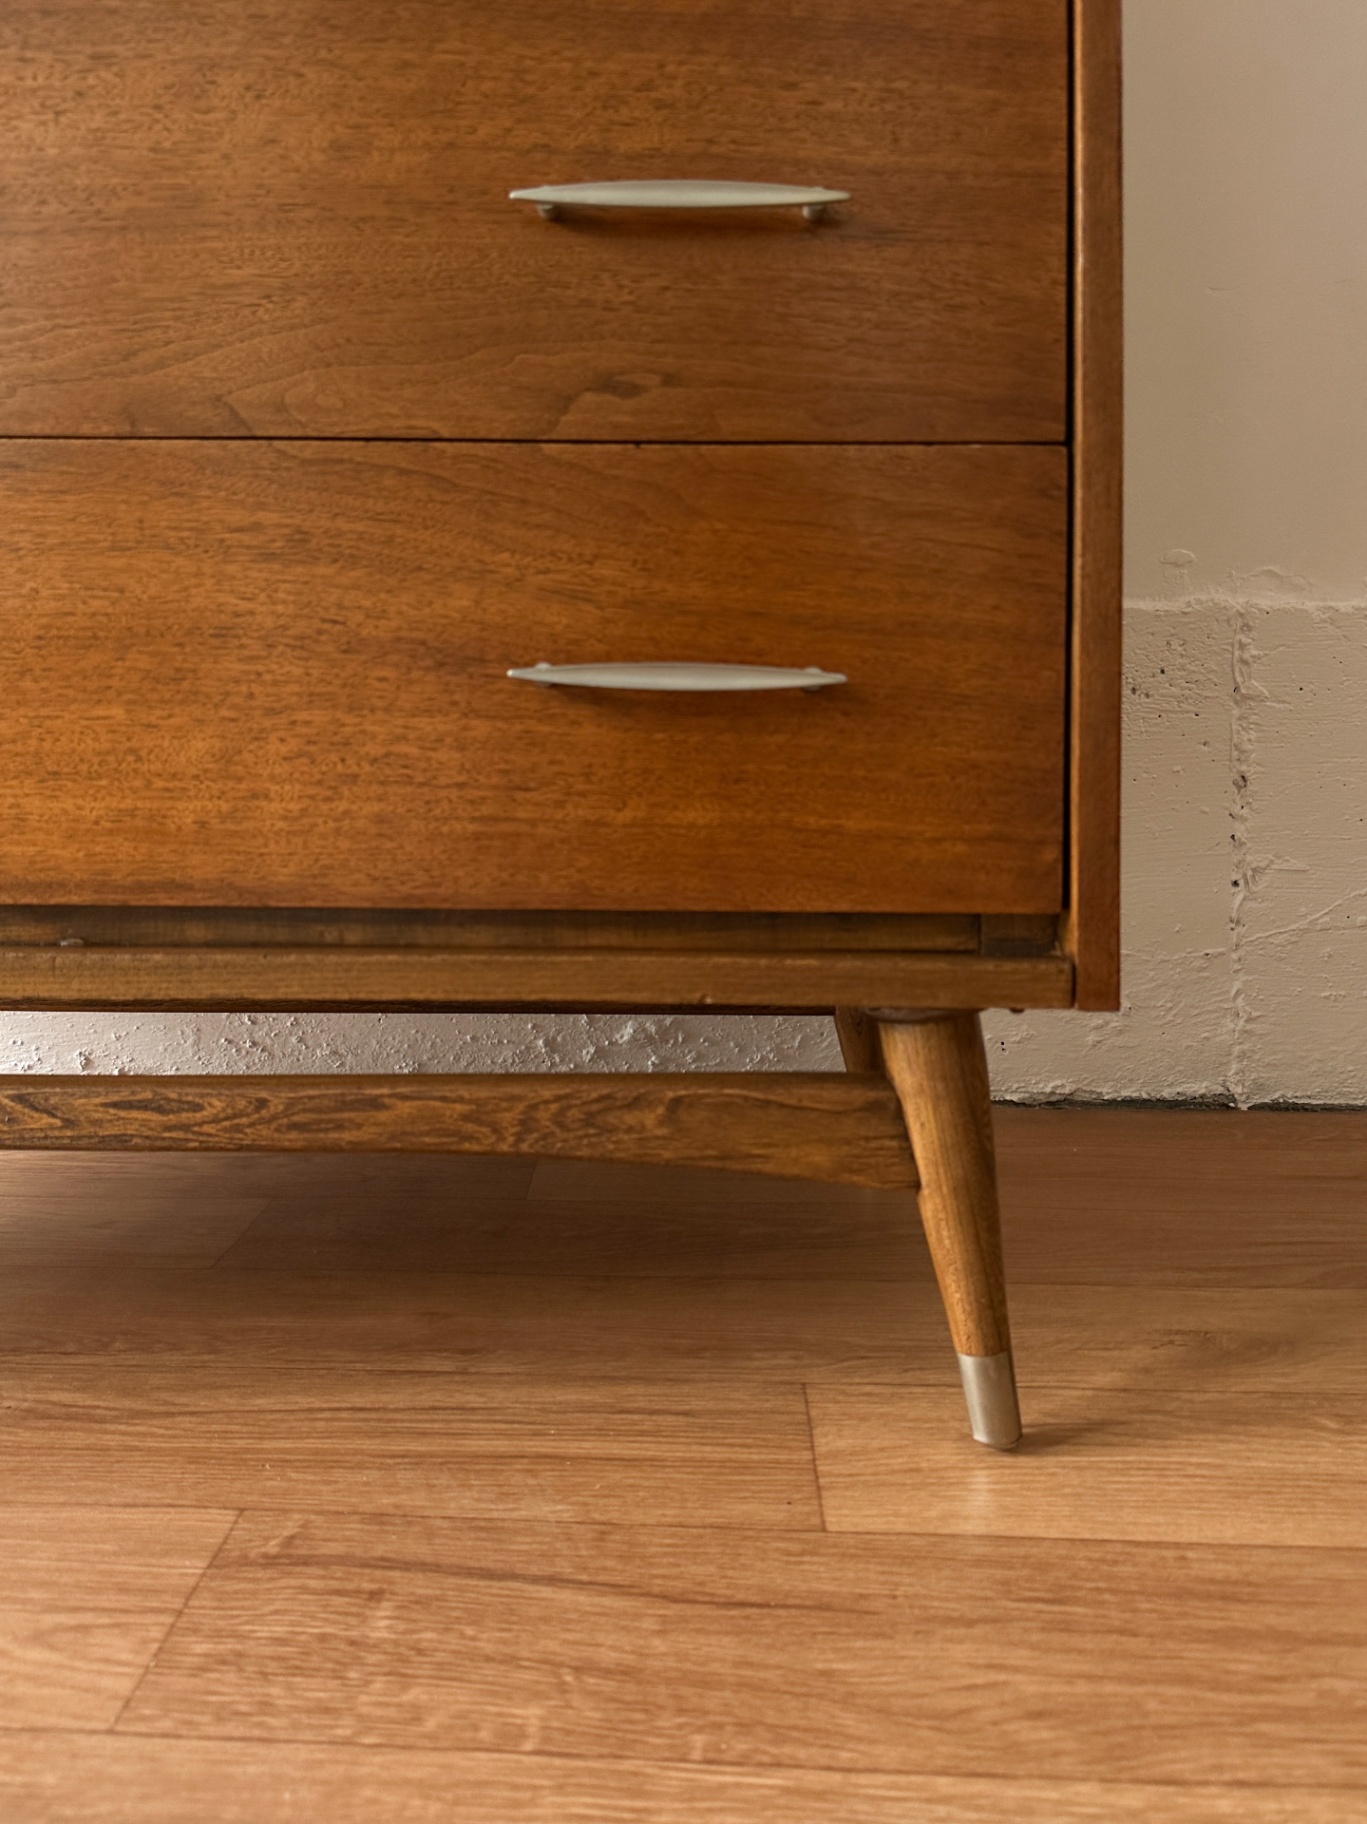
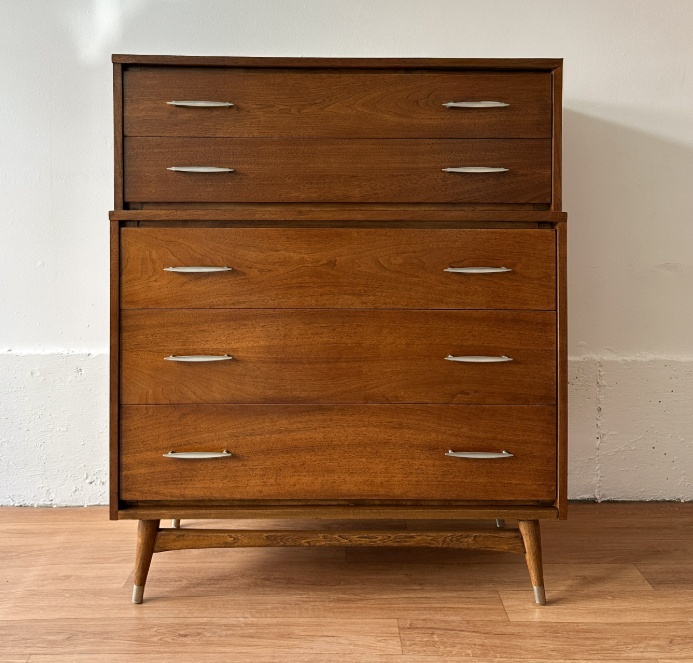
The Final Look
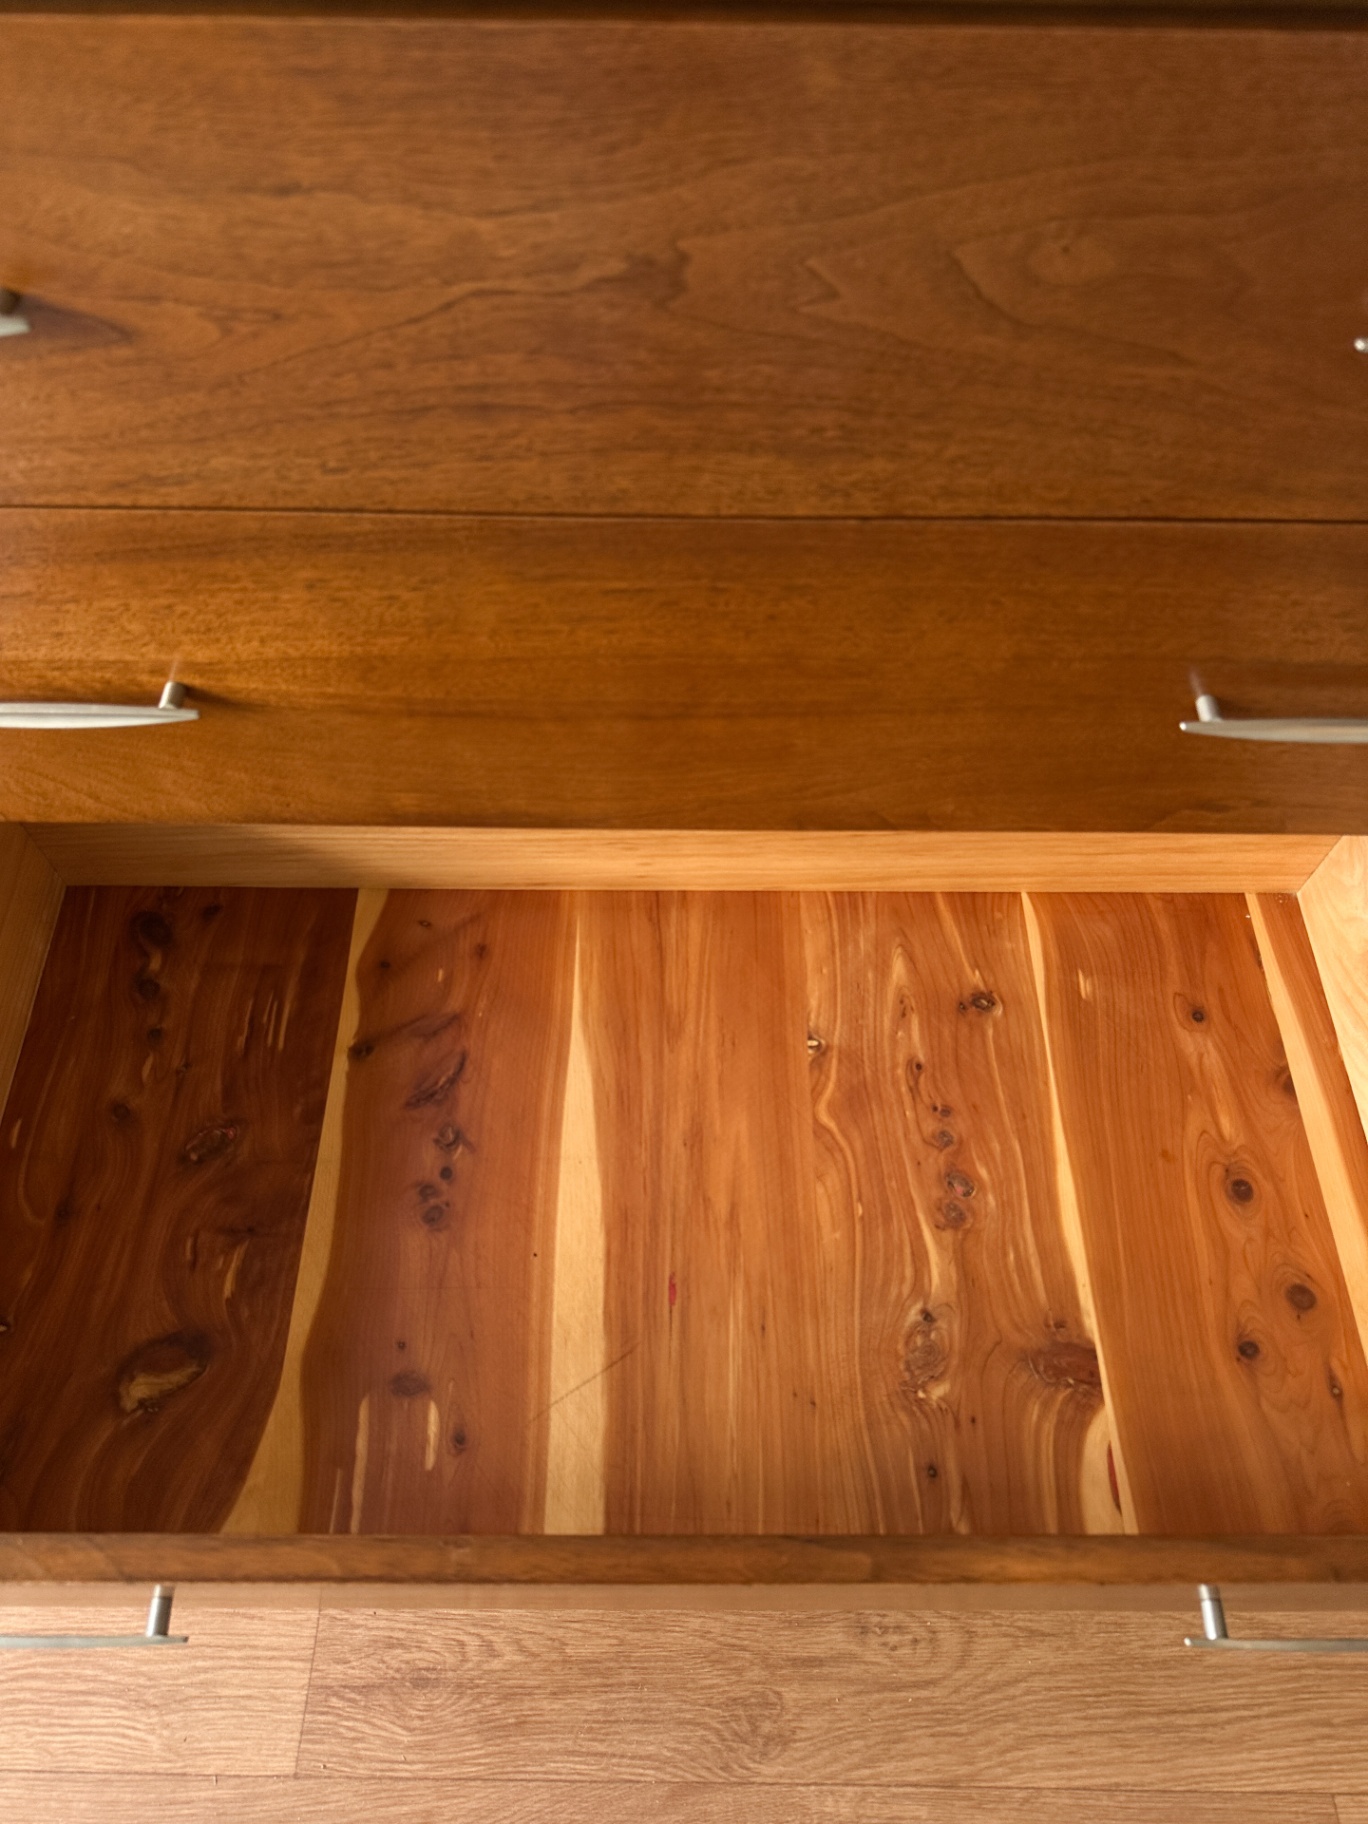
The deep walnut tones brought out every curve and angle of that sculptural base, and the contrast against the brass-tipped feet makes it feel right back in its mid-century prime. Between the silhouette, the cedar lined bottom drawer, and the rich finish, this dresser feels timeless again.

So what do you think — would you have kept it light and bleached, or gone dark and rich like I did?
Before & After
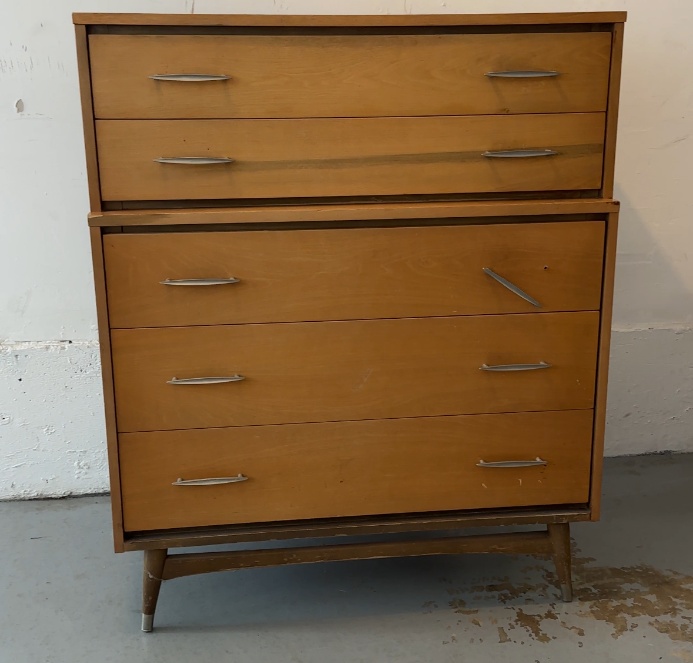
Before: Faded, bleached walnut with uneven tones.
After: Deep, satin-finished walnut with warm mid-century character restored.
he look.
📌 Save This for Later
If you found this helpful, make sure to pin it for your next furniture flip — or send it to someone who has a dated bedroom set they’ve been meaning to update!
More DIY Projects You Might Like
If you’re working on updating furniture, you might also like these:
French Provincial Dresser Makeover – the full tutorial on how I restored, paint-washed, and finished this beautiful vintage piece
Mid-Century Modern Dresser Restoration – stripping and restoring a MCM tallboy dresser (just wait till you see the wood grain hiding under the paint)
These are great inspiration options if you're looking to flip, refinish, and restore more second-hand furniture!