4 Things I Wish I Knew Before Laying Pavers for the First Time
Thinking about laying pavers yourself? In this post, I’m sharing 4 things I wish I knew before laying pavers for the first time after building a 5x10 paver landing as part of our cottage garden makeover. From saving money on gravel to choosing a paver pattern and using polymeric sand, these beginner-friendly tips can help make your DIY paver project feel a whole lot less overwhelming.
4 Things to Know Before Laying Pavers for the First Time
If you’ve ever looked into a DIY paver project and immediately felt overwhelmed, same. Laying pavers was one of those projects that seemed super intimidating when I first started researching it, and I felt like every tutorial assumed you already knew the basics.
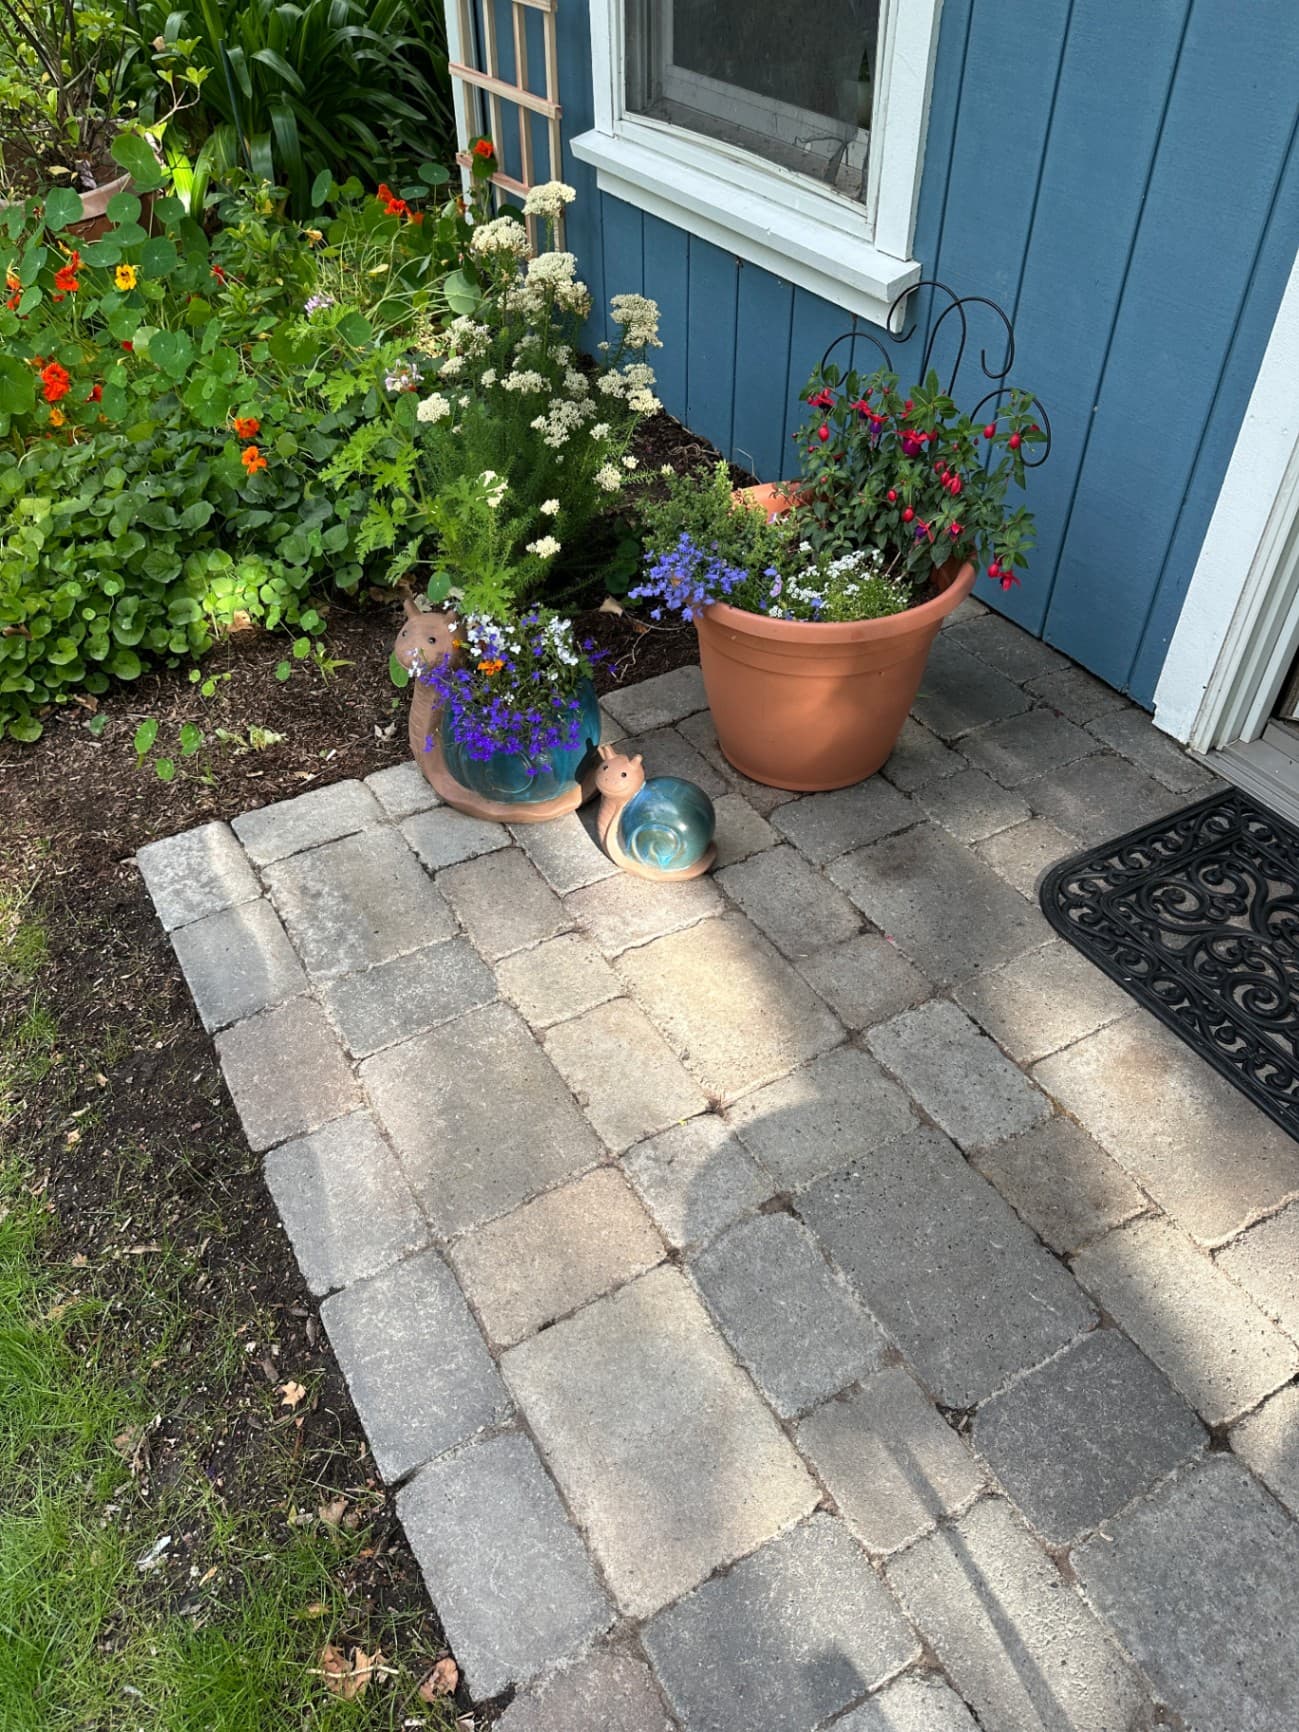
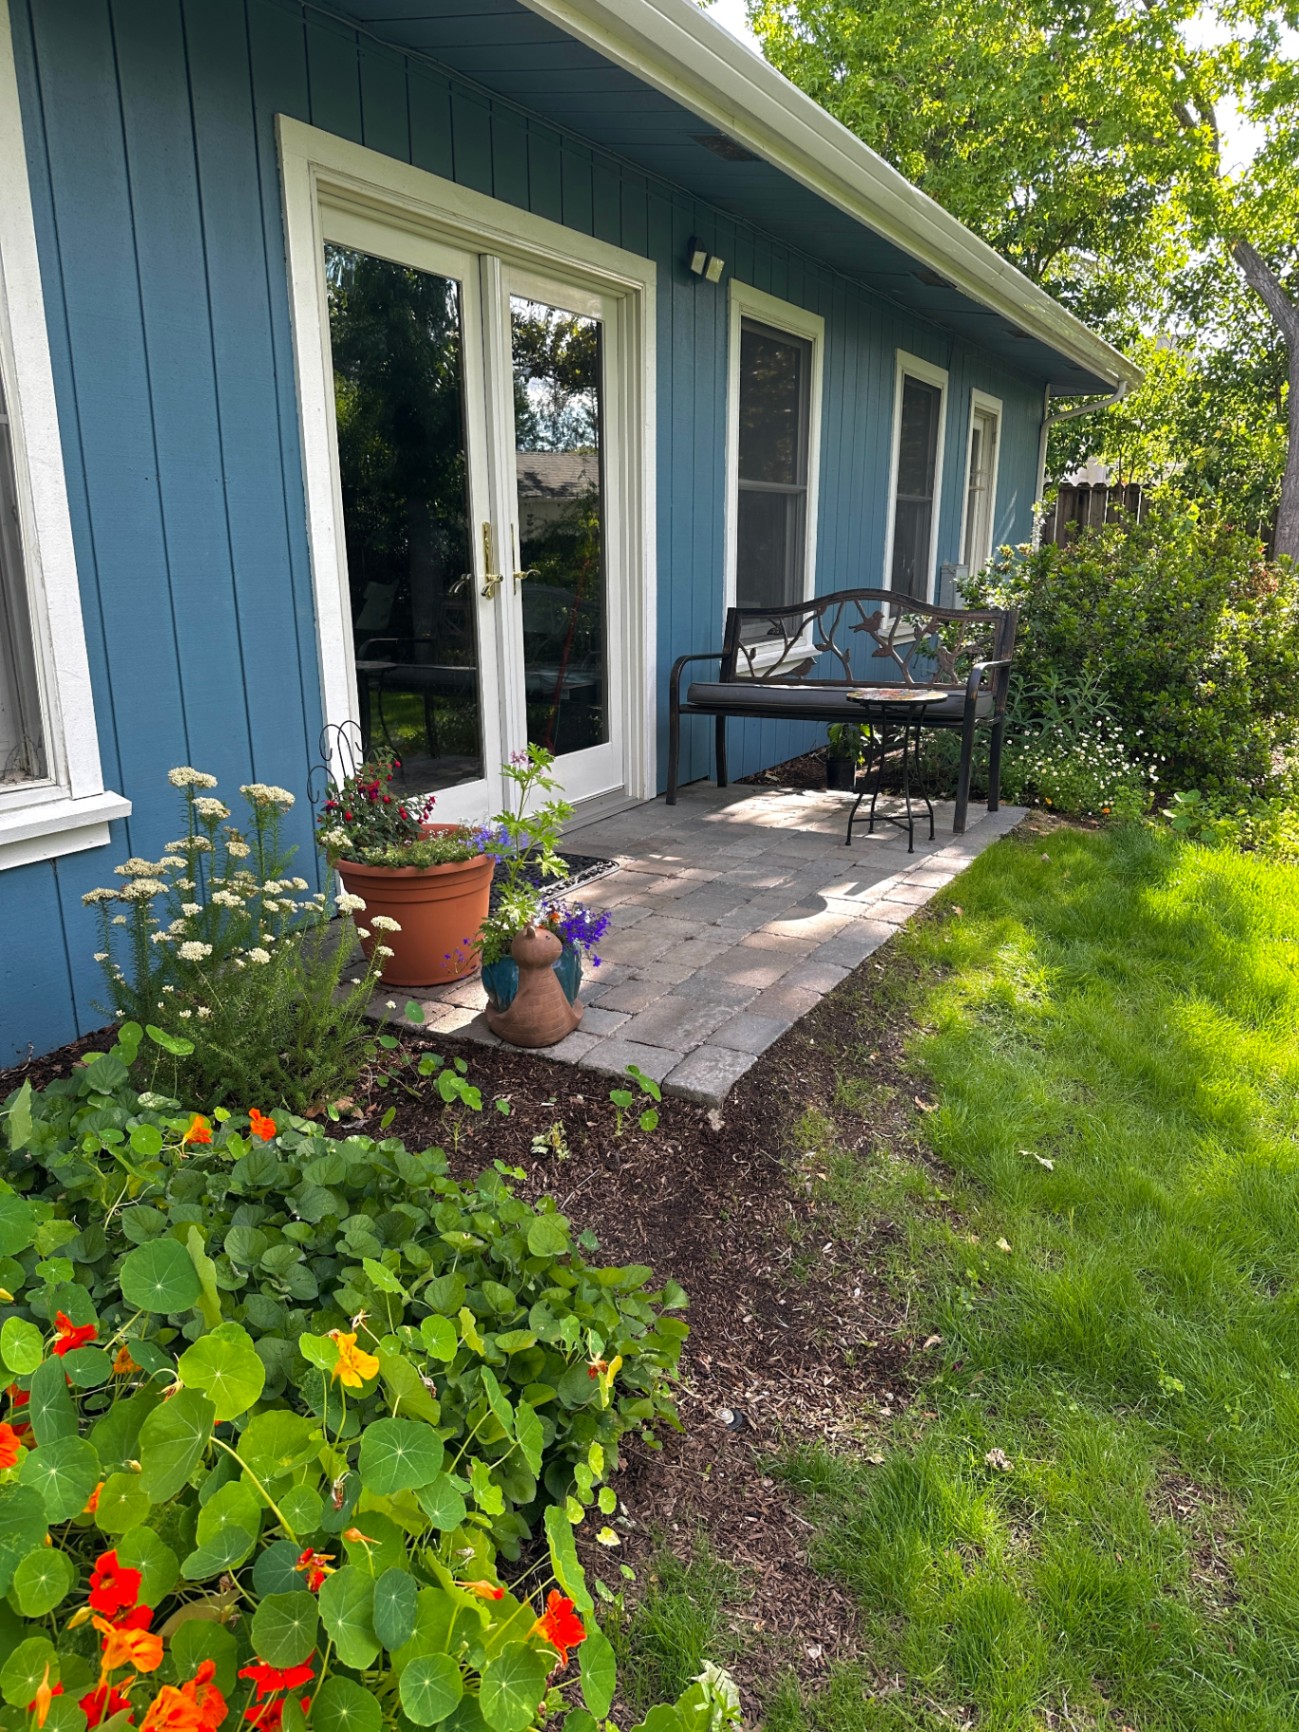
This project was the very first step in our cottage garden series, where my siblings and I are making over my parents’ yard. There was an old landing here before, but it was tiny, falling apart, and honestly not very usable. We decided to tear it out completely and rebuild it larger as a new 5x10 ft paver landing that would actually function as a real landing space — and now we use it all the time.
Because this was our first time laying pavers, there were definitely a few things I learned the hard way. So if you’re thinking about tackling a DIY paver patio, paver landing, or walkway, here are 4 things to know before laying pavers that can save you time, money, and frustration.
Why We Rebuilt This Paver Landing
The original landing had seen better days. It was much smaller than we needed, it was old and dilapidated, and it just wasn’t serving the space well anymore.
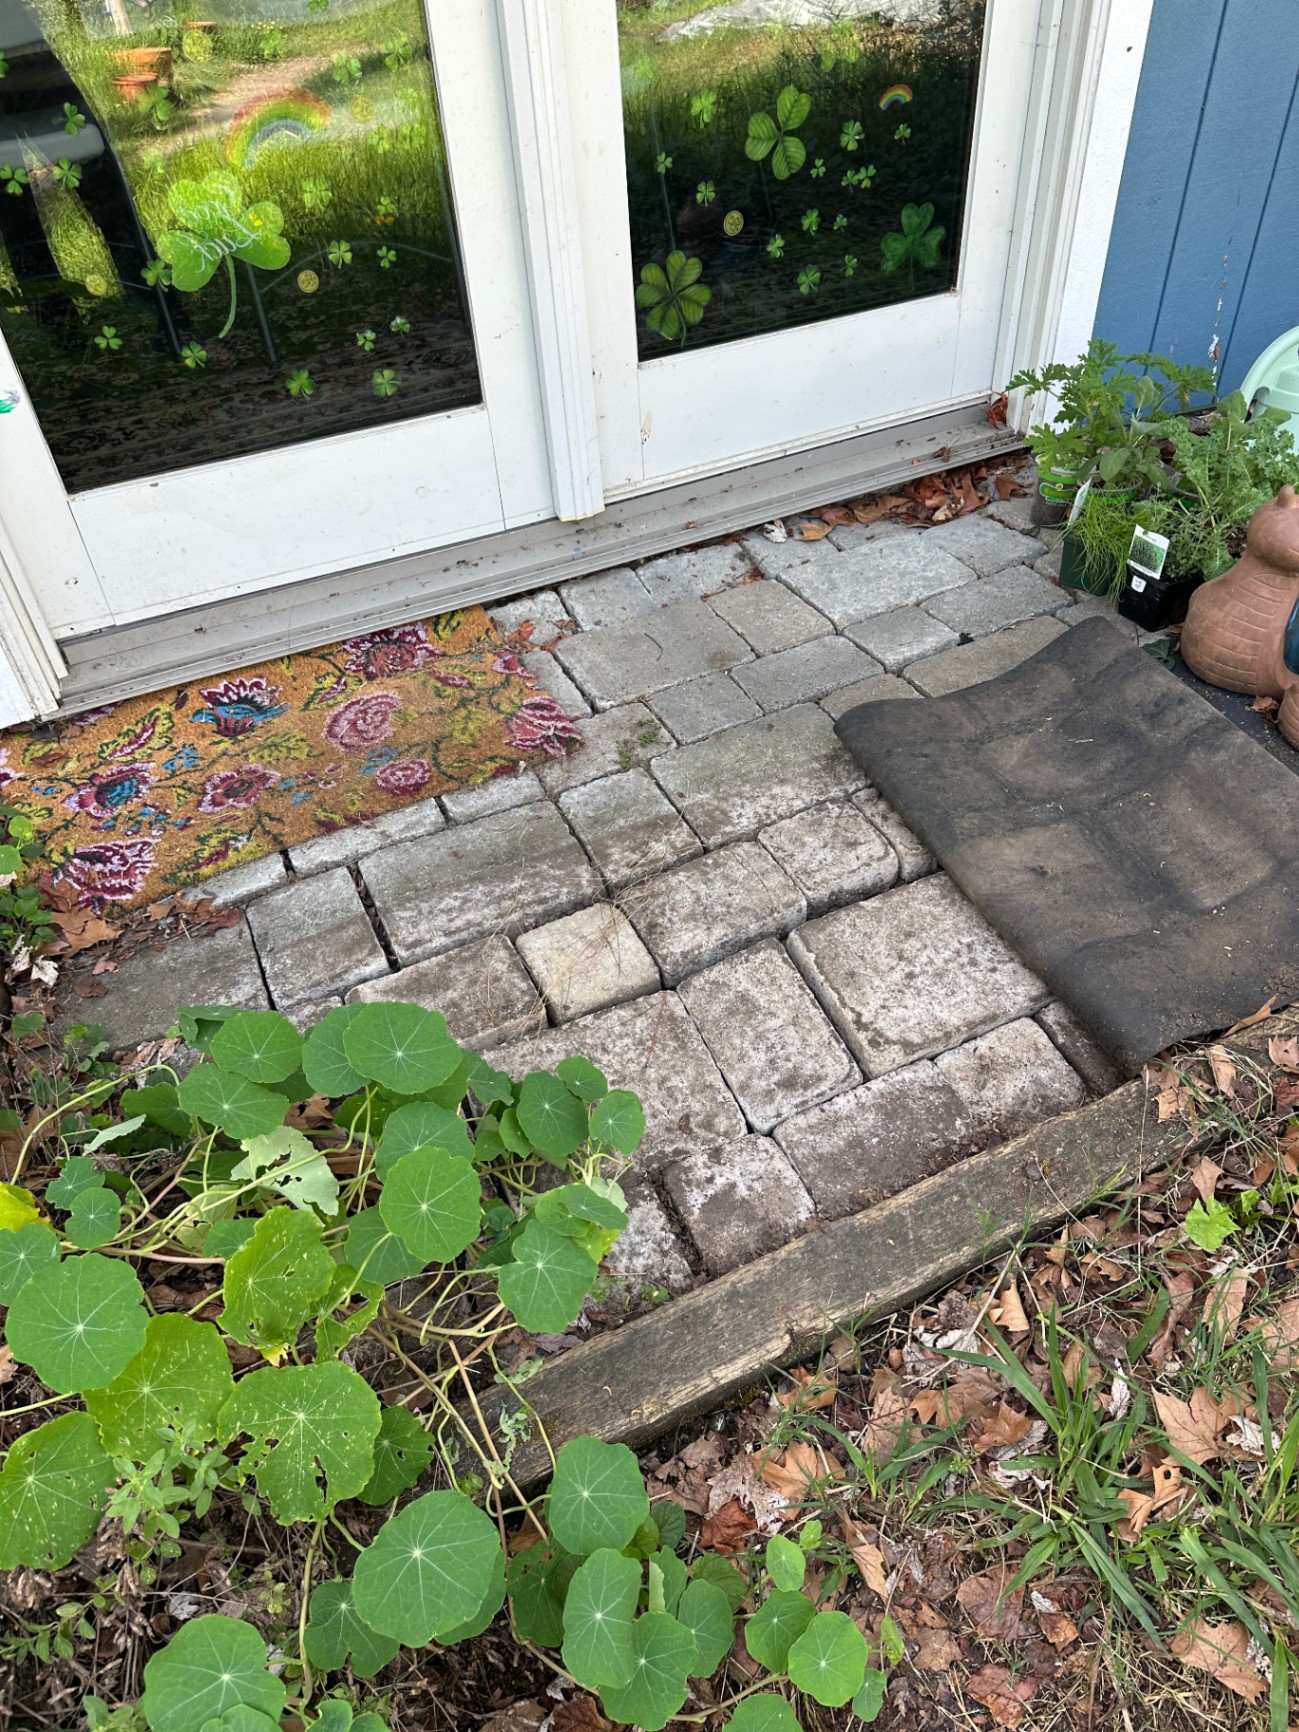
The before...
Since this was the first project in our parents’ cottage garden makeover, we wanted to start with something practical that would make an immediate difference. A new, larger landing felt like the perfect choice because it would make the area more functional right away and create a much better foundation for the garden plans around it.
We ended up rebuilding the space into a 5-foot by 10-foot paver landing, which gave us a much more usable footprint without making the area feel oversized.
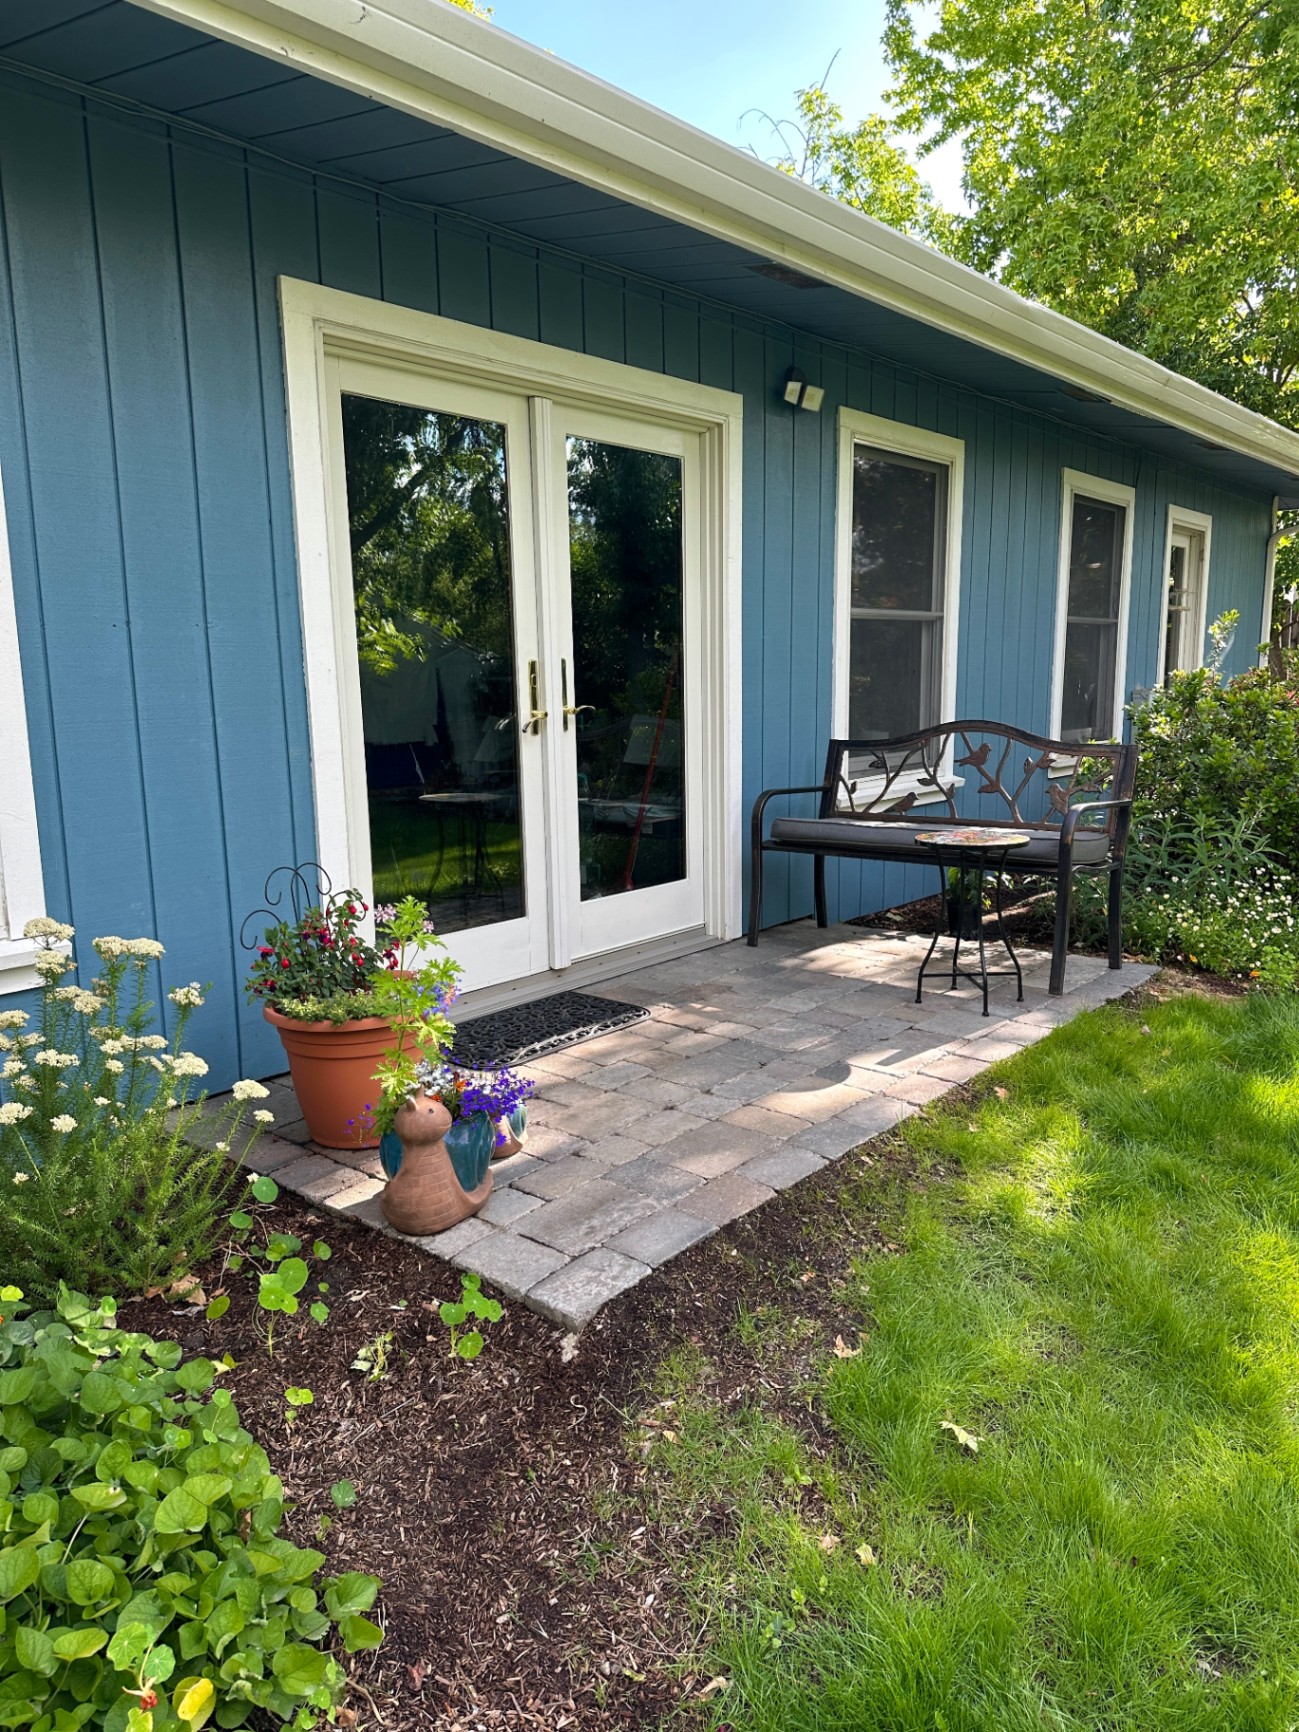
After!
What This DIY Paver Project Included
For this project, we:
demoed the old landing
cleared the entire area
dug down for the new base
added and compacted gravel
added and leveled bedding sand
laid the pavers (cottage style blend)
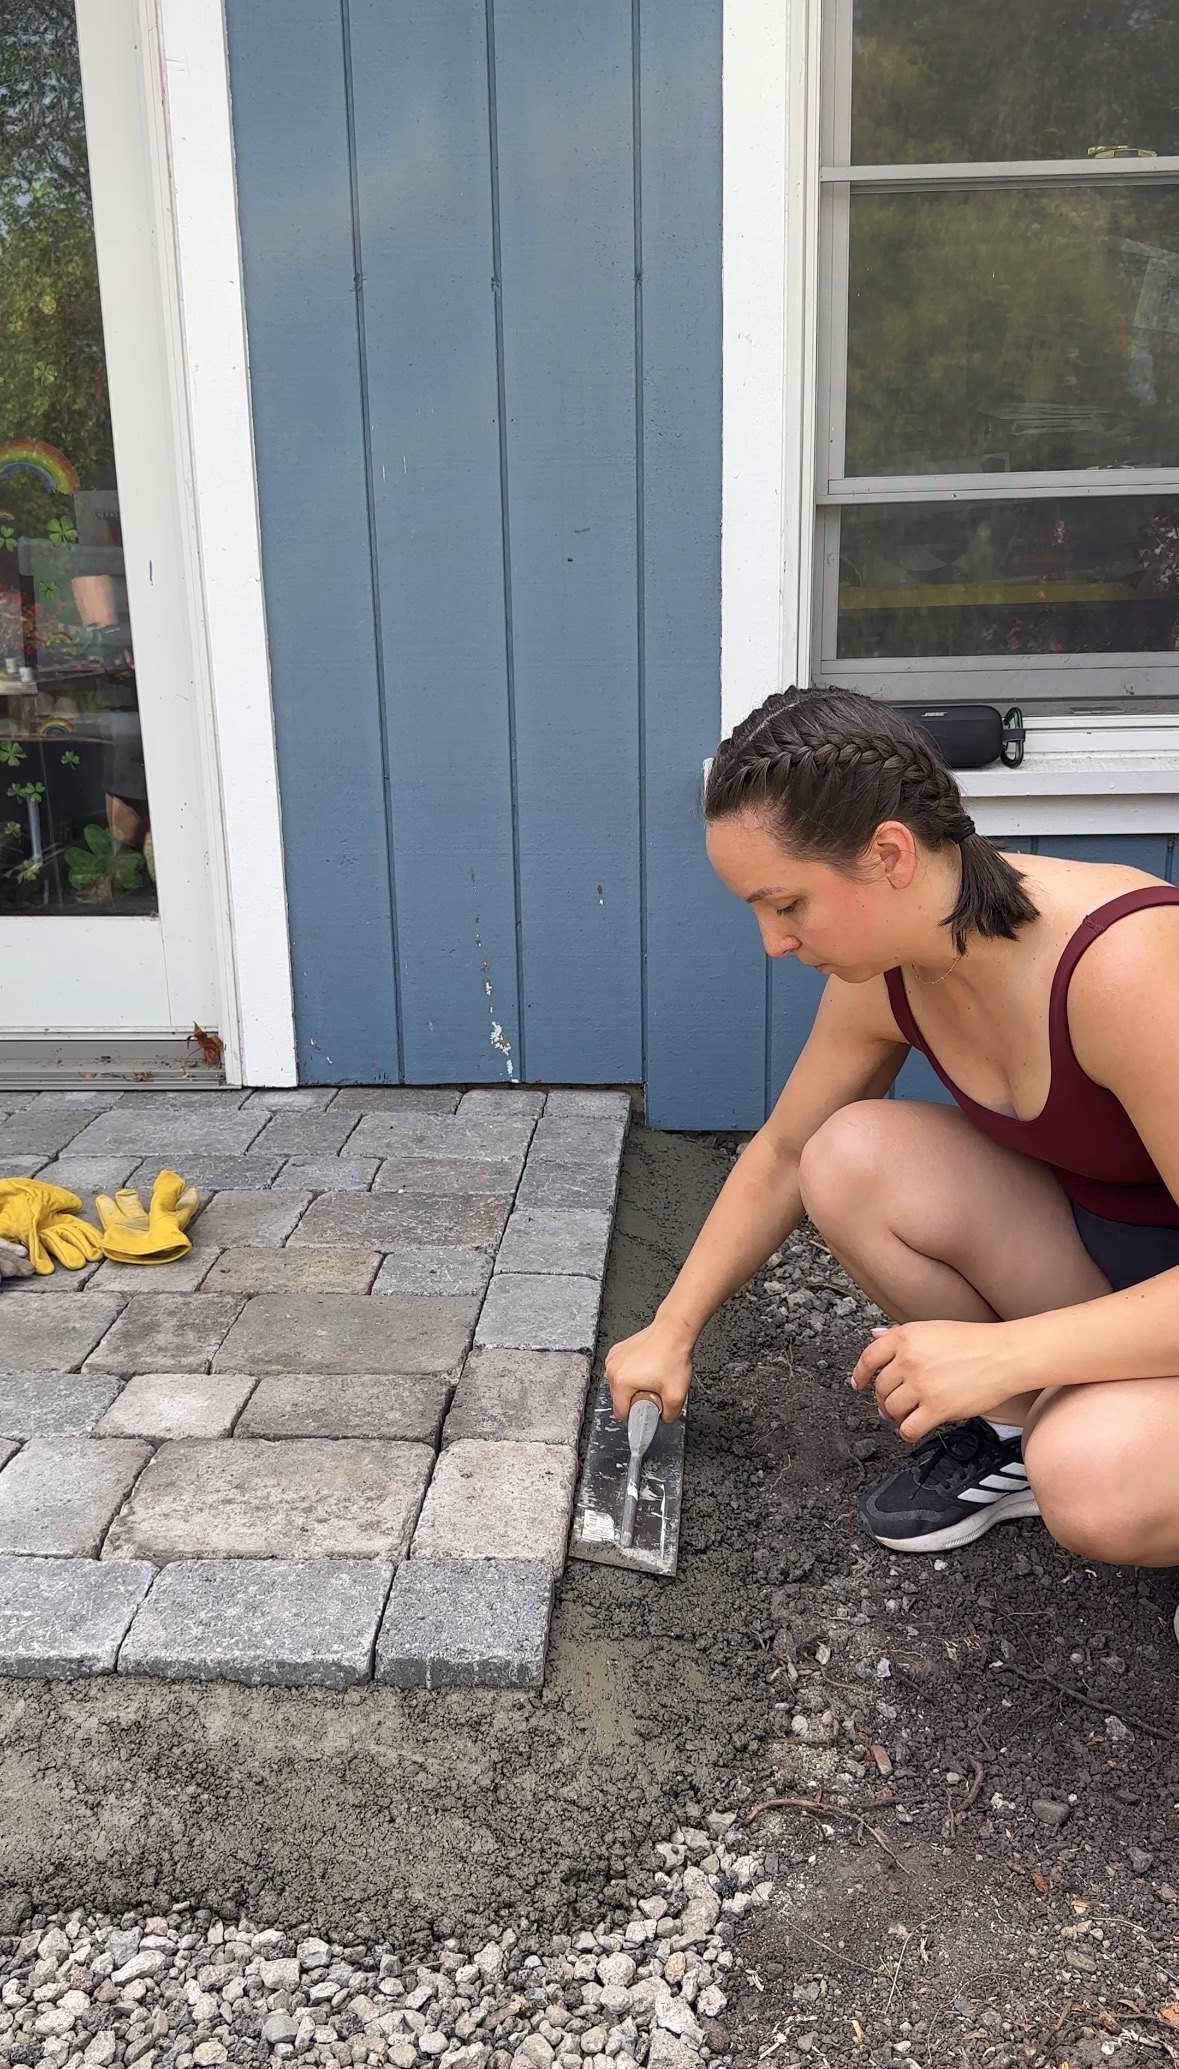
installed a concrete edge restraint
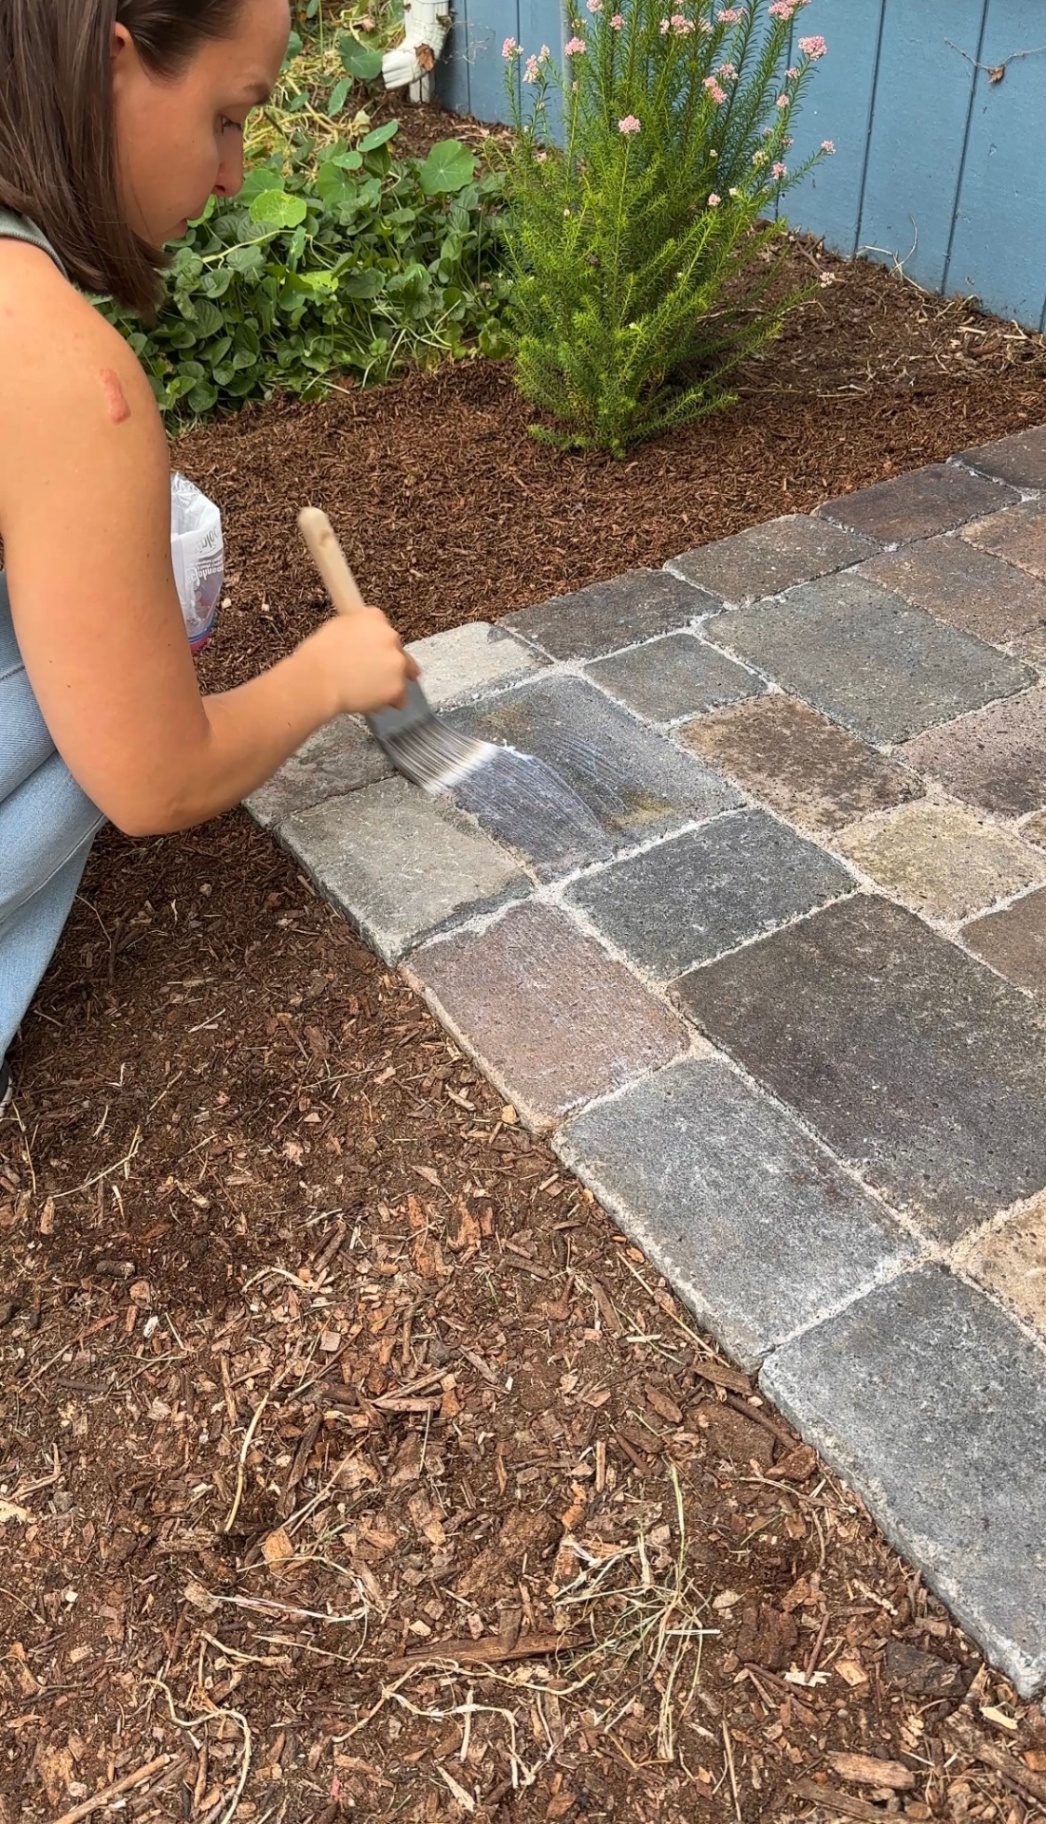
finished everything with polymeric sand and a sealer
So while this wasn’t the biggest paver project in the world, it was a full start-to-finish install and definitely enough to learn some lessons along the way.
If you’re looking for the full step-by-step tutorial for this project, you can check out my complete DIY paver landing blog post here.
1. Gravel adds up really fast, so check local suppliers first
One of the biggest surprises for us was how quickly the cost of gravel added up.
When you’re pricing out a DIY paver project, it’s easy to focus on the pavers themselves and forget how much the base materials can cost — especially once you get beyond a tiny walkway. Our landing was 50 square feet total (5x10 ft), and for a project like this you’ll want about 6 inches of gravel base before adding your sand layer. We probably went slightly deeper in a few spots since we had to dig down more in some areas, and even then we still ended up with a little extra gravel left over afterward.


Instead of ordering from a big box store, check your local gravel or landscape suppliers first. We used an app called Rockery (services SF Bay Area, San Diego, and Central TX) and had a great experience. We got 2 cubic yards for $175, compared to what would have been about $675 from a big box store for the same amount!! Massive difference. I also really liked that Rockery lets you schedule deliveries in advance or even do same-day delivery, which was super convenient during a project like this.
If you’re trying to keep your DIY paver patio or landing project affordable, this is one of the best places to save money without sacrificing the quality of the project.
2. Use 1-inch PVC pipe to screed your sand
This tip made the whole process so much easier.
Before laying your bedding sand, place 1-inch PVC pipe on top of your compacted gravel base. Then spread the sand around it and use a 2x4 or level across the top of the pipes to screed everything smooth. It gives you a really easy guide for getting a consistent depth across the whole area.
Once the sand is leveled, remove the pipes and fill in those channels with a little extra sand and a trowel (or similar) to smooth it out.
As first-timers, this made a huge difference because getting the sand perfectly level is super important and can be an intimidating part of the project. The PVC trick made it way more manageable and helped us get a super even base without overthinking it.
If you’re laying pavers for the first time, I really recommend this step.
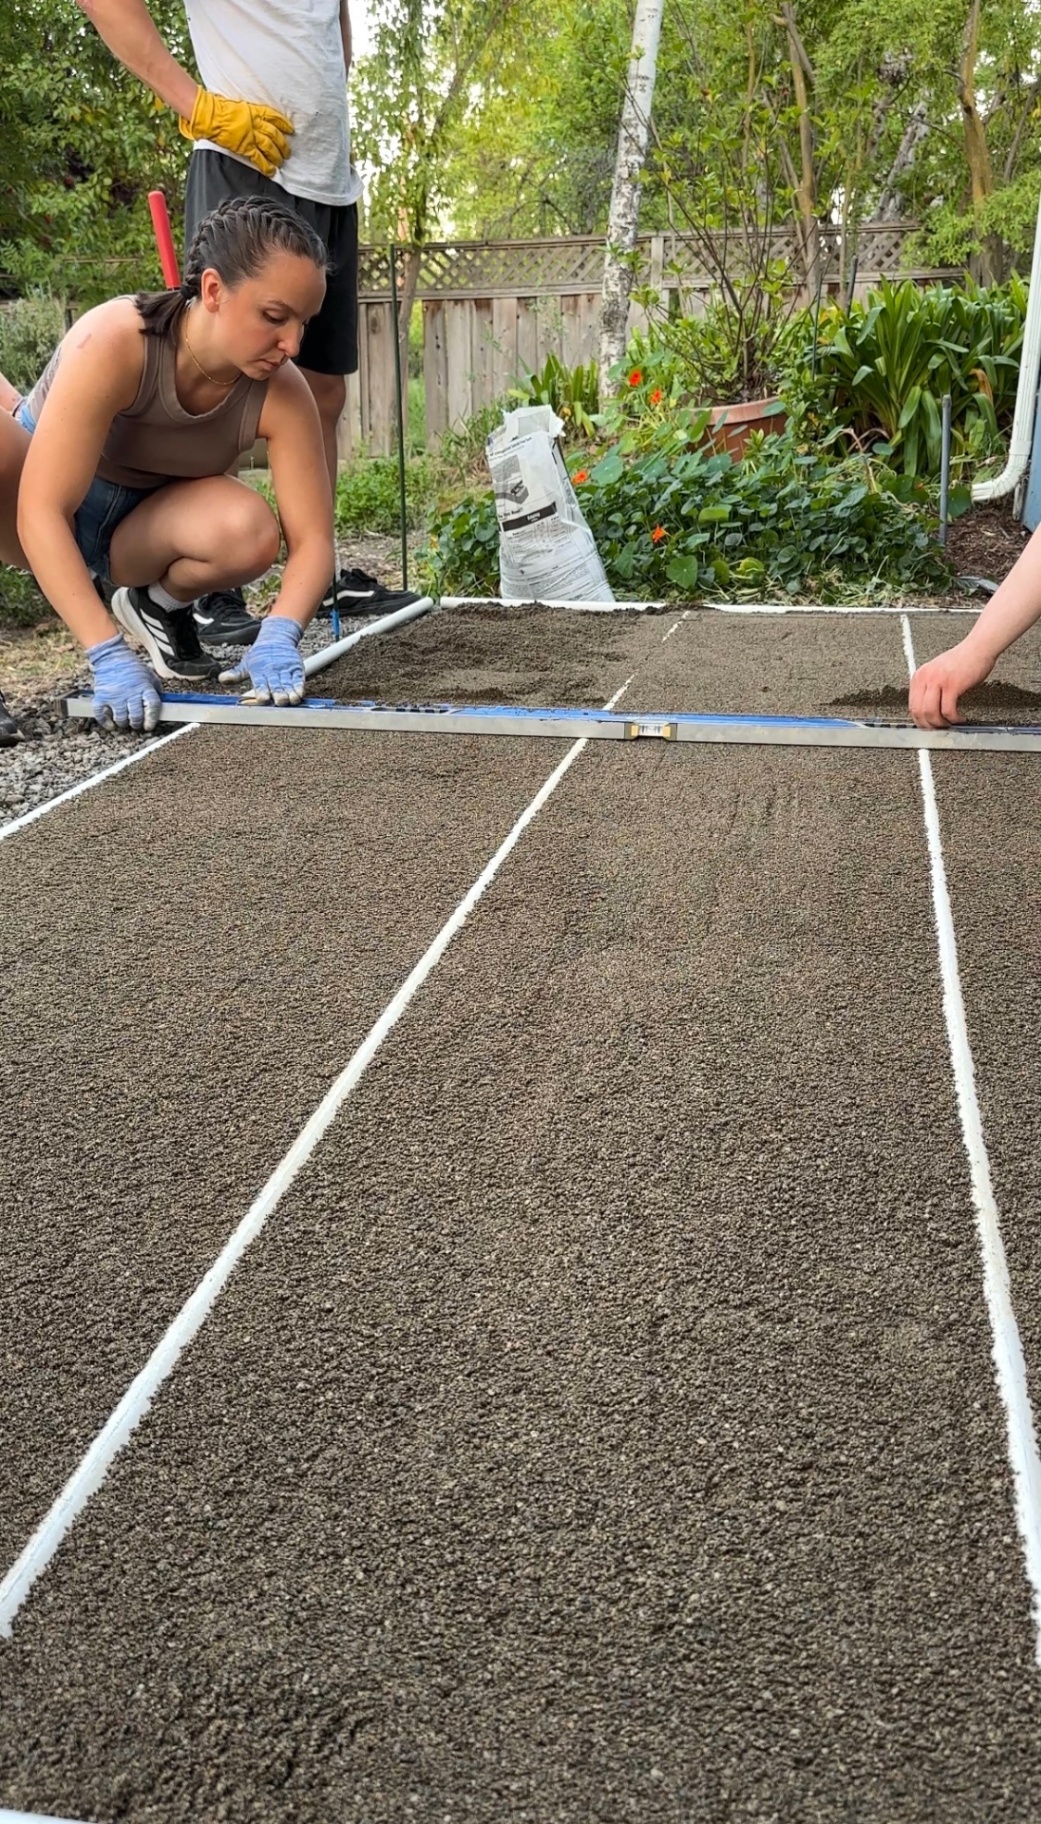
P.S. I’ve gotten a few questions about whether you can leave the PVC pipes in — definitely don’t. They’re just a guide for screeding your sand and aren’t meant to support the weight or movement of the pavers long term.
3. Dry-lay your paver pattern before you commit
Do not skip this.
Before we actually started installing the pavers, we laid out two full rows to test the pattern and figure out how everything was going to land. We used the Home Depot Cottage Blend pavers, which come in three sizes: 5x5, 5x7, and 8x11, and I’m really glad we took the time to experiment first because it helped us figure out a layout that worked with the space and avoided cuts completely.
We ended up going with a pattern that alternated by row. The first row was long paver, medium paver, long paver, medium paver, and so on. Then the second row alternated short paver, medium paver rotated the opposite direction, short paver, medium paver, and so on, with those two row styles repeating throughout the whole landing. Once we saw it laid out, it made so much more sense visually and helped us confirm that the pattern would work cleanly within the 5x10 footprint.
That extra planning step was 100% worth it because we ended up needing zero cuts for the entire landing, which saved time, simplified the install, and made the whole project feel much less intimidating for a first-time paver job.
Here’s a look at the pattern we landed on after testing a few different layout options:
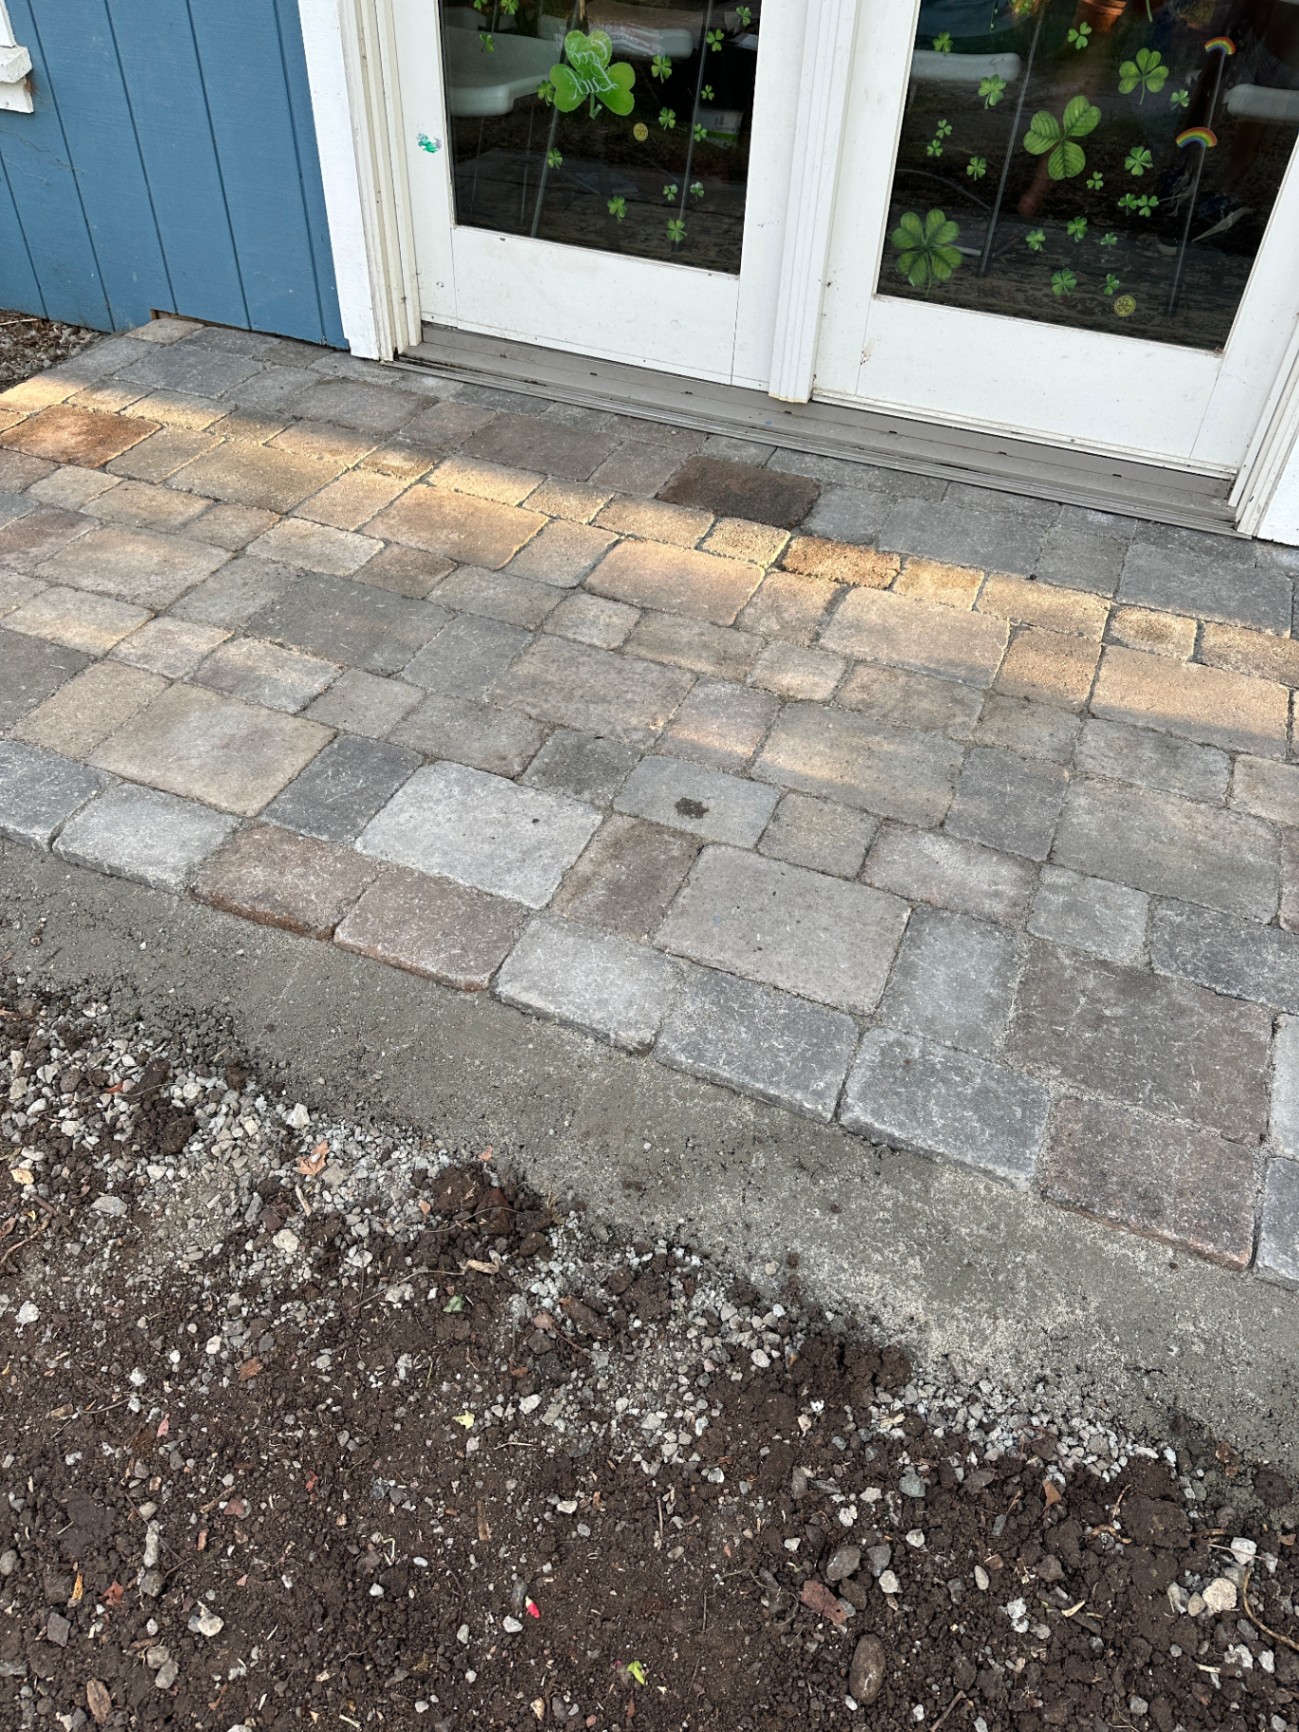
Tip: If your pavers come in multiple sizes like ours did, I really recommend dry-laying at least a couple of full rows before starting. It’s one of the easiest ways to avoid awkward spacing and last-minute layout problems.
4. Use polymeric sand from the start
I had heard so many stories about people regretting not using polymeric sand, and now I totally understand why.
If you’re new to pavers, polymeric sand is the sand you sweep into the joints between the pavers at the very end of the project. Once it’s activated with water, it hardens up and helps lock the pavers together more securely. It makes the whole surface feel sturdier underfoot and helps keep weeds, bugs, and erosion from becoming a bigger issue later on.
We used one bag, which ended up being the perfect amount for our 5x10 landing, and it was honestly incredibly easy to apply. At that point in the project, it can be tempting to skip a finishing step like this, but I really think it’s worth doing right away.
Another big benefit is that it makes the pavers easier to clean over time too. Because the joints crust over instead of staying loose and sandy, it’s much easier to hose the landing down or pressure wash it later without constantly disturbing the lines between the pavers.
If you’re already putting in all the effort to lay pavers, polymeric sand is one of those small final steps that makes a big difference in both the finished feel and the long-term maintenance.
It’s one of those things that feels minor in the moment, but makes the finished project look better, feel better, and hold up better.
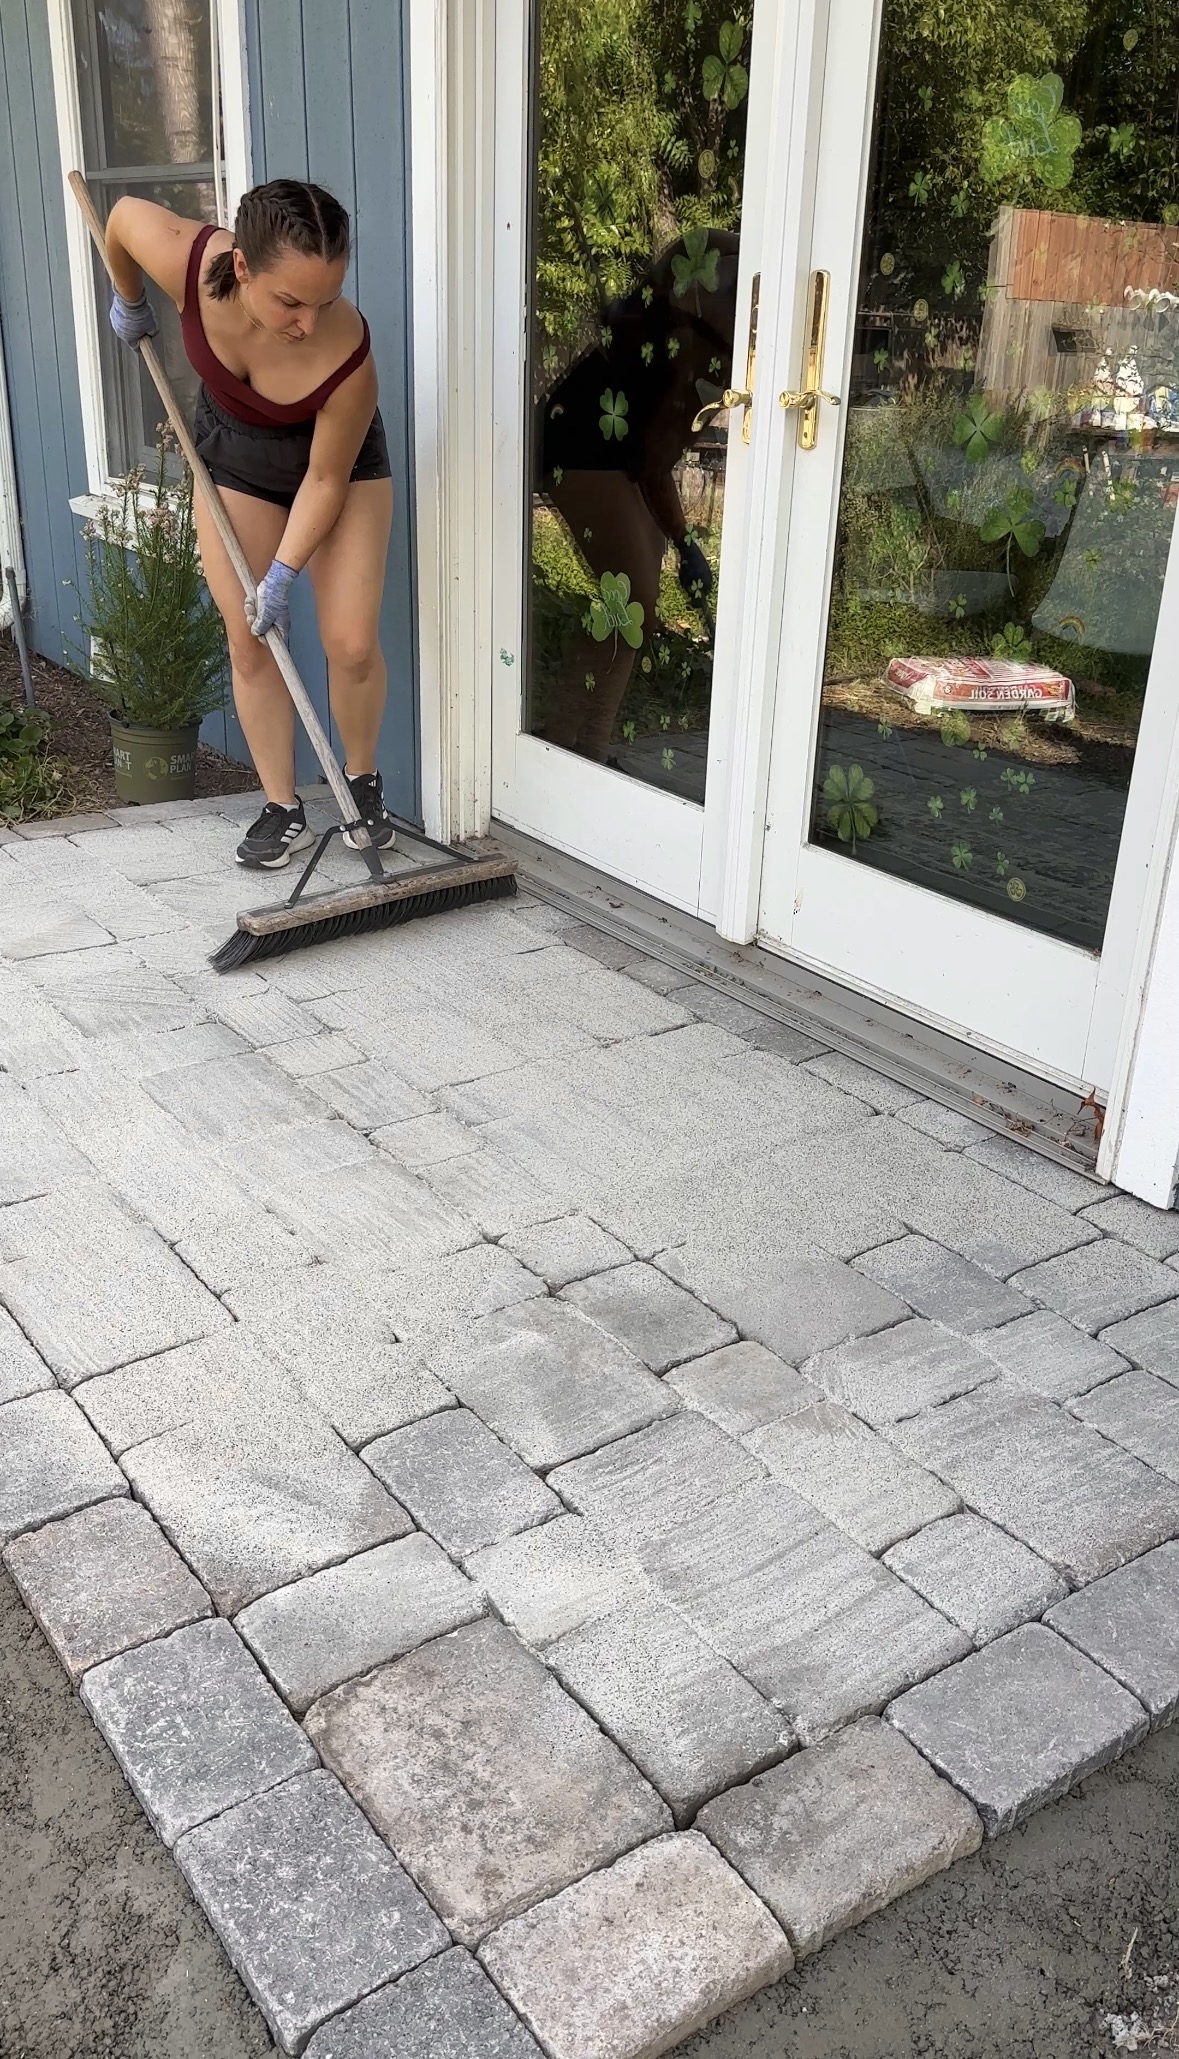
P.S. One more thing on polymeric sand: because it has a glue component, make sure you sweep or blow off the excess really well before spraying it down. If there’s leftover sand sitting on top of the pavers or on something nearby like a door threshold, it WILL crust over once it gets wet and you’ll have to scrape it off later. Not the end of the world, just annoying and definitely better to avoid from the get go.
A few honorable mentions: more mistakes to avoid when laying pavers
In addition to the bigger lessons above, here are a few other things I’d keep in mind if I were doing a DIY paver project again:
Not digging down enough from the start. Once you account for the gravel base, sand, and the pavers themselves, you need more depth than you might think. Plan it all ahead of time to save hassle later!
Not thinking ahead about your edge restraint. A solid edge restraint is what helps keep your pavers locked in over time, especially if you’re dealing with any slope. We chose concrete edge restraint because it’s super heavy duty and gives us a lot more confidence that the landing will stay tightly in place long term.
Not checking level and slope as you go. You want water to drain properly, so it’s worth keeping an eye on this throughout the project instead of assuming it’ll all work out at the end.
Underestimating how much time the prep work takes. Demo, digging, leveling, and base prep take way longer than the actual paver-laying part.
Not ordering a little extra material. Having a bit of extra gravel, sand, or a few extra pavers on hand can save you from an annoying mid-project scramble.
Not dry-checking your final height against a door or threshold. This one's really important - if your paver landing connects to an entry, make sure the finished height is going to make sense before everything is locked in.
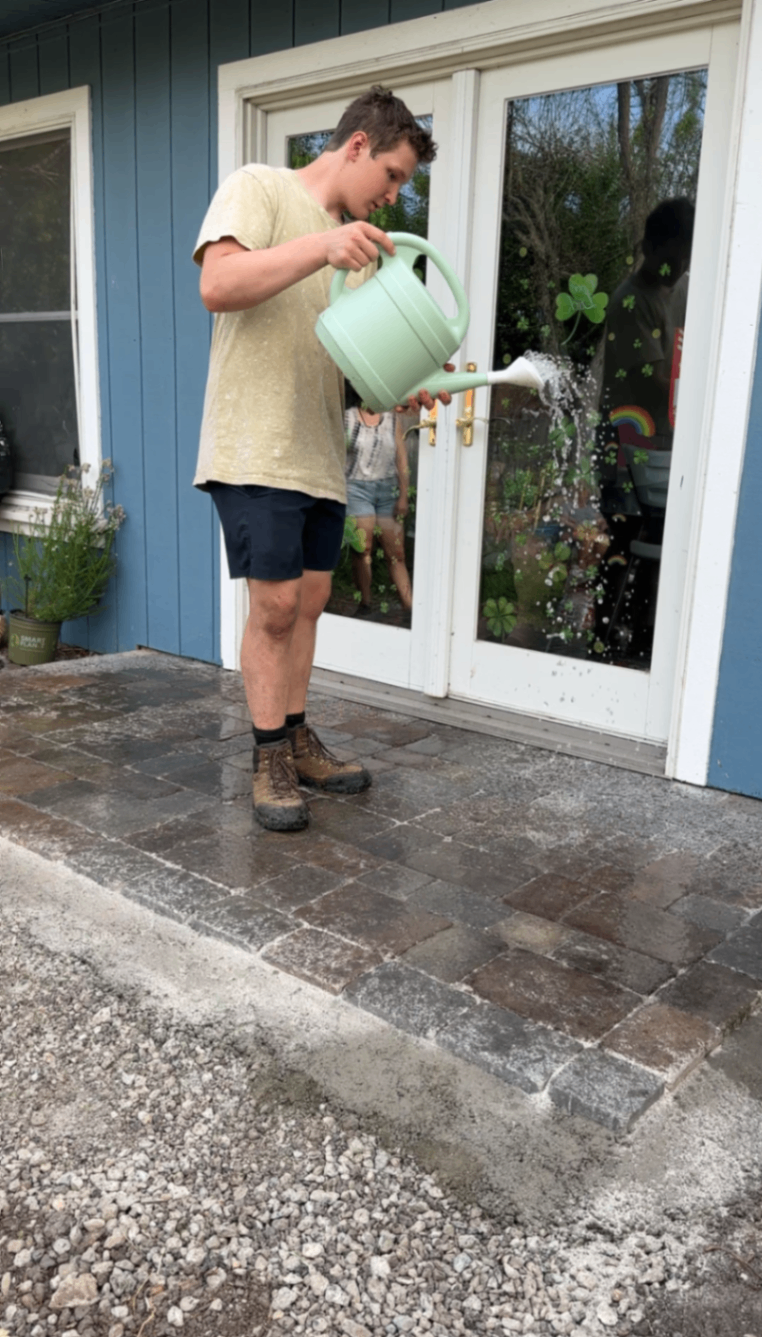
Not sealing the finished pavers. This one isn’t 1000% necessary, but I do think it makes a big difference in the longevity of the finish. We did two coats of a concrete sealer, and it not only helps protect the pavers over time, but also makes them much easier to clean, hose down, and maintain.
👉 If you’re looking for more detailed instructions for how to actually build this project, be sure to check out my full step-by-step paver landing tutorial here.
Final Thoughts on Our First DIY Paver Project
For our first time laying pavers, this project definitely came with a learning curve — but it was so worth it.
Replacing the old, crumbling landing with a new 5x10 paver landing made a huge difference in the space, and it gave us a much more functional area that actually gets used all the time now. It also ended up being the perfect first step in our cottage garden makeover, because it instantly made the yard feel more intentional and usable.
If you’re on the fence about tackling a DIY paver project, I totally get it. It can feel like a lot at first. But hopefully these tips help make the process feel a little less intimidating and save you from learning everything the hard way like we did.


And if you want to see exactly what this project cost, I’m sharing that breakdown next.
FAQ
Is laying pavers hard for beginners?
It can definitely feel intimidating at first, but it’s doable if you take it step by step and spend time on the prep work.
How do you level sand for pavers?
Using 1-inch PVC pipe as a guide and screeding the sand across the top with a 2x4 or level is one of the easiest ways to get consistent depth.
Is it cheaper to buy gravel locally?
100%. Local gravel suppliers are typically much more affordable than big box store pricing. Be prepared to purchase by the cubic yard though so plan ahead for how much you'll need.
Do you really need polymeric sand?
If you want your pavers to feel more locked in and you want to help prevent weeds and bugs in the joints, polymeric sand is definitely worth it.
How do you avoid cutting pavers?
Dry-laying part of your pattern first can help you figure out spacing and make layout adjustments before the full install begins. That being said, be prepared to make some cuts depending on your layout, dry-fitting first can just minimize them.
Do I need to seal my pavers?
No, sealing your pavers isn’t absolutely required, but I do think it’s worth considering if you want the finish to hold up better over time. We did two coats of concrete sealer, and it made a noticeable difference in both protection and maintenance — the pavers are easier to clean, easier to hose down, and overall feel a little more finished.
📌 Save This for Later
Planning to tackle this project later? Be sure to save it so you can come back to it when you’re ready:
👉 Pin this project on Pinterest
More DIY Projects You Might Like
If you’re working on upgrading your outdoor space, you might also like these:
Full DIY Paver Install Tutorial – the complete step-by-step breakdown of how we built this paver landing from demo to finished install
DIY Jasmine Wire Trellis – an easy, budget-friendly project that adds structure and gives climbing plants a beautiful place to grow
These are great next projects if you’re looking for more ideas to make your outdoor space feel more finished, functional, and garden-forward.